

Do you want to convert your picture into a fun and playful cartoon effect? Well, this whole process is quite simple with Adobe Photoshop.
Below, we’ll walk through the steps to help you achieve a creative and professional result without much effort.
Table of Contents
Methods to Create a Cartoon Filter in Photo Using Photoshop
With Photoshop, you can turn your photos into a cartoon character in two different ways.
Method 1: Oil Paint and Poster Edges Filters
The Filters in Photoshop can blur out the details, highlight the edges of the subject, and create a shading effect in the image to make it look like a playful cartoon character. But they might not work well on photos with lots of accompanying details in them.
Method 2: Generative Fill
Generative Fill in Photoshop uses AI to stylize your images and convert them into a cartoon-like version based on your prompts. The downside is that this feature is not available in older Photoshop versions and may give inconsistent outcomes.
Steps To Convert Image to Cartoon in Photoshop
Here are the steps to turn real-life pictures into cartoons using Photoshop Filters:
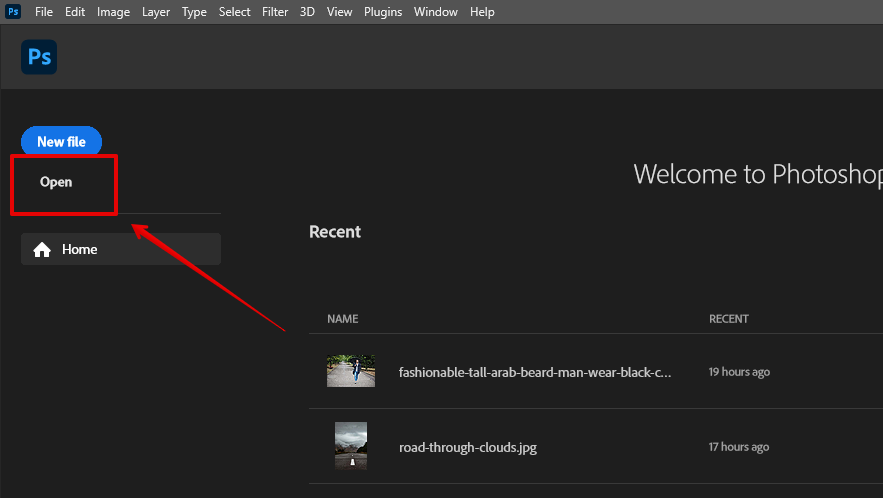
Step 1: Import the Image
Launch Photoshop, click Open, and choose your picture to import.
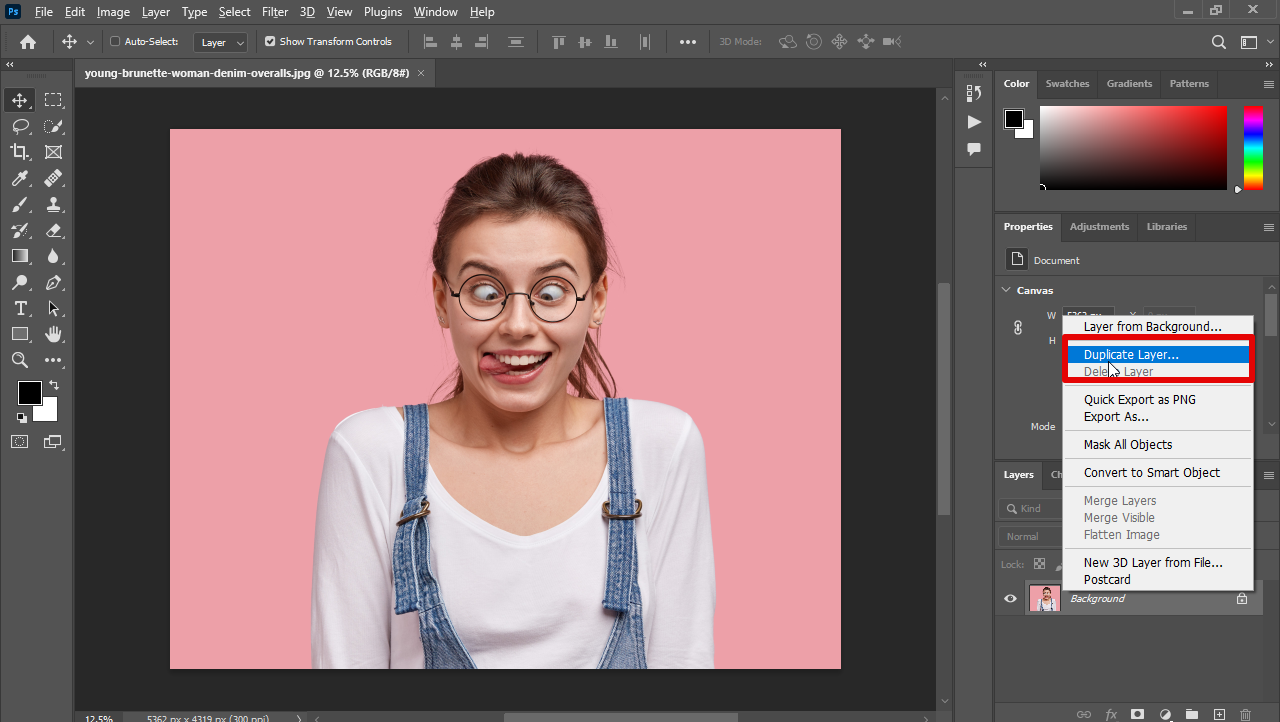
Right-click your picture layer in the Layers panel and choose Duplicate. Rename the layer to Cartoon.
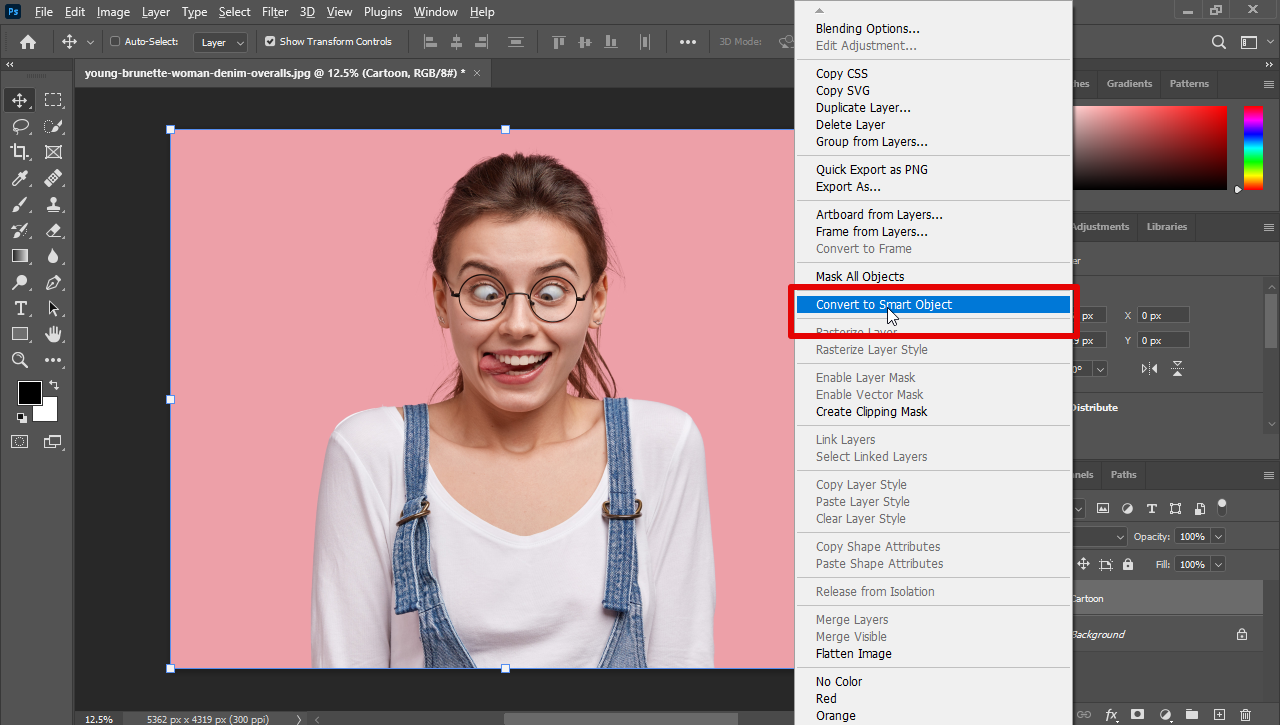
Again, right-click the Cartoon layer and choose Convert to Smart Object.
Step 2: Adjust the Shadow and Apply Oil Paint
Click Image (top toolbar), choose Adjustments, and select Shadow/Highlights.
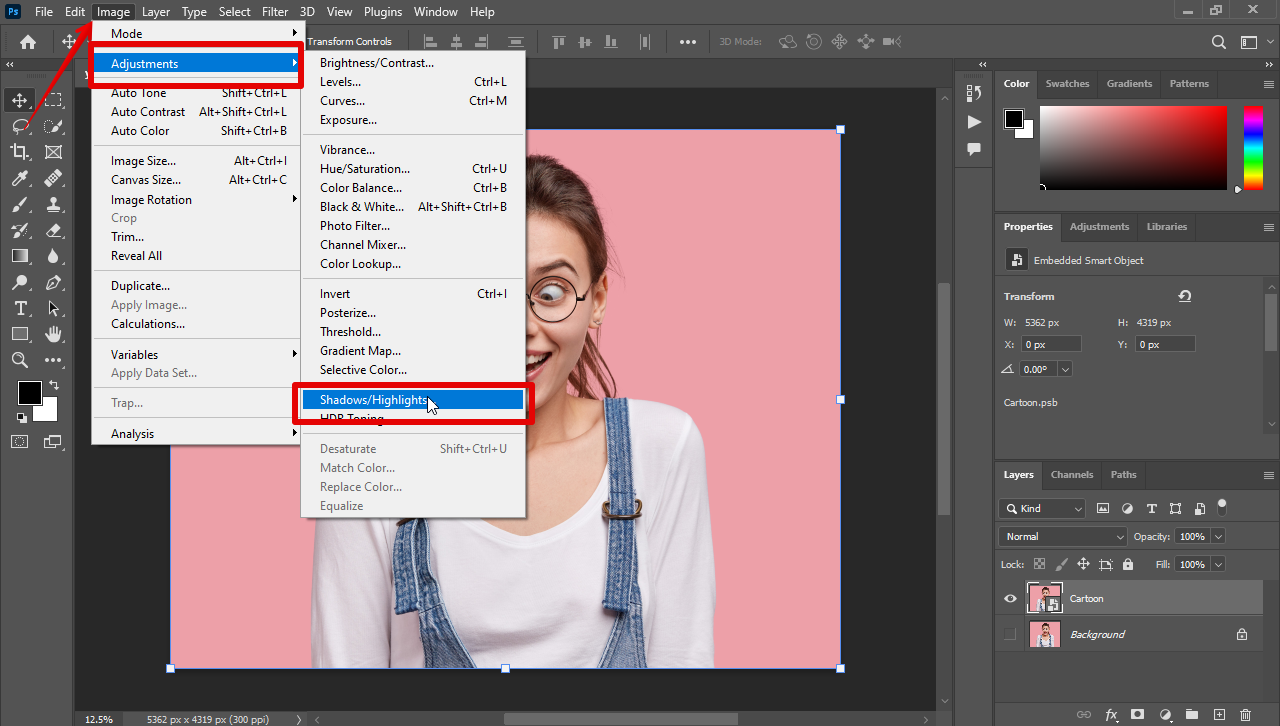
Set the Shadow to around 35% and click OK.

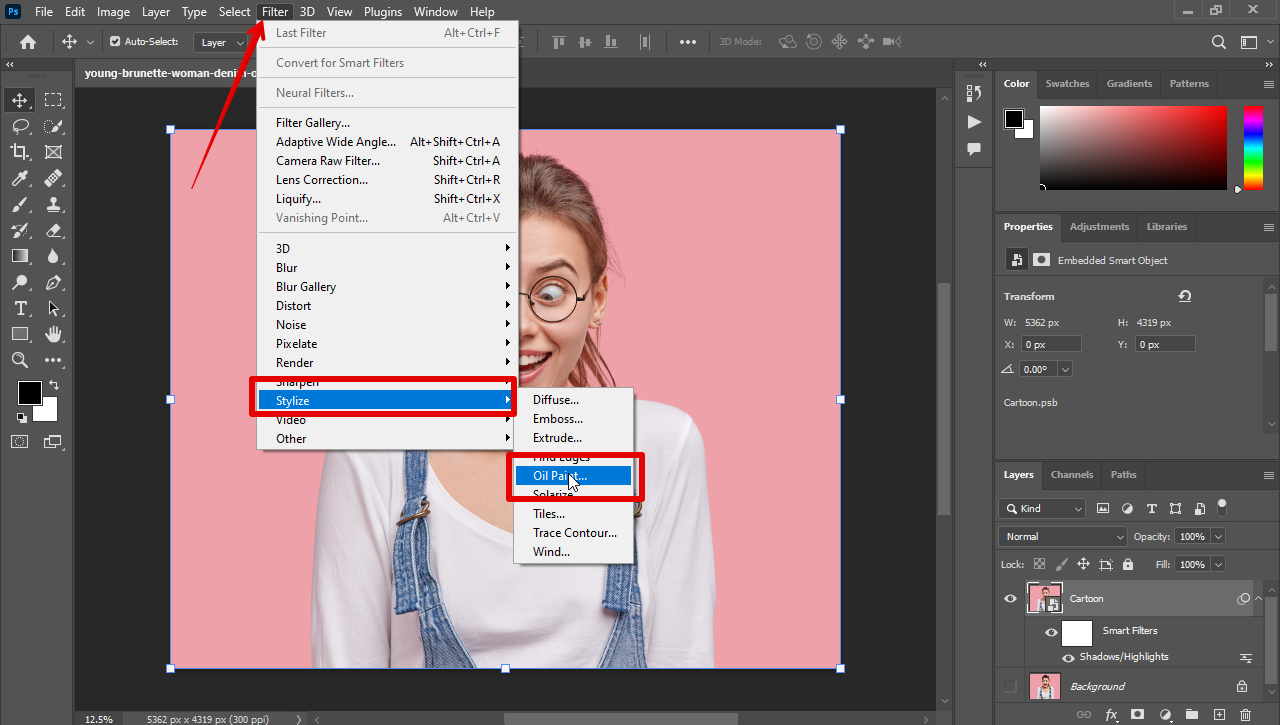
Click Filter in the top toolbar, select Stylize, and choose Oil Paint.
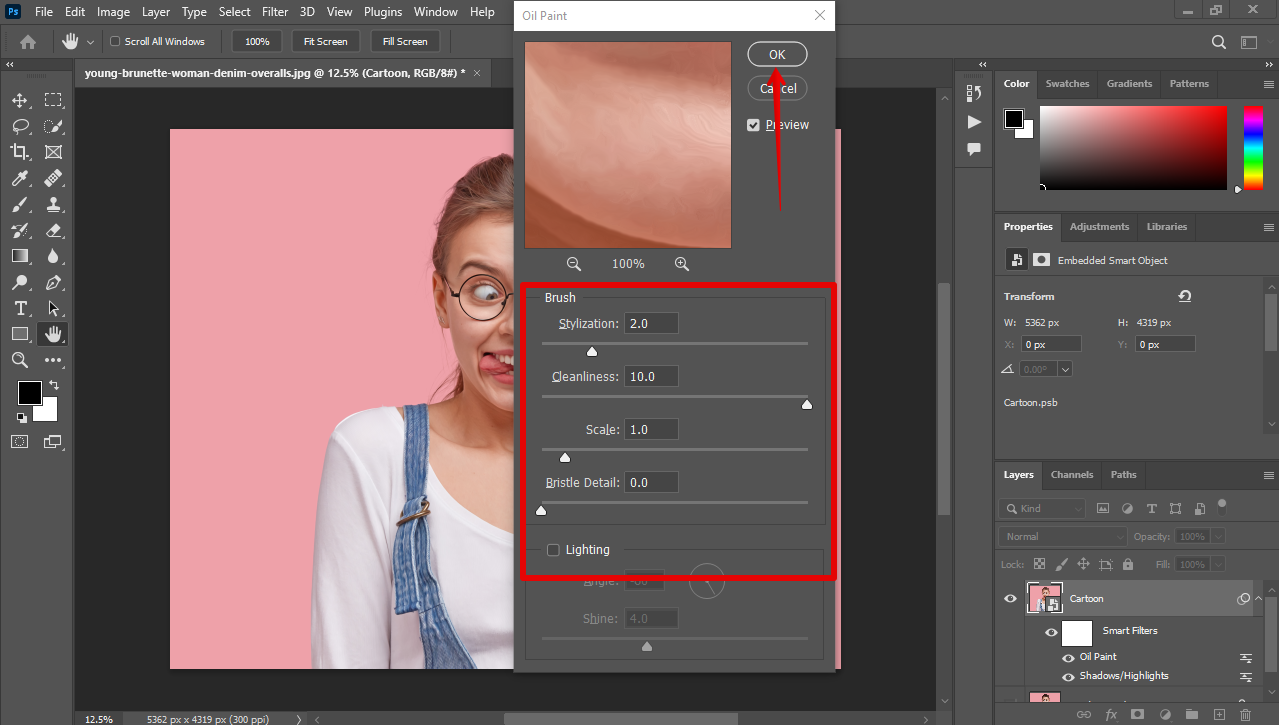
Set Stylization to 2, Cleanliness to 10.0, Scale to 1.0, and Bristle Detail to 0. Uncheck Lighting and click OK.
Step 3: Apply Poster Edges Effect
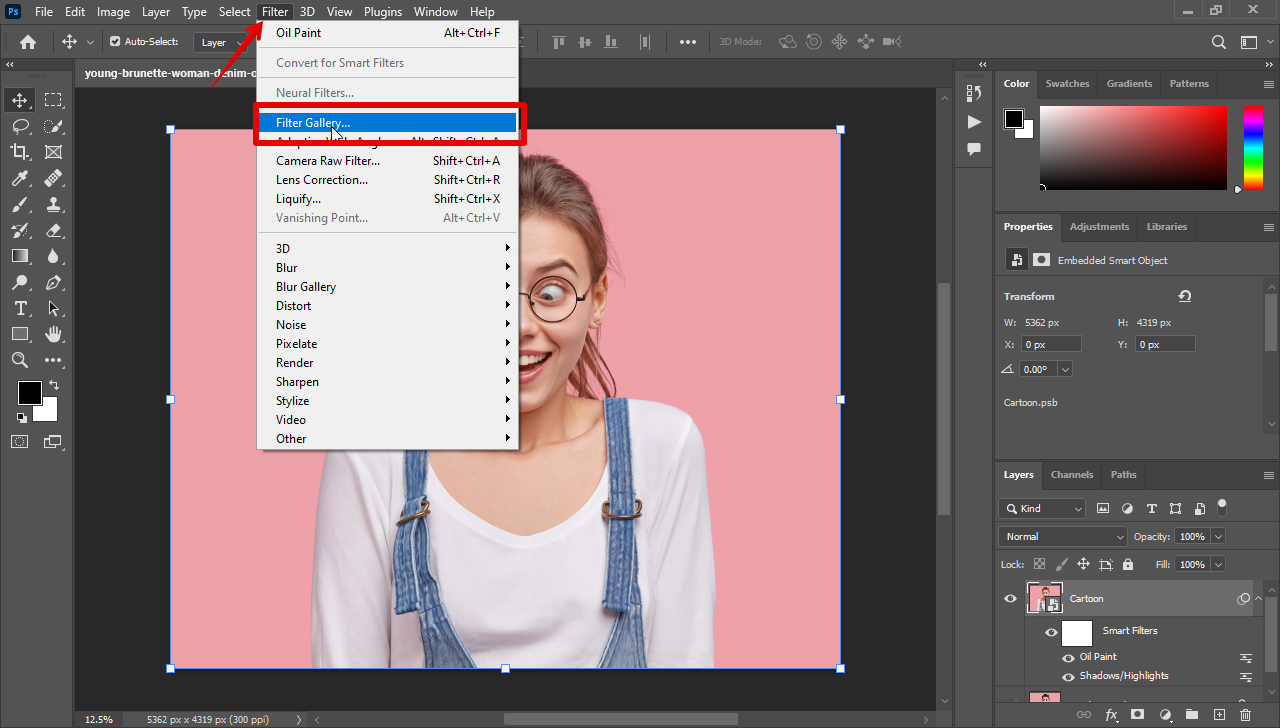
Next, select Filter and choose Filter Gallery.
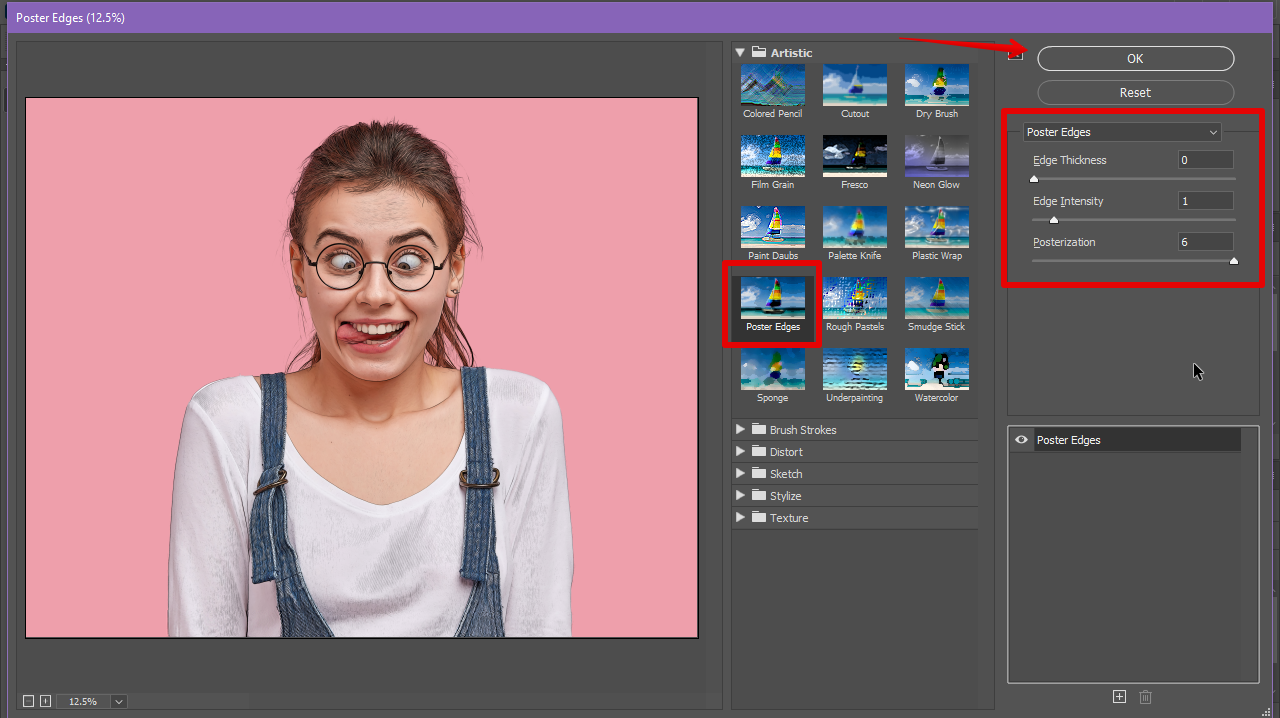
Click Poster Edges under the Artistic folder and set Edge Thickness to 0, Edge Intensity to 1, Posterization to 6, and click OK.
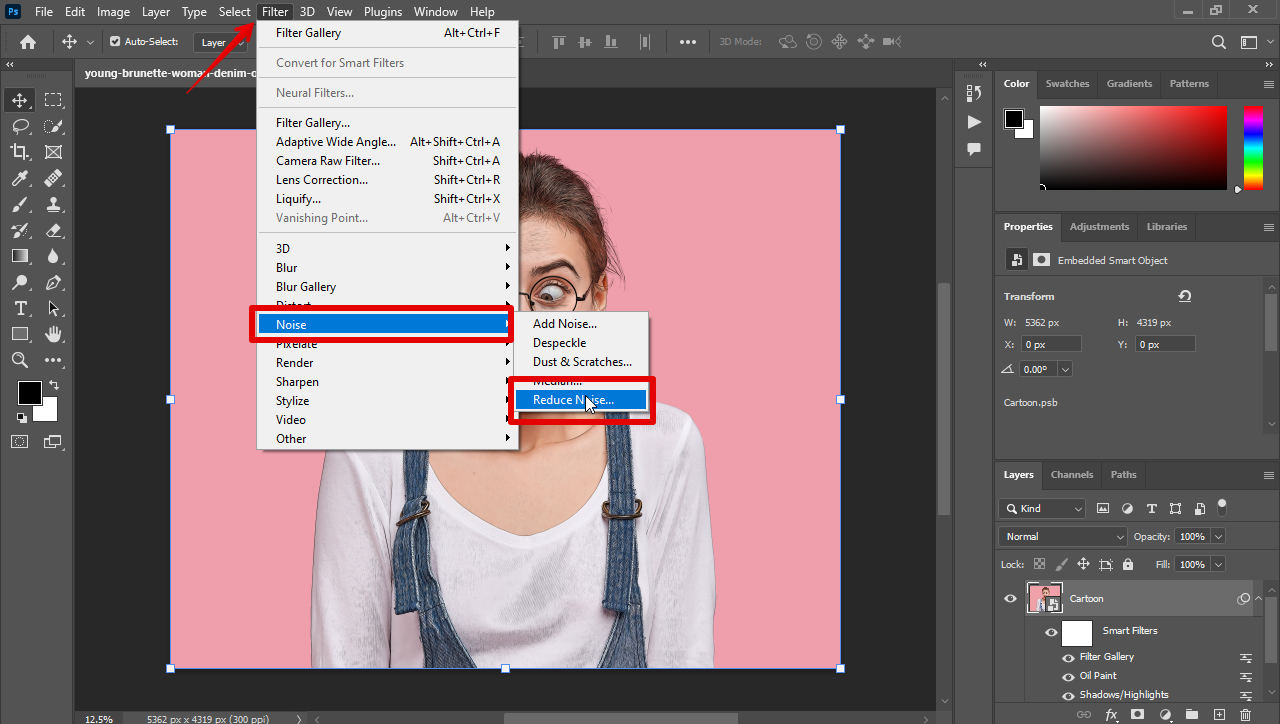
To reduce the dark outlines and unwanted texturing, go to Filter>Noise and click Reduce Noise.
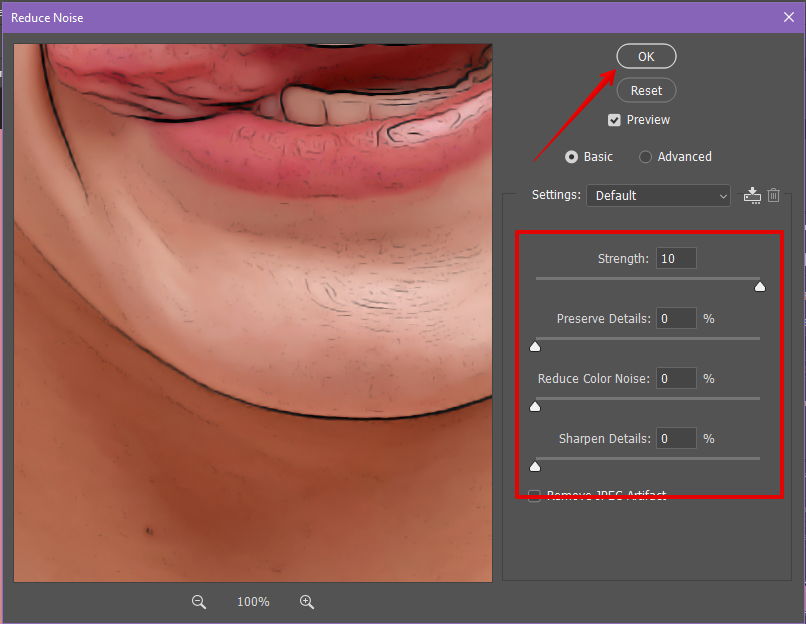
Set the Strength to 10, all other settings to 0, and click OK.
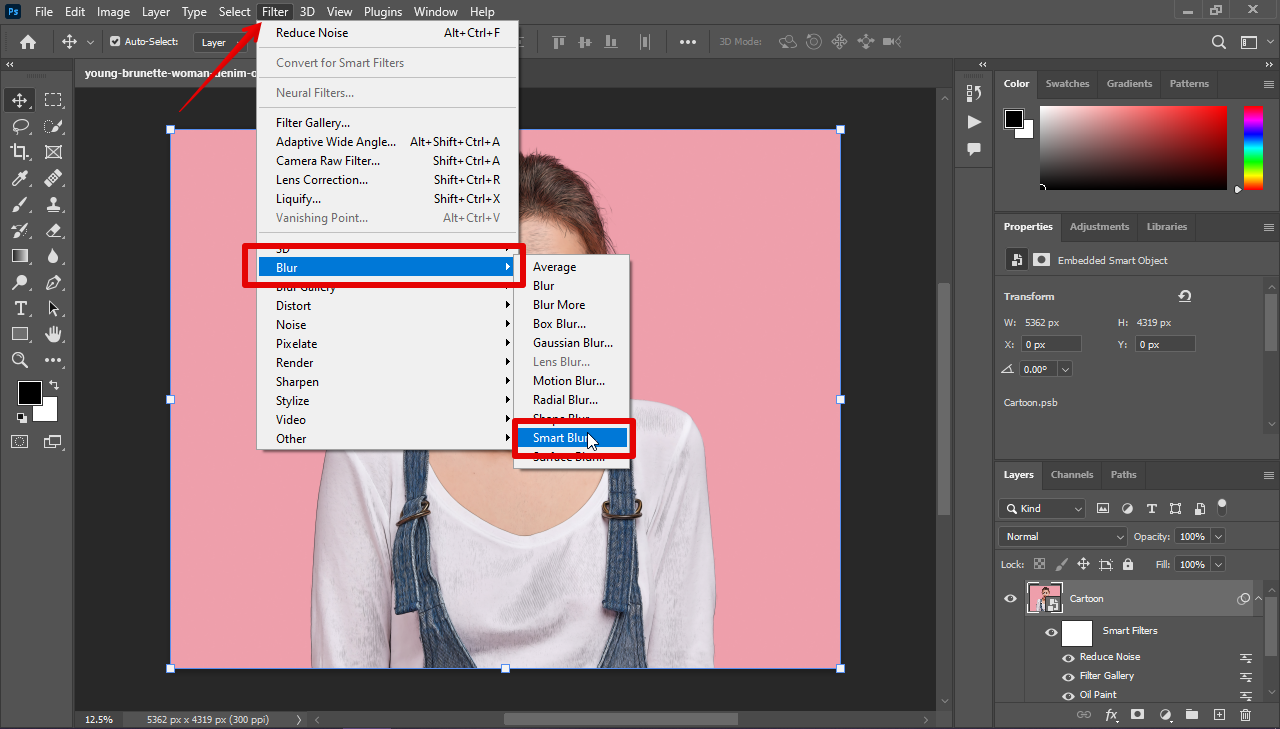
Now, click Filter again, choose Blur, and select Smart Blur.
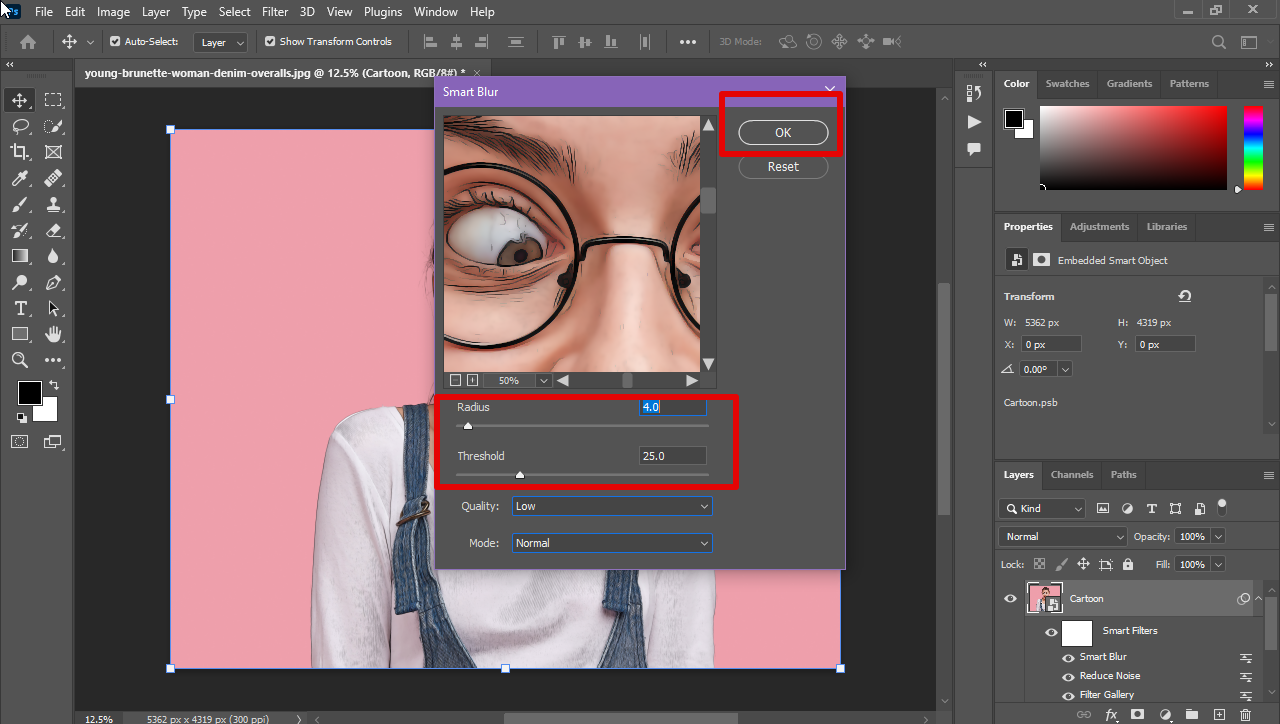
Set the value of the Radius to 4.0 px and the Threshold to 25 and click OK.
Step 4: Bring Out the Details
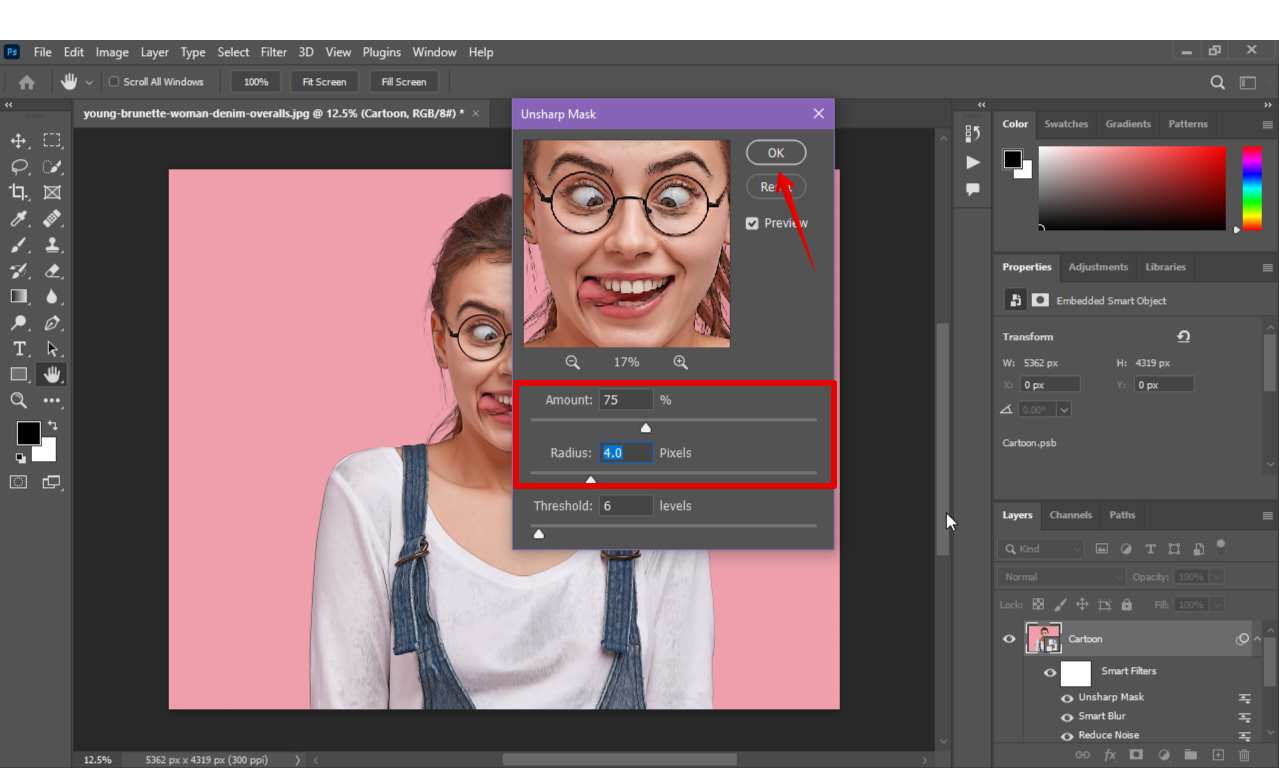
In this step, click Filter, choose Sharpen, and select Unsharp Mask.
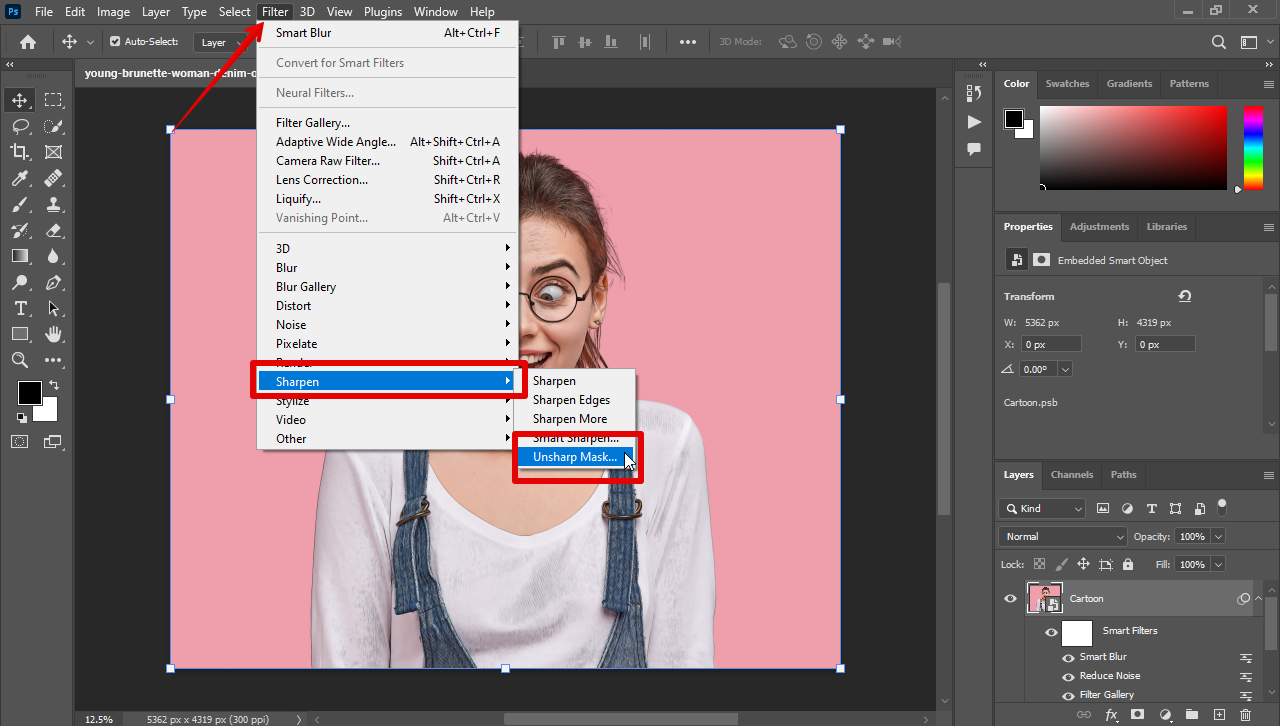
Use settings of 70% Amount and 4px Radius, and click OK.
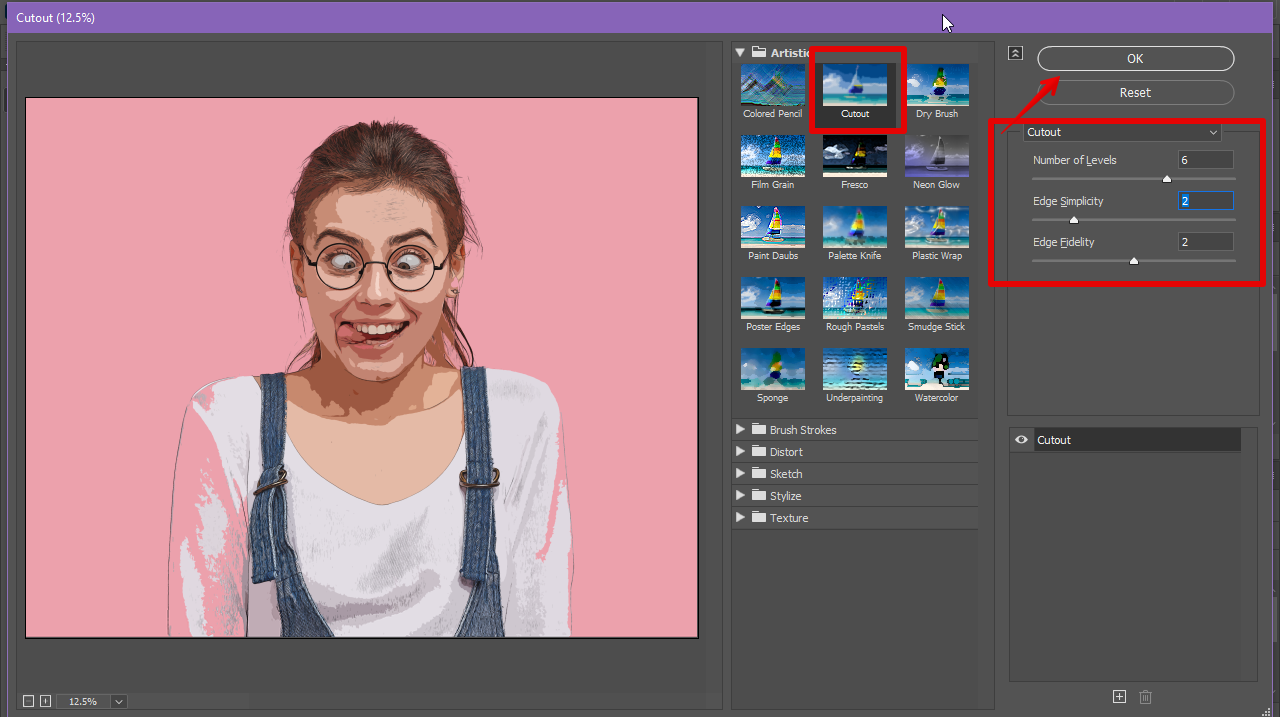
Open the Filter Gallery menu again, choose Cutout, and set the Number of Levels to 4 or 6, Edge Simplicity to 2-4, Edge Fidelity to 2, and click OK.
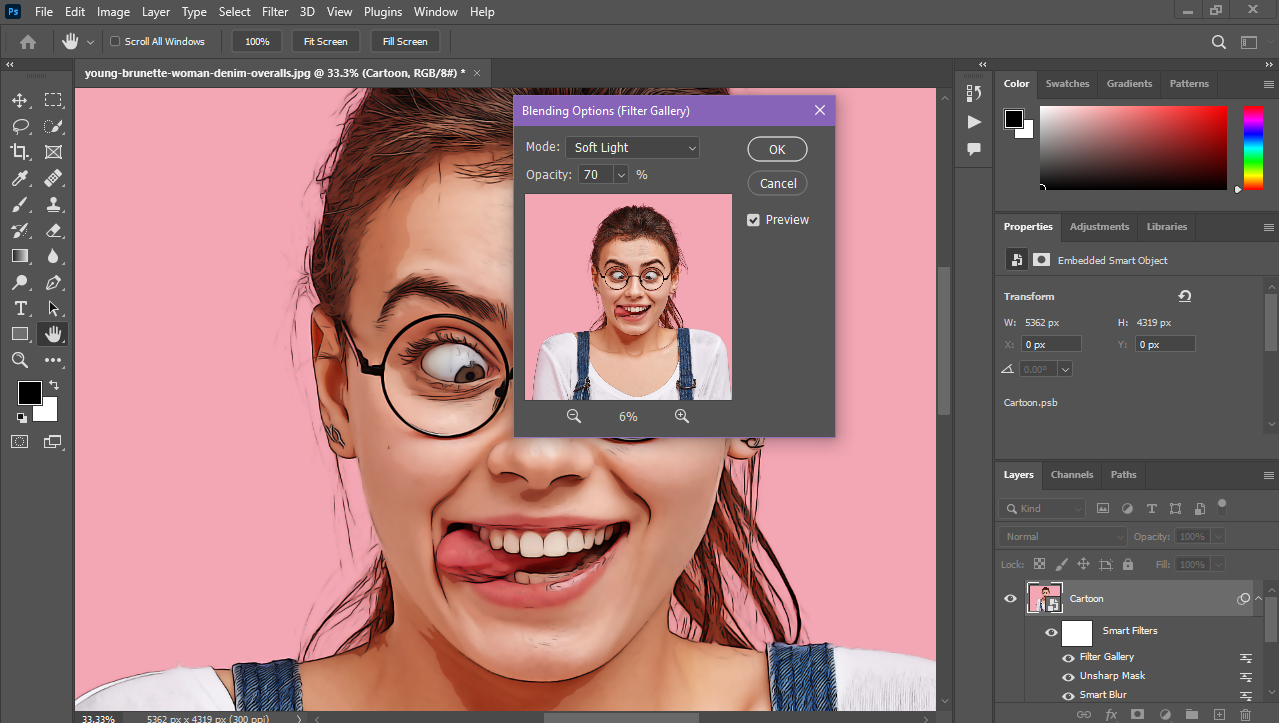
Double-click the little icon next to the Cutout (Filter Gallery) layer in the Layers Panel. Set the Mode to Soft Light, choose the opacity value between 50% to 70%, and click OK.
Step 5: Export the Image
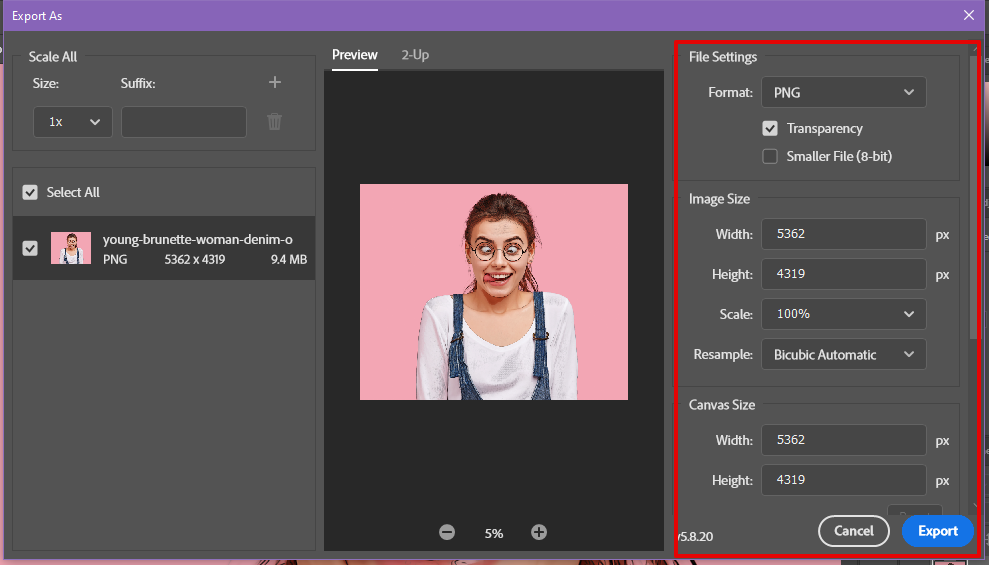
Click File and choose Export > Export As.
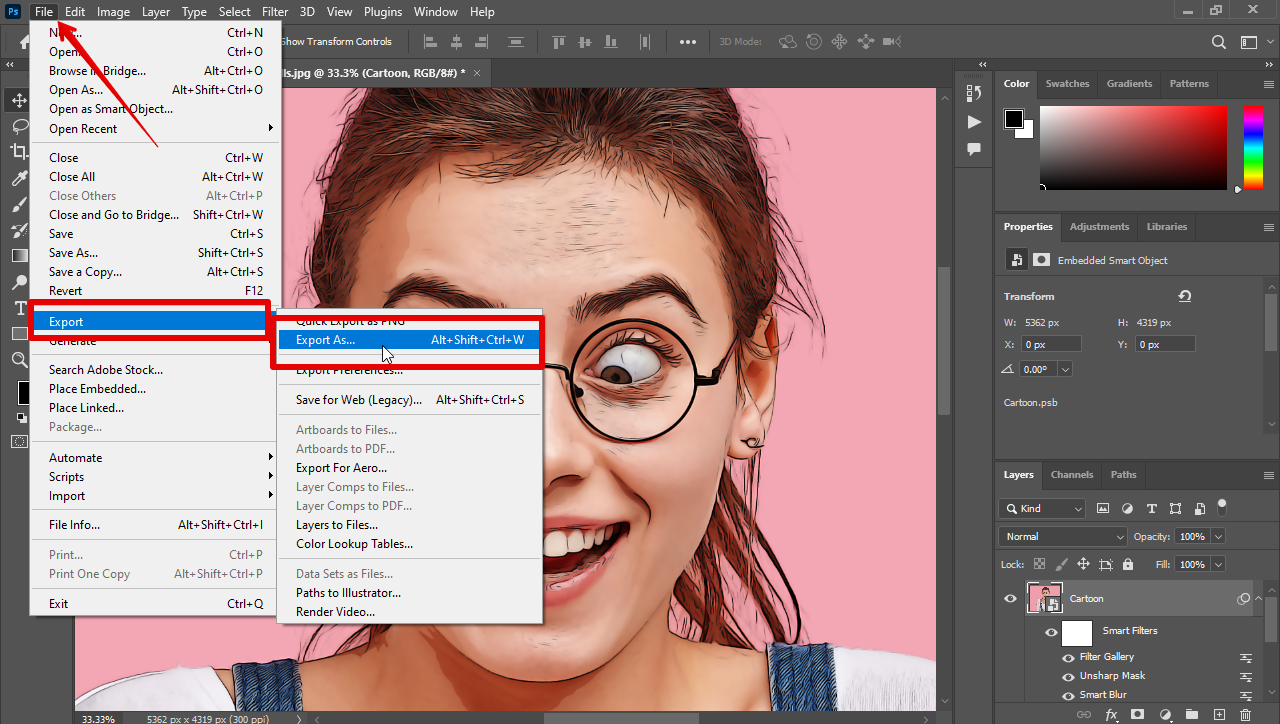
Select the file format & size, click Export, and select a folder to save the image on your PC.
Tips and Tricks
Apply Liquify Filter
Before or after applying the main cartoon filters, click on Filter > Liquify, and adjust the Eye, Nose, Mouth, and Face shape sliders to make the eyes bigger or the nose smaller, etc., to create a more playful, cartoonish character.
Experiment With Cutout Filter Settings
Always experiment with the Number of Levels under the Cutout filter setting. Lower levels, like 1 to 3, give a more abstract, flat look. Higher levels (4 to 8), on the other hand, maintain more details in the shapes.
Common Mistakes to Avoid
Over detailing
Avoid setting the values of Poster Ege and Unsharp Mask too high. Otherwise, your pictures will look too harsh, and you won’t have a smooth, stylized cartoon appearance.
Overusing Filters
Stick to a few key filters and avoid layering too many effects that clash, which can ruin the cartoonish simplicity you’re aiming for.
FAQs
What Should I Do if the Poster Edges Filter Creates Overly Dark Outlines?
If the outlines are too intense, adjust the Edge Intensity setting to reduce their thickness or apply a Smart Blur after using Poster Edges to soften the lines.
How To Adjust Skin Tone in Photoshop?
Open your image in Photoshop and click New Adjustment Layer > Selective Color under the Layers panel. Double-click the Selective Color layer thumbnail to open the Selective Color panel. Then, choose the Red, Blue, or Yellow channel and drag the sliders below the Cyan, Magenta, Black, and Yellow sliders to adjust the skin tone.
Conclusion
As we wrap up this article, you’ve learned how to turn a real-life photo into a cartoon effect using different filters in Photoshop.
Go on, try it out yourself, and add your own spin to bring out the true cartoonish spirit of your captured images.
