

Adding neon effects to your text in Adobe Photoshop conveys your message with a stylish and contemporary edge. This approach quickly grabs your audience’s attention and makes them ideal for social media or websites.
In this tutorial, we’ll break down this process into simple steps so anyone can follow along. Whether new to design or a pro, you’ll quickly master adding dazzling neon effects to your text.
Table of Contents
- 1 What Are the Different Methods of Adding Neon Text Effect Using Adobe Photoshop?
- 2 Steps for Applying Neon Effects to Text in Photoshop
- 2.1 Step 1: Creating a New File
- 2.2 Step 2: Open the Background Image
- 2.3 Step 3: Copy the Image to the Main Document
- 2.4 Step 4: Creating a Black & White Background
- 2.5 Step 5: Adding Text
- 2.6 Step 6: Applying Layer Styles
- 2.7 Step 7: Customize the Neon Glow
- 2.8 Step 8: Enhance the Glow
- 2.9 Step 9: Further Enhancements
- 2.10 Step 10: Export Your Neon Text
- 3 Tips and Tricks
- 4 Common Mistakes to Avoid
- 5 FAQs
- 6 Conclusion
- 7 Author
What Are the Different Methods of Adding Neon Text Effect Using Adobe Photoshop?
You can apply a neon sign effect in Adobe Photoshop using various methods. Each one offers unique advantages suited to your design and skill level.
Method 1: Layer Styles
Layer Styles in Photoshop offer a quick and easy method to apply neon effects directly onto text layers. While convenient, they provide limited opportunities for adjusting or refining the effect compared to other methods.
Method 2: Brush Tool
The brush tool offers precise control over creating neon effects. You can adjust size, opacity, and color to create glowing lines resembling real neon lights. However, it demands more manual control and attention, which potentially requires extra time and effort.
Method 3: Blending Modes
Blending Modes provide numerous options for creating a neon Photoshop text effect by blending layers. However, mastering these techniques may require some practice and experimentation.
Steps for Applying Neon Effects to Text in Photoshop
With customizable options and “undo” capability, using Layers Styles is often the easiest way to add neon text with Photoshop. Here’s how to do this:
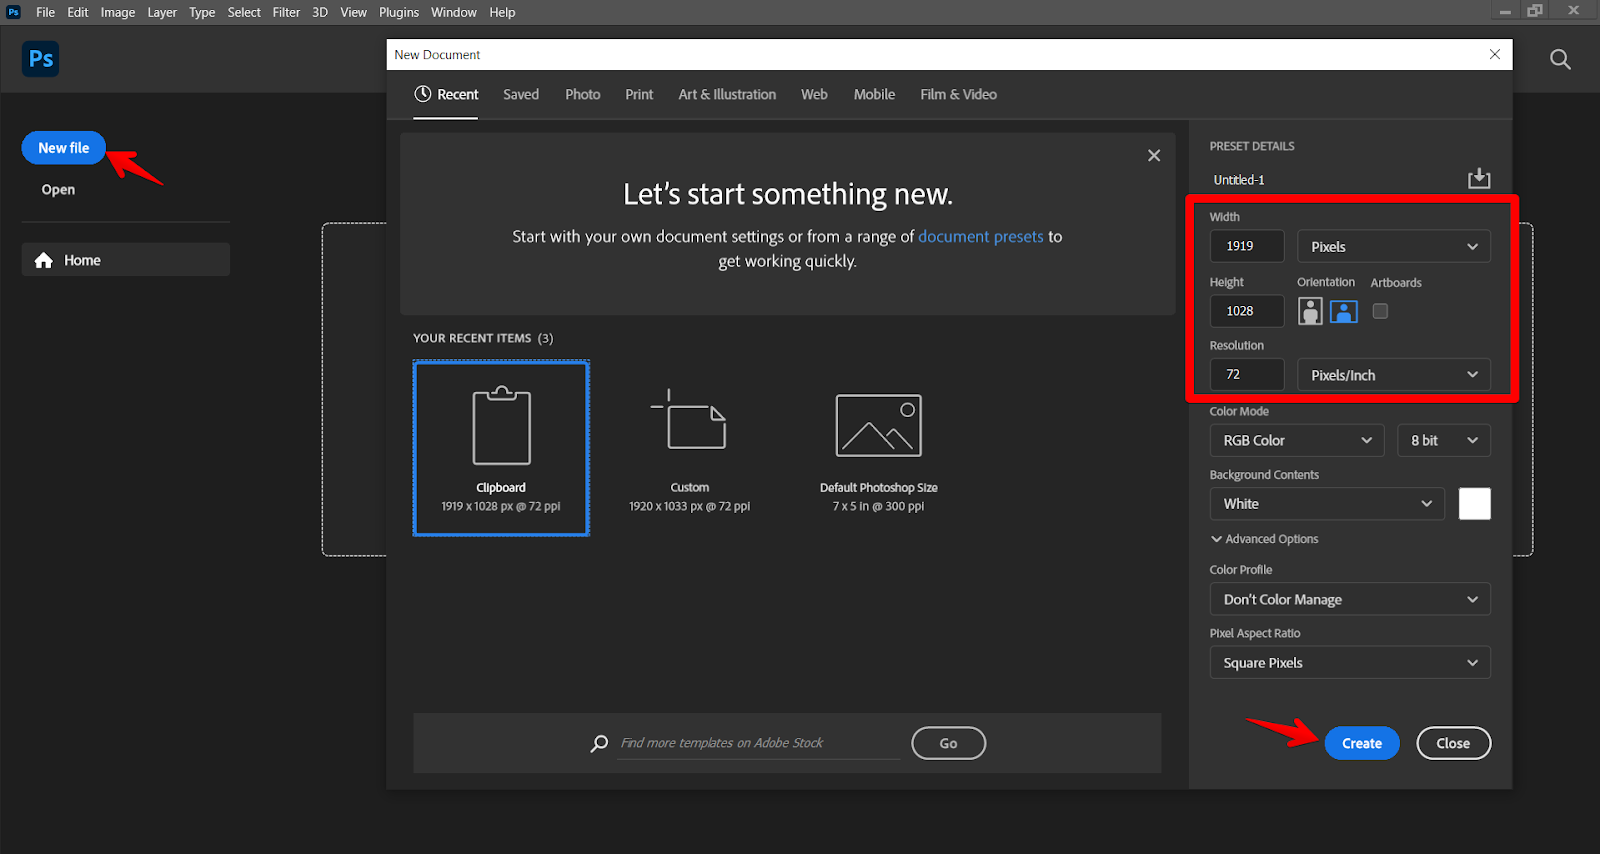
Step 1: Creating a New File
First, go to File > New, specify your new canvas’s dimensions (Width and height) and resolution, and then click Create.
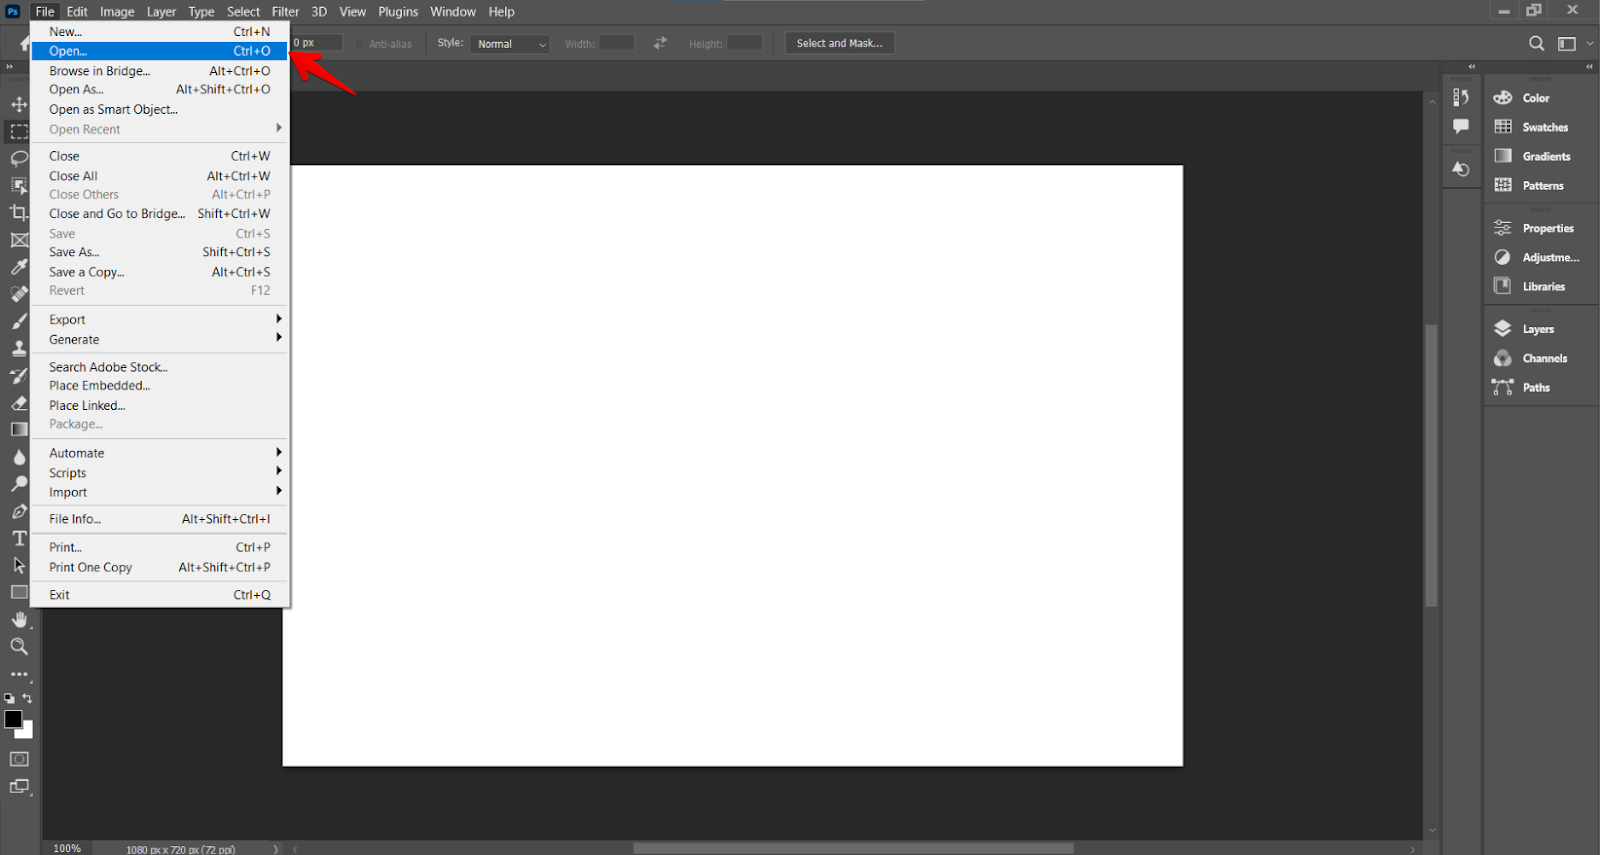
Step 2: Open the Background Image
Click File at the top-left corner and click Open to browse to the location of your background image file.
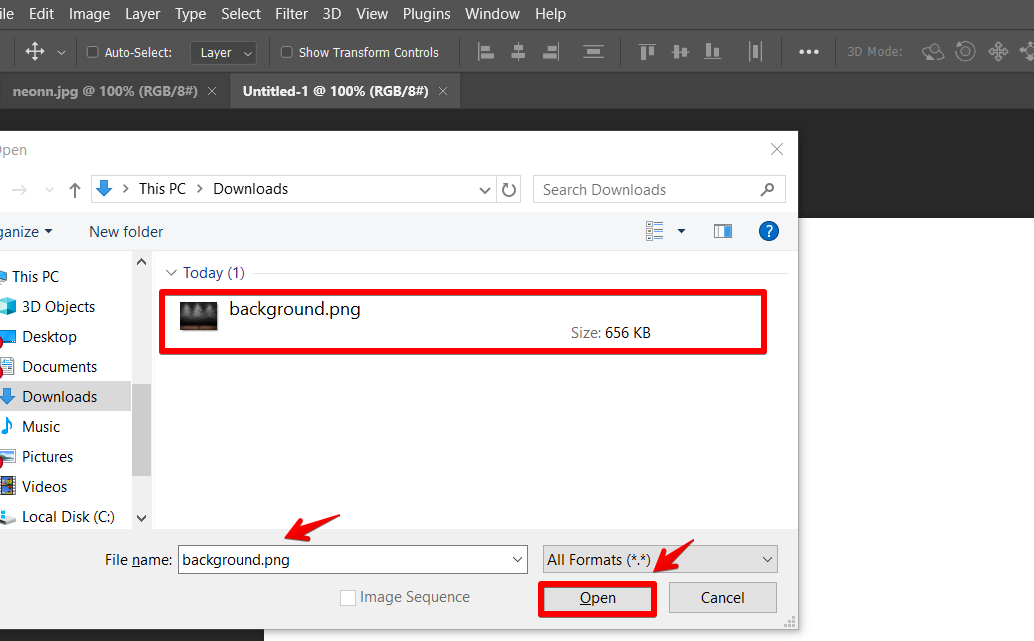
Select an image for the background of your text and click Open to import it into your Photoshop workspace.
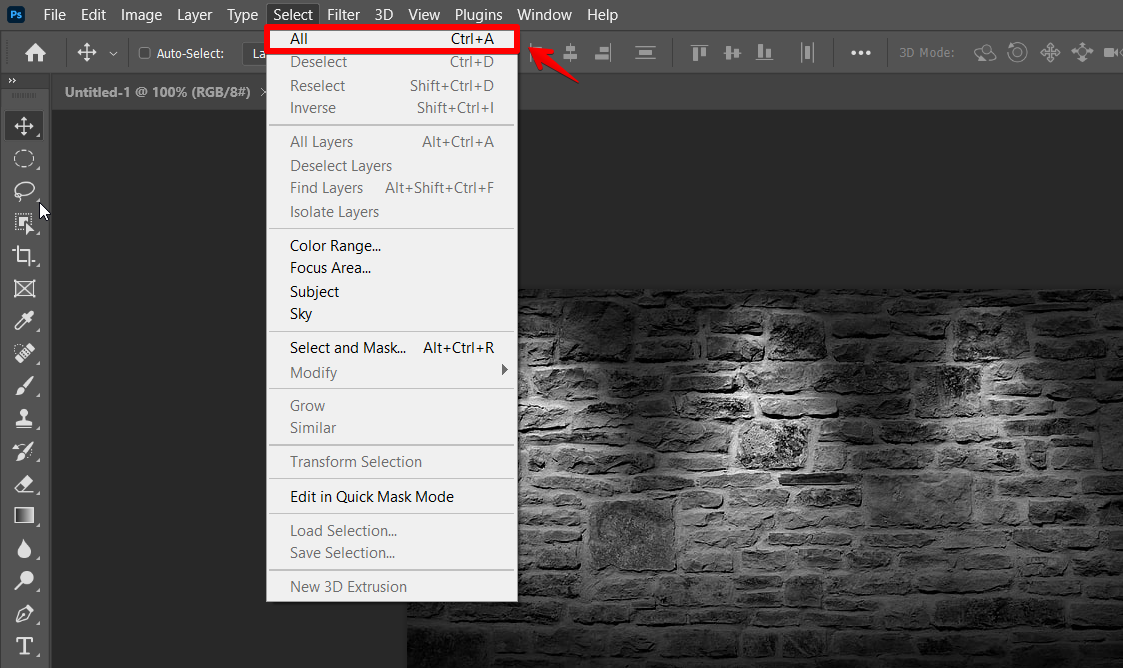
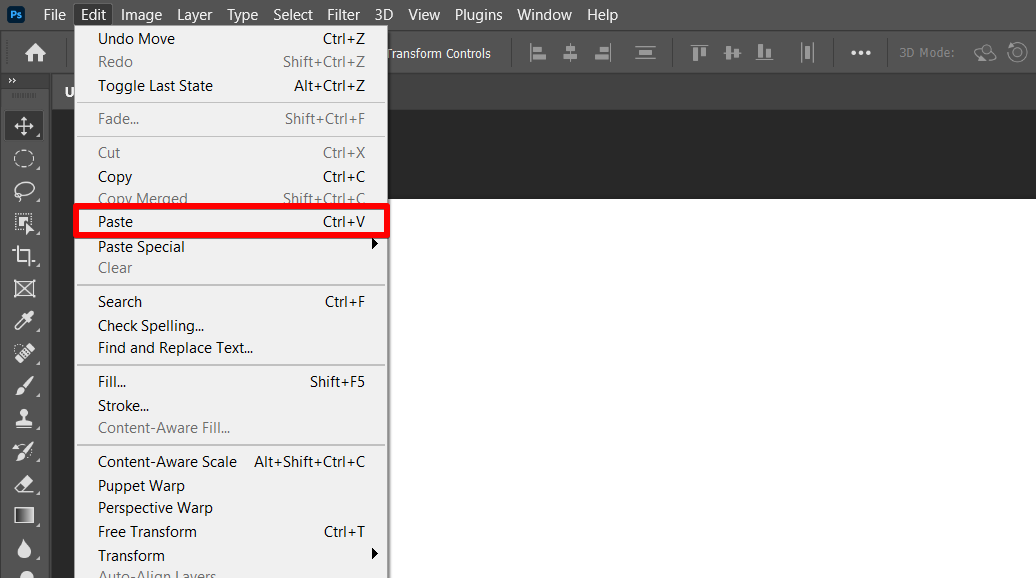
Step 3: Copy the Image to the Main Document
After opening the background image, go to Select and click All to highlight the entire image.
Navigate to Edit and select Copy to copy the image.

Finally, go to Edit and paste the image in the main document.
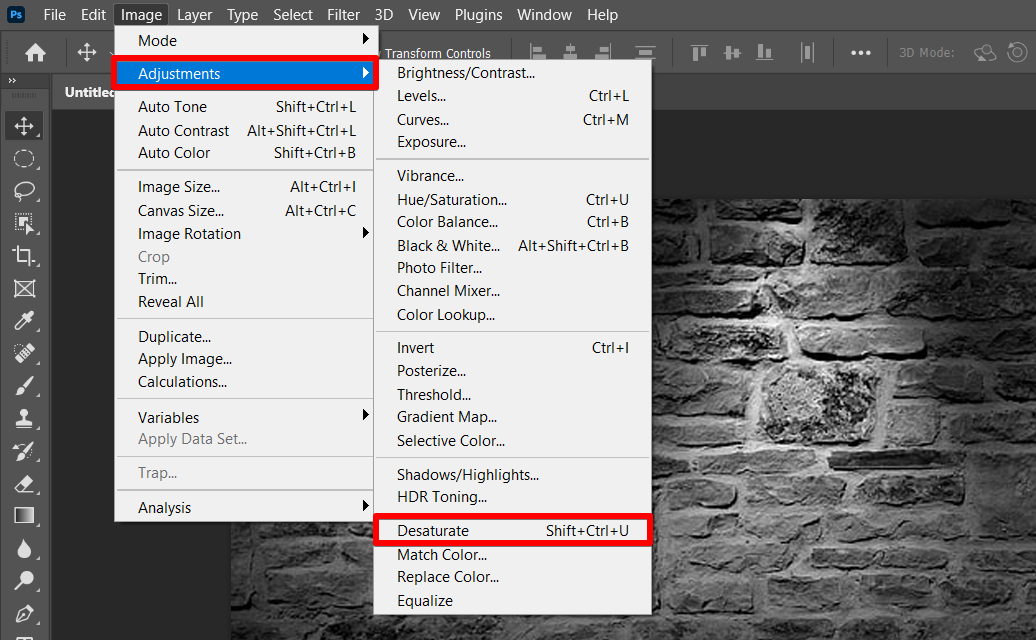
Step 4: Creating a Black & White Background
You can convert the background to black and white to increase the text visibility. Simply go to Image > Adjustments and select Desaturate.
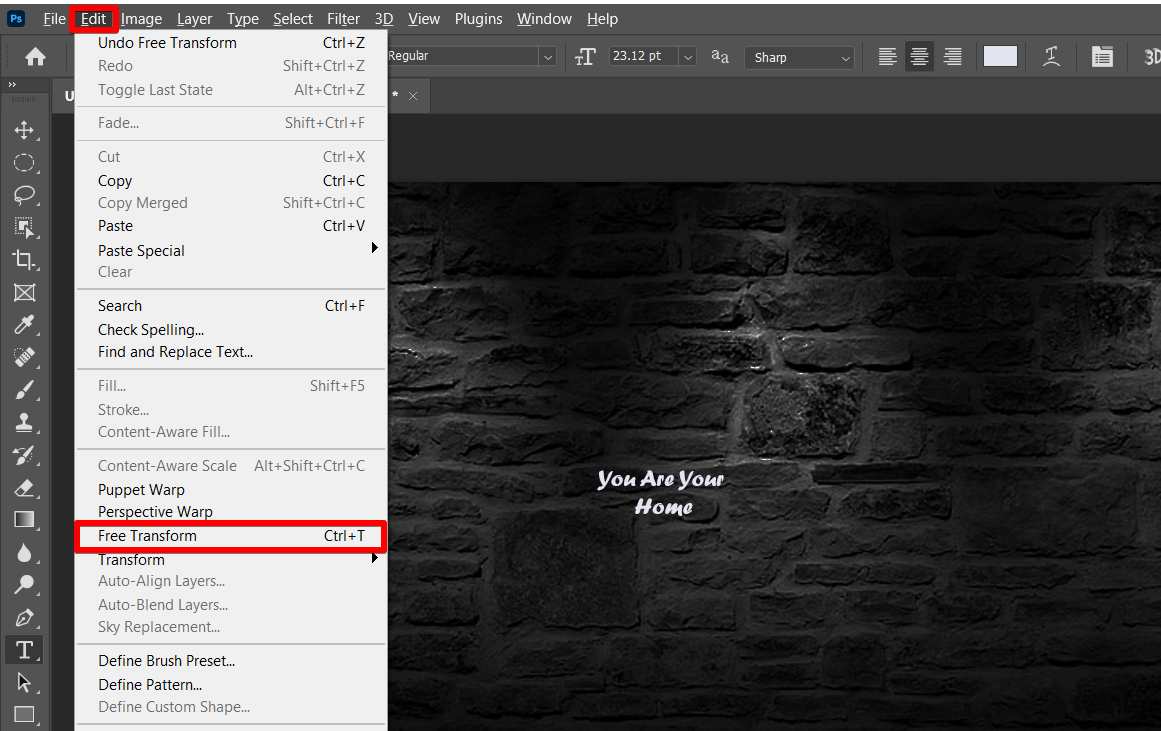
Step 5: Adding Text
Next, choose the Type Tool from the toolbar, and select your favorite font from the font dropdown menu. Once selected, click on the canvas and start typing your text.

To adjust the image size, go to the Edit menu and select Free Transform.
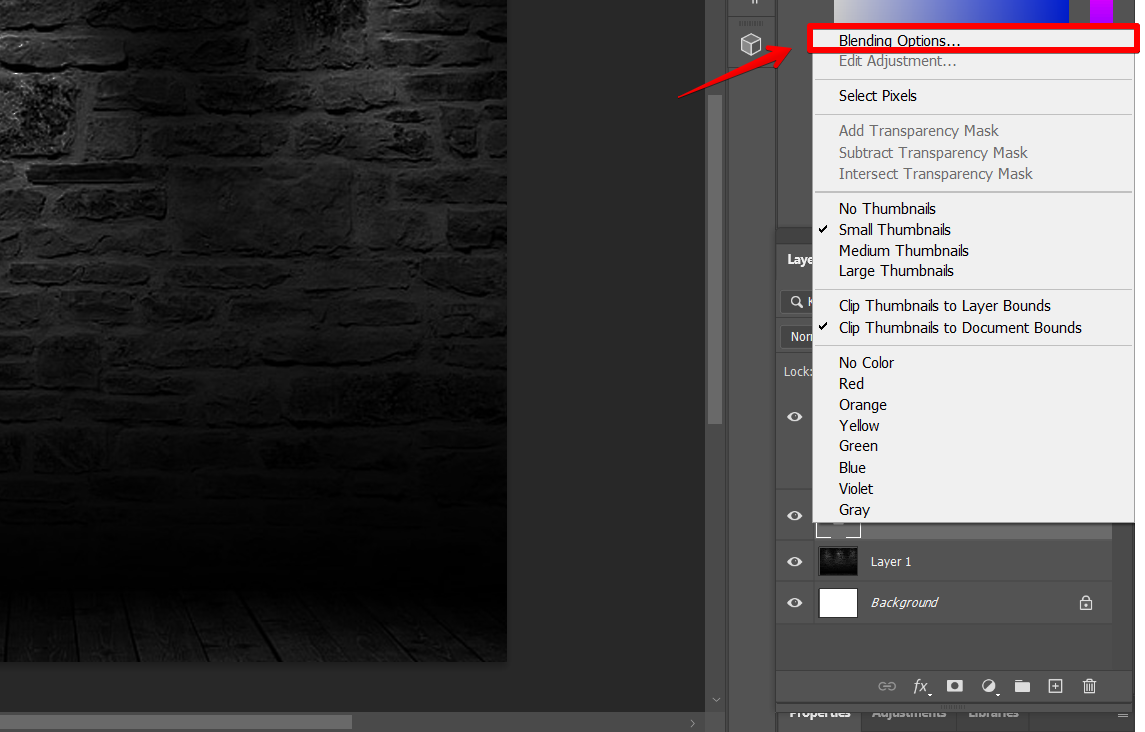
Step 6: Applying Layer Styles
Double-click the Text layer to access the Layer Style options, or, if you prefer, right-click and choose Blending Options from the menu.
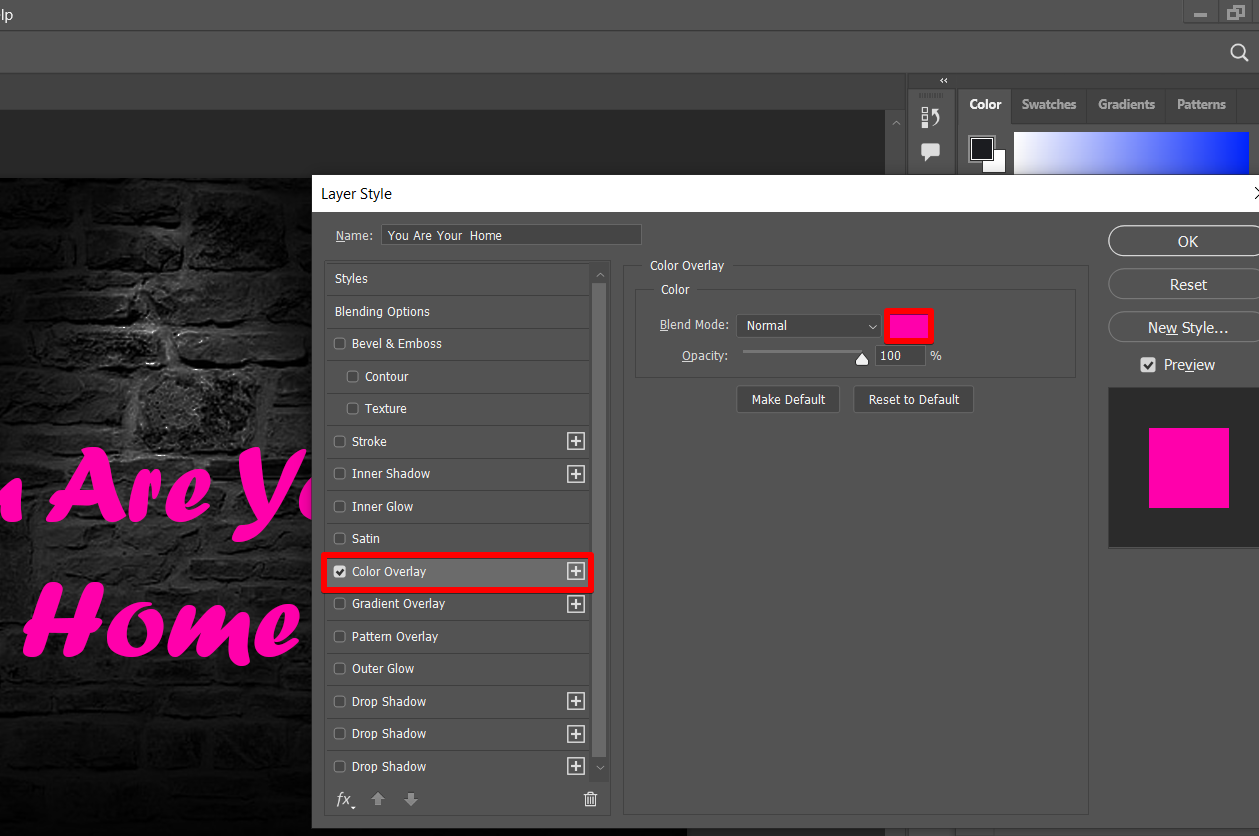
Step 7: Customize the Neon Glow
Start by applying Layer Styles to your text layer. Begin with a Color Overlay to set the base color of your neon text.
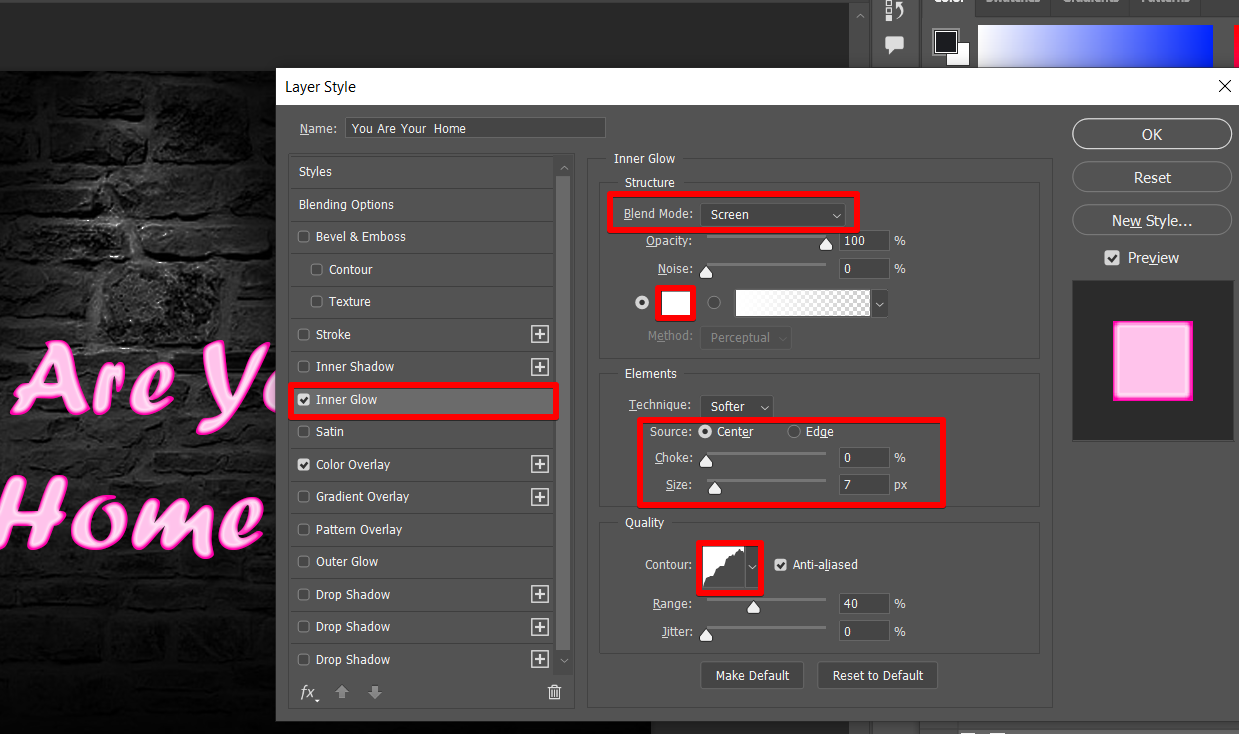
Next, you can add the Inner Glow to illuminate the tube. Set the color to white, blend mode to Screen, and source setting to Center. Adjust the choke to zero and size according to your preference. Modify the contour to your liking or use presets.
Step 8: Enhance the Glow
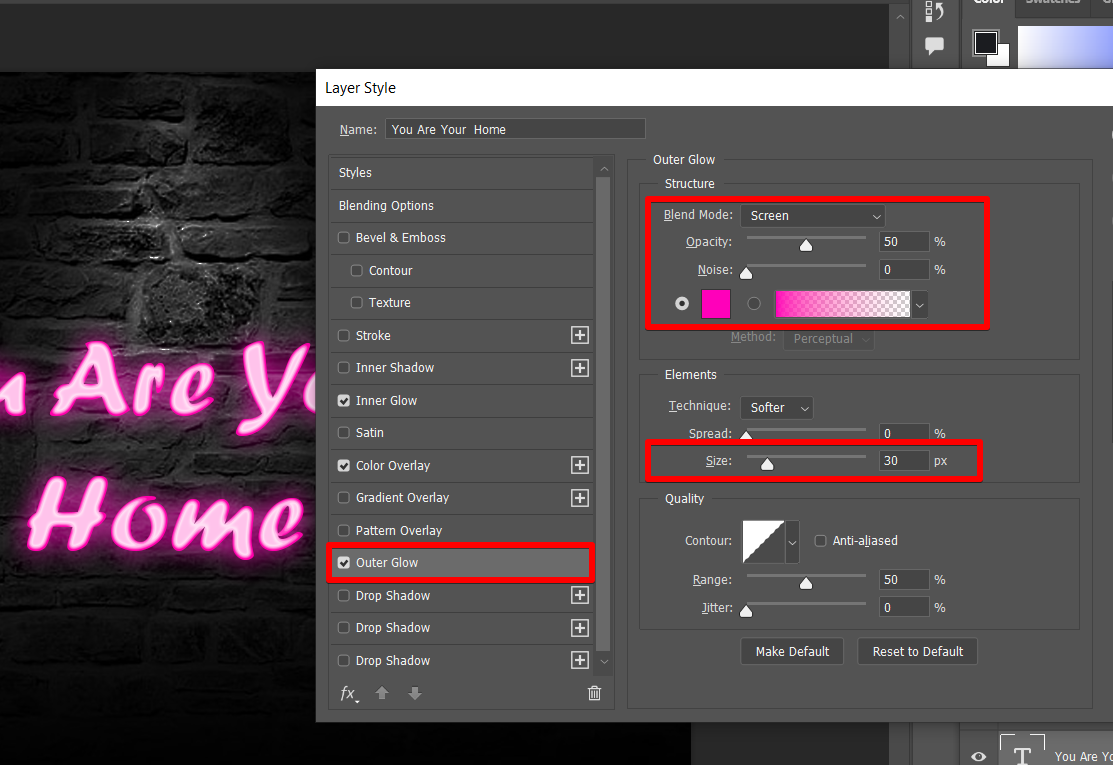
To enhance the glow, you can continue by adding an Outer Glow. Set the color to the same hue as the Color Overlay, then increase the size to soften the edges. Adjust the opacity to around 50%.
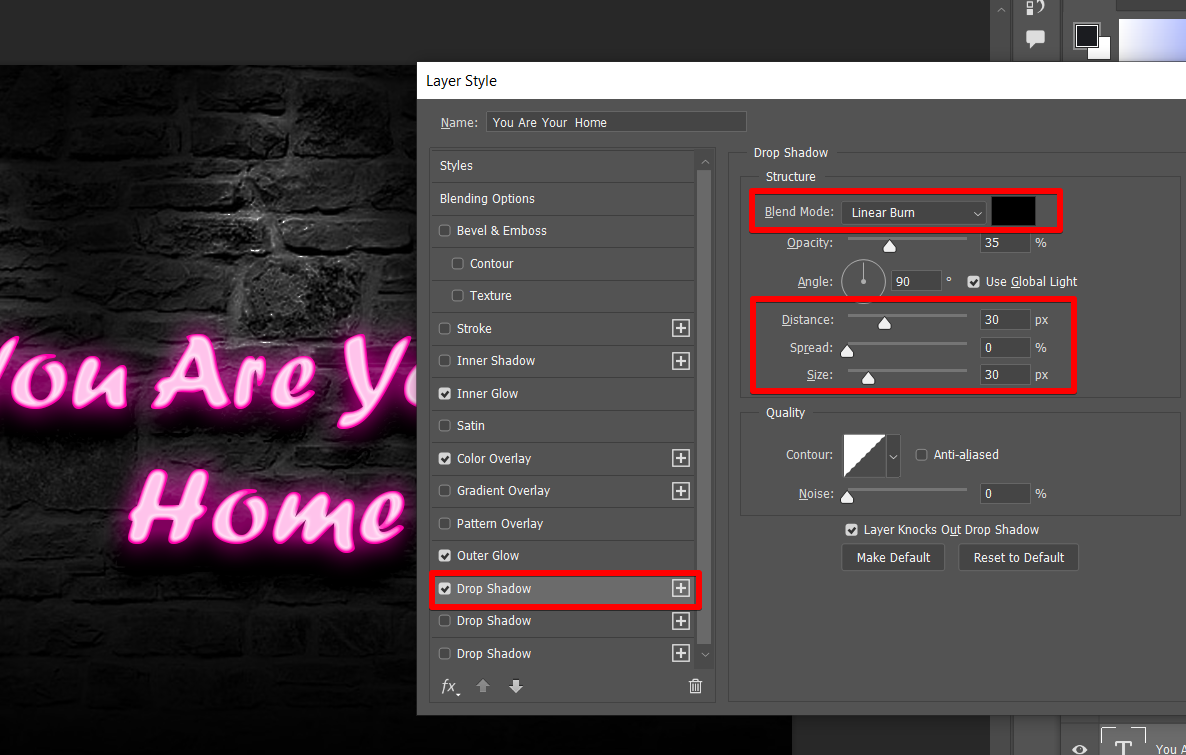
You can also add up a Drop Shadow while setting the blend mode to Linear Burn. Choose black as the color and set the distance and size to 30 pixels to create basic shading and lift the text from the background.
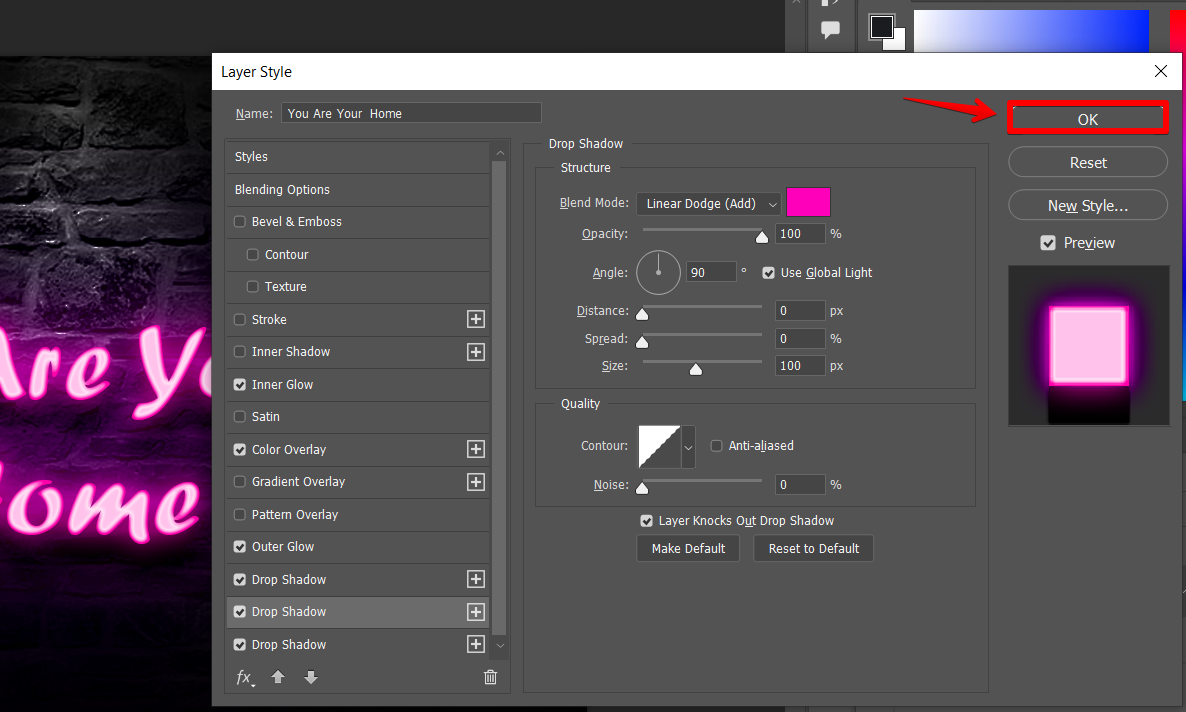
Step 9: Further Enhancements
Add another Drop Shadow with the blend mode set to linear dodge. Set the color same as the base color. Make the opacity and size 100, bringing the distance to 0 to enhance the glow.
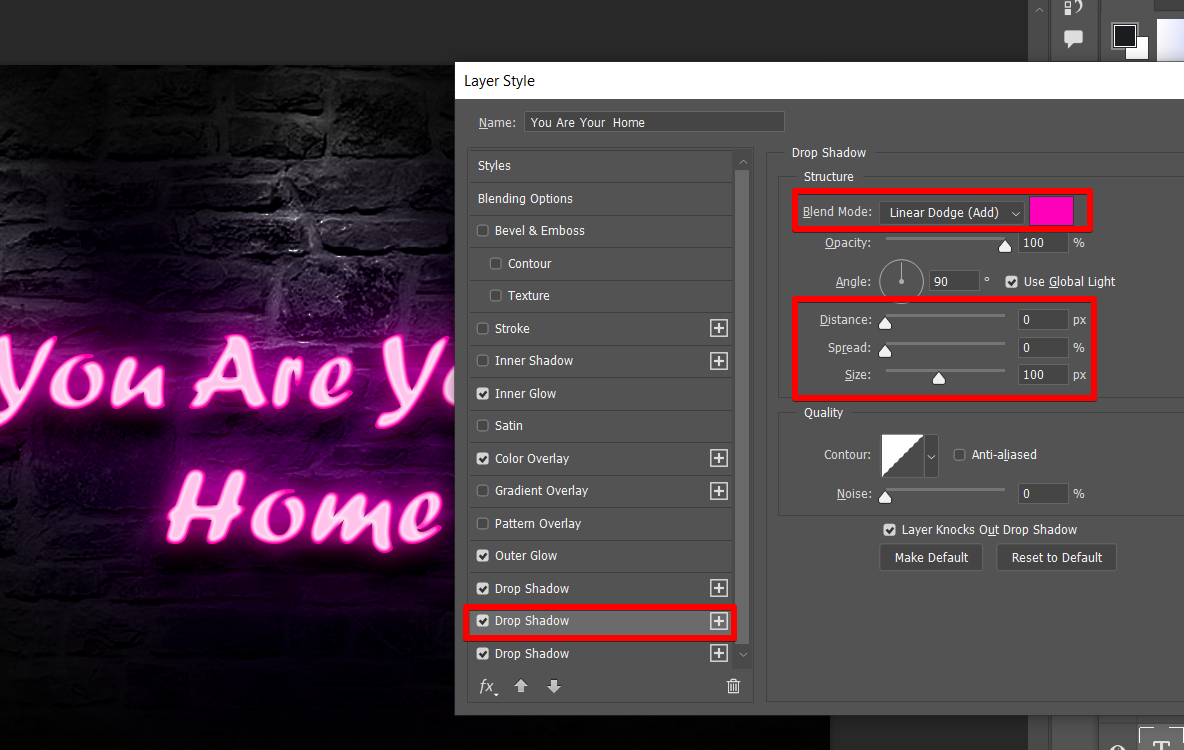
Click OK to save the layer styles.
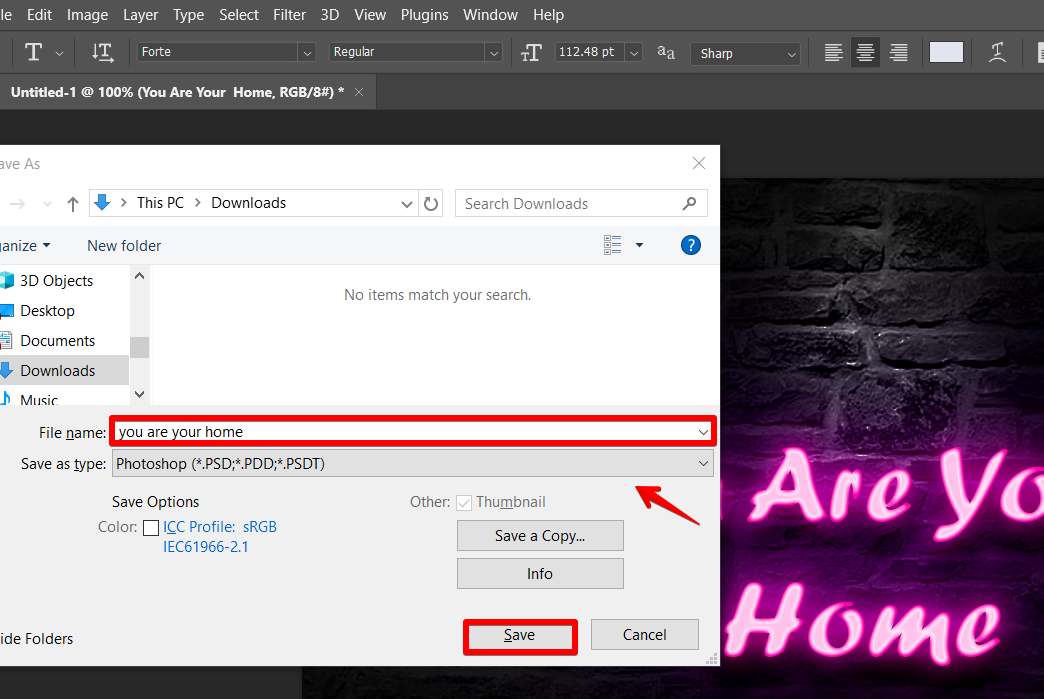
Step 10: Export Your Neon Text
When you’re done, go to File > Save As. Choose your format and destination, then click Save to save your neon text as an image file.
Tips and Tricks
Choosing the Right Font
Always try to choose a font that complements the neon effect you want to achieve. For this, opt for bold, sans-serif fonts for a modern look or script fonts for a more decorative design.
Contrasting Backgrounds
You can select dark or neutral backgrounds to make your text stand out clearly and grab more attention with its vibrant glow.
Keep Your Layers Organized
Make sure your layers are well-organized and named correctly to help you manage the different parts of your neon effect. This simple step not only makes finding and adjusting elements easier while working on your design, but it also frees up valuable time and energy.
Common Mistakes to Avoid
Neon Color Overload
While neon colors are undeniably eye-catching, using them excessively can overwhelm the viewer and detract from the overall aesthetic. Opt for a balanced approach in selecting colors to achieve a visually pleasing result.
Overlooking Contrast
Neglecting to create sufficient contrast between the neon text and the background color can make it difficult to read. Therefore, try adjusting colors and brightness levels to increase clarity and readability.
Disorganized Layers
A cluttered workspace can disrupt your creative workflow. So, keep your layers organized for easy navigation and efficient editing as you work on your neon project.
FAQs
Are neon effects only suitable for text?
Neon effects aren’t exclusive to text; you can apply them to shapes, logos, and a wide array of graphic elements in Photoshop.
Can I export neon text with a transparent background?
Yes, you can export neon text with a transparent background by saving the file in a format that supports transparency, such as PNG.
Why should I duplicate text layers when applying neon effects?
Duplicating text layers allows you to experiment with different neon effects while preserving the original text. This comes in handy if you don’t like the outcome and want to revert back to the basics.
Conclusion
In conclusion, infusing neon effects into your text using Photoshop can rejuvenate your designs by increasing their visual allure. Using tools like Layer Styles and blending modes, you have the power to craft mesmerizing neon text effects that captivate audiences and lift the impact of your project.
Now, dive into the endless options of text effects in Photoshop and discover new ways for creative design.
