

Table of Contents
Introduction
Have you ever wondered how to add a touch of modernity and sophistication to your photos?
If YES!
Then you’re in the right place. In this guide, we’ll explore the art of rounding corners in Photoshop, unleashing your creative potential, and elevating your design game.
Key Takeaway: This article will guide you through multiple methods to smoothly and aesthetically round the corners of your photos in Photoshop, customize the radius, and use handy shortcuts like actions.
Why Round Corners in Photoshop?
Tired of boxy photos? Rounding the corners adds a professional, artistic touch in a few clicks.
In graphic design, rounded corners aren’t just a trend; they are a visual delight. They bring a contemporary and friendly feel to images, making them stand out on social media, websites, or any digital platform.
By mastering the skill of rounding corners in Photoshop, you open doors to endless possibilities for expressing your creativity.
Getting Started
Before we get into the intricacies of rounding corners, let’s ensure you’re comfortable navigating the Photoshop interface.
If you’re new to Photoshop, don’t worry—we’ll take it step by step. Open Photoshop and load the photo you want to work on.
Remember, it’s always a good practice to work on a duplicate layer. This way, you can experiment fearlessly, knowing that your original photo remains untouched.
Steps for How to Round Corners of a Photo in Photoshop
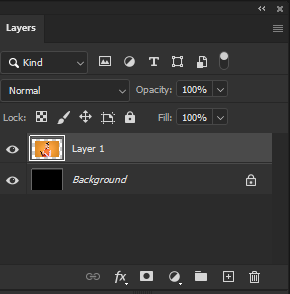
Step 1:
Open a new blank document fill the background layer with black color and drag the photo into the new document.

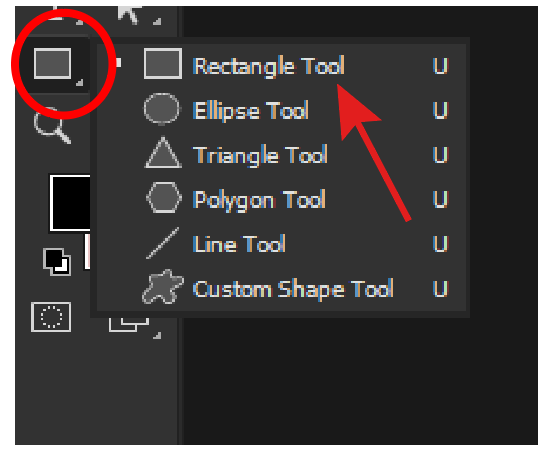
Step 2:
Select the Rectangle Tool from the left panel.
Step 3:
Make a rectangle over your Image.
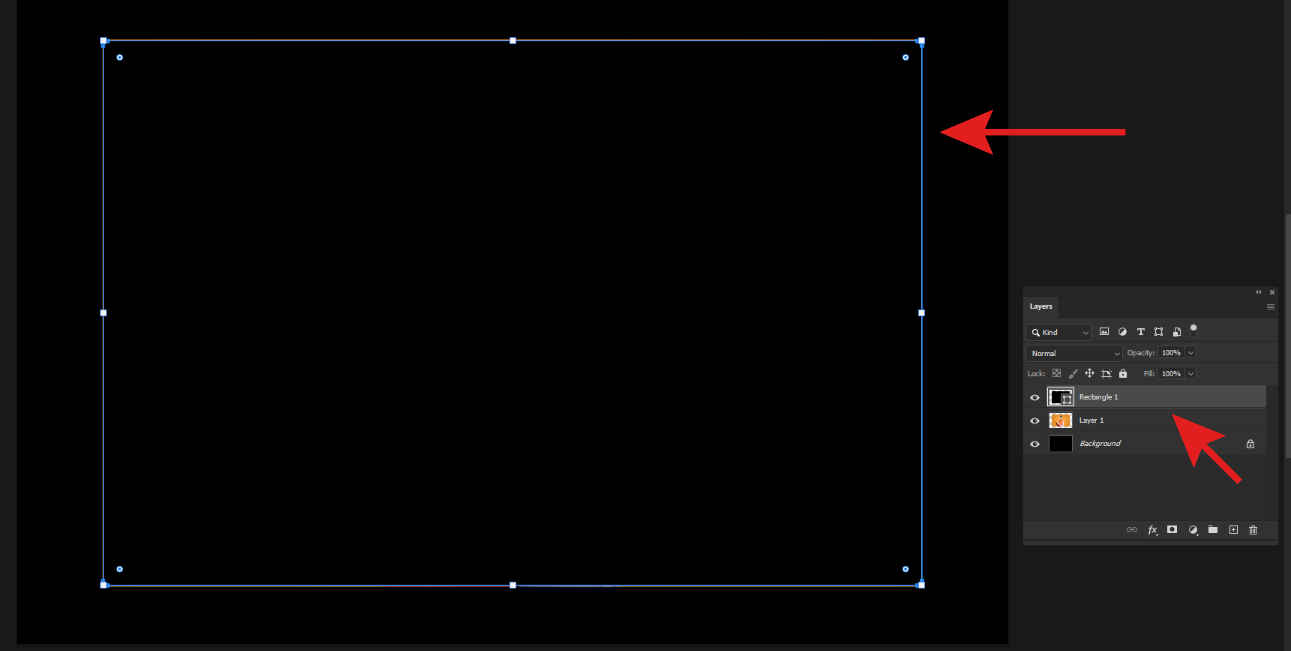
You’ll see a rectangle layer above your layer 1
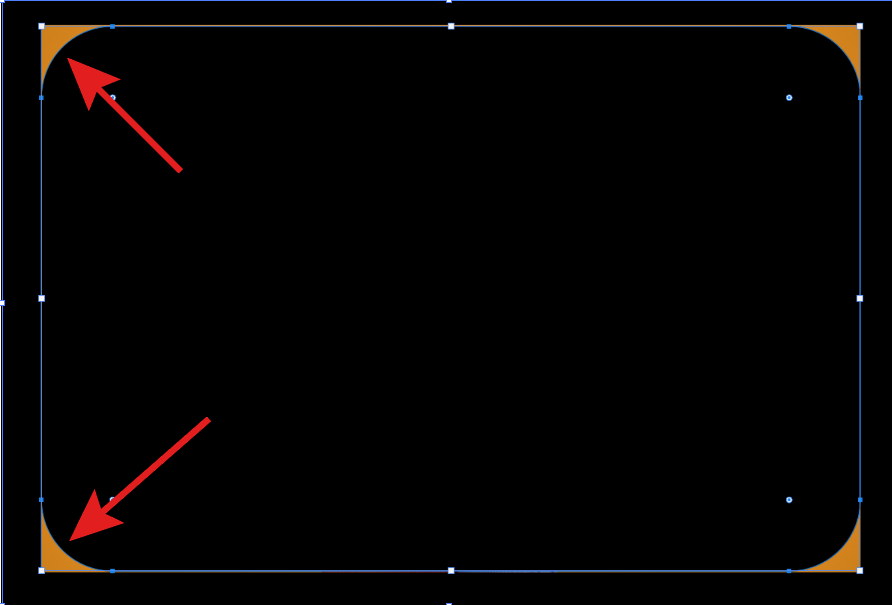
Step 4:
After making the rectangle you’ll see a dot on every corner.
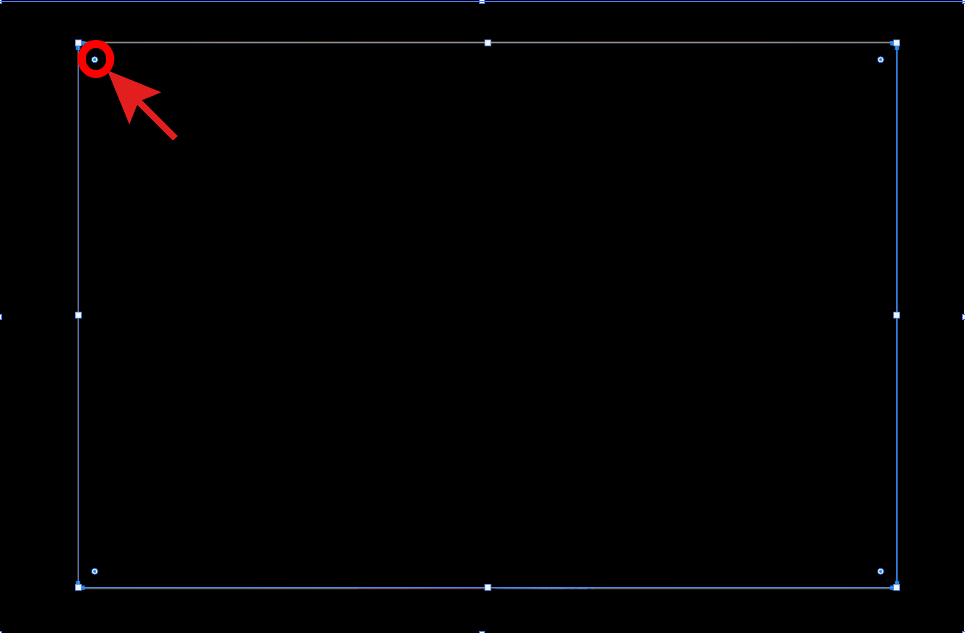
Hold and drag one dot inwards to make a curve.
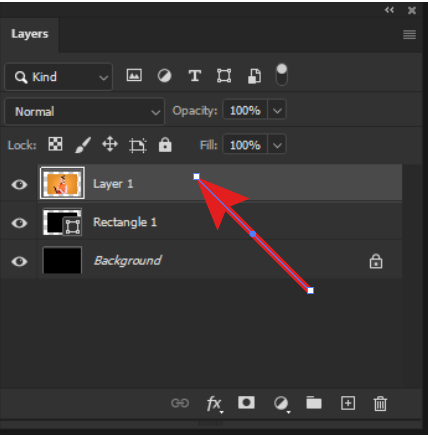
Step 5:
Move Layer 1 above the rectangle layer.
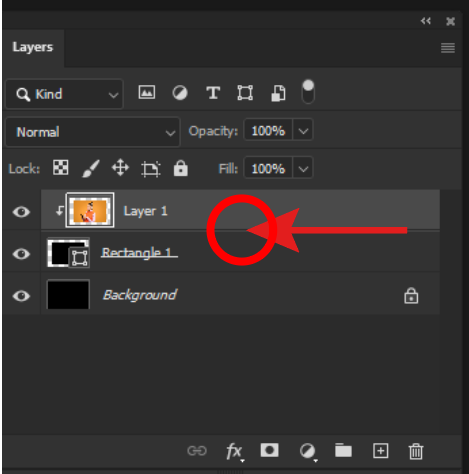
Step 6:
Hold the Opt / Alt key and click in between Layer 1 and Rectangle Layer to create a clipping Mask.

And that’s It. You have successfully rounded the corners of your photo in Adobe Photoshop.
Tips and Tricks for Perfectly Rounded Corners
1. Adjusting corner radii for different design styles
Rounded corners aren’t one-size-fits-all. Depending on your design goals, you might want subtle curves for a professional look or bold rounding for a playful vibe. Adjust the corner radii accordingly to match your design style.
2. Combining rounded corners with other Photoshop effects
Don’t limit yourself to just rounding corners. Experiment by combining this technique with other Photoshop effects. Drop shadows, gradients, or overlays can add depth and dimension to your design, creating a truly unique visual experience.
Bonus Tips:
Keyboard Shortcuts for Efficiency:
Speed up your workflow by using keyboard shortcuts. Press ‘Ctrl + Alt + R’ (Windows) or ‘Cmd + Option + R‘ (Mac) to access the Rounded Rectangle Tool quickly.
Creating Rounded Borders with CSS:
If you’re working on web design, consider using CSS to apply rounded corners directly to your images. This ensures a consistent look across various devices and platforms.
Common Mistakes to Avoid
In the excitement of transforming your photos, it’s easy to overlook some crucial details. Here are common mistakes to avoid:
1. Overlooking image resolution
Ensure your photo has sufficient resolution to maintain quality after rounding corners. Low-resolution images may appear pixelated or lose detail.
2. Ignoring the importance of a duplicate layer
Always work on a duplicate layer to preserve your original image. This way, you can experiment freely without the fear of irreversible changes.
3. Not experimenting with different radius values
Every photo is unique, and the ideal radius value may vary. Don’t settle for the first result; try different radius values to discover the perfect fit for your design.
FAQs (Frequently Asked Questions)
Q: Can I round only specific corners of a photo?
Yes, Photoshop allows you to selectively round individual corners. Simply drag the corner radius sliders independently for a customized look.
Q: Does rounding corners affect the image quality?
No, rounding corners in Photoshop is a non-destructive process. As long as you save a copy of your work, the original image quality remains intact.
Q: Are there alternative methods to round corners in Photoshop?
While the Rounded Rectangle Tool is the most straightforward method, you can also achieve rounded corners using the Pen Tool for a more precise selection.
Q: Can I round corners in Photoshop Express or other versions?
Yes, the process is similar across different versions of Photoshop, including Photoshop Express. The tools may vary slightly, but the concept remains consistent.
Q: How can I remove rounded corners if needed?
To revert to sharp corners, simply open the original photo or the duplicate layer you created before applying the rounded corners effect.
Conclusion
Congratulations! You’ve unlocked the secrets to rounding corners in Photoshop, adding a touch of flair to your digital creations. As you continue your design journey, remember that experimentation is key.
Embrace the versatility of rounded corners, and don’t hesitate to combine this technique with other Photoshop features for truly unique designs.
Feel free to share your rounded masterpieces on social media and inspire others to explore the endless possibilities within Photoshop. Happy designing!
