

If you’re starting out as a graphic designer or just someone curious about creating simple yet stunning vector shapes in Photoshop, you’re in the right place. In this step-by-step tutorial, we’ll show you how to make a crescent moon in Photoshop. We’ll also guide you through saving it as a custom shape, making it a handy tool for future design projects. So let’s dive right in and explore the magical world of “crescent moon drawing” in Photoshop!
Table of Contents
The Basics of Creating a Crescent Moon
Understanding Simple Shapes
Before we jump into creating our crescent moon, let’s understand what we mean by “simple shapes” in graphic design. Simple shapes, in this context, refer to geometric figures that can be constructed using basic building blocks like circles and rectangles. The beauty of it all is that a crescent moon, despite its elegance, is essentially a composition of these very basic shapes.
Setting Up Your Photoshop Document
Before we can get creative with our crescent moon, we need to set up the canvas. Here’s how:
Step 1: Create a new document in Photoshop. You can select pixel size as per your preference, as it will allow you to scale without losing image quality. For example, we’ll create a 600×600 pixels document for our tutorial, you can choose the size as per your preference.
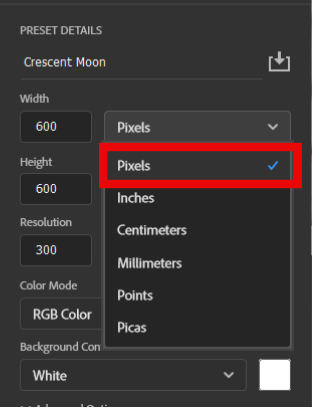
Pro Tip: Choosing a higher resolution (more pixels) will give you greater flexibility when resizing your moon.
Preparing the Background
Next, let’s prepare the canvas background. This step is crucial for achieving the desired visual effect of your crescent moon.
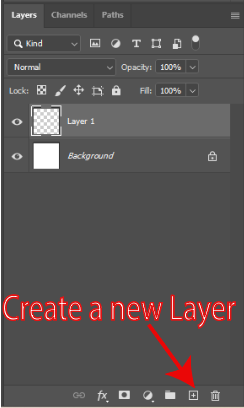
Step 2: Create a new layer. Click on the “Create a new layer” icon in the layer panel.
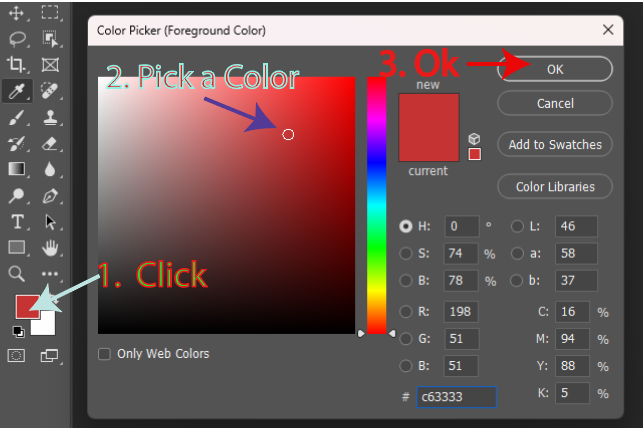
Step 3: Set the background color. Click “Set foreground color” on the toolbar and use the color picker to choose a suitable background color for your crescent moon. Remember, the background color can significantly impact the overall look.
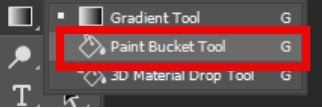
Step 4: Fill in the background. Select the Paint Bucket Tool (usually hidden under the Gradient Tool) from the toolbar and click on the canvas to fill it with the chosen background color. If you intend to have a transparent background, feel free to skip this step.

With our canvas prepared, we’re ready to start drawing the crescent moon.
Related: Create a Photo Mosaic in Photoshop | How to Change Canvas Size in Photoshop
Drawing the Crescent Moon
Choosing the Moon Color
Step 1: Select the moon color. Click on “Set foreground color” on the toolbar again, but this time, choose the color you want for your moon. This color selection is where your creativity can shine.
Drawing the Moon Shape
Now, let’s create the crescent moon’s core shape:
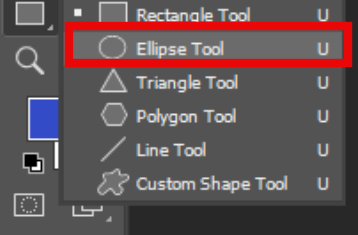
Step 1: Select the Ellipse Tool. This tool is usually hidden under the Rectangle Tool.
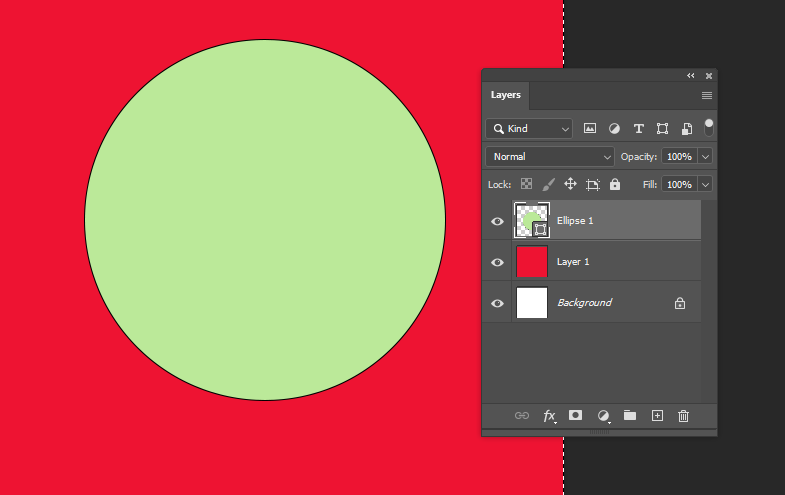
Step 2: Create a perfect circle. Hold down the Shift key and click and drag on the canvas. This action will create a perfect circle, which will be the foundation of our crescent moon.

Shaping the Crescent Moon
Creating a crescent moon involves some clever shaping techniques:
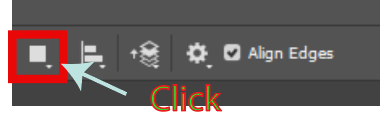
Step 1: Use the Ellipse Tool again. With the Ellipse Tool still selected, go to the top toolbar.
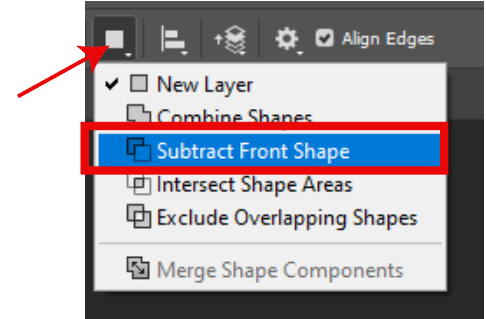
Step 2: Select “Subtract Front Shape. This action allows you to subtract one shape from another.
Please note the interface might be different on Mac.
Step 3: Draw another circle. Click and drag to make another circle, ensuring it overlaps the existing one. If you want it to be a perfect circle, remember to hold down the Shift key. However, a key tip here is to click first, then hold the Shift key, as this ensures the subtraction works correctly.
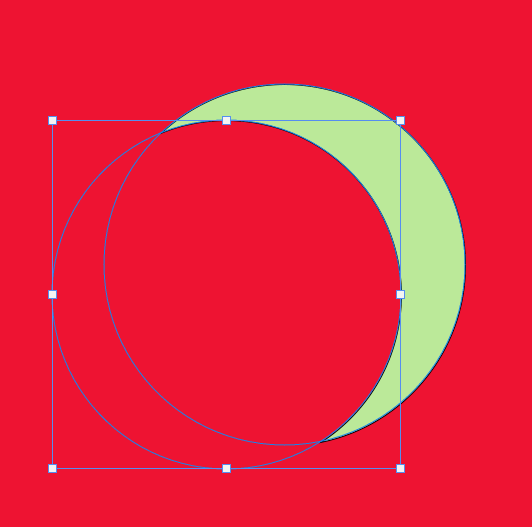
Step 4: Fine-tune the shape. To adjust the crescent moon’s appearance, use the Path Selection Tool from the toolbar. Click on the second circle and move it to the desired position.
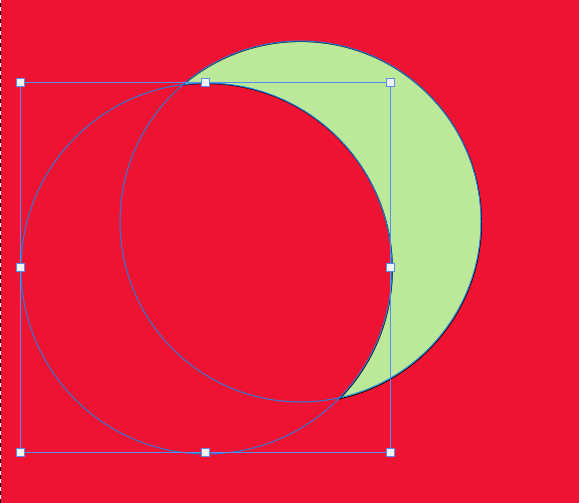
Step 5: Deselect the layer. Once you’re satisfied with the crescent moon’s shape, deselect the layer by clicking on a different layer in the layers panel or selecting another tool.
Step 6: Optional: Move the crescent moon. If you wish to reposition the crescent moon, choose the Move Tool. This allows you to move the entire shape rather than the two circles separately.

Congratulations! You’ve successfully created a crescent moon in Photoshop. Now let’s explore how to save it as a custom shape for future use.
Saving Your Crescent Moon as a Custom Shape
Step 1: How to Save a Shape
Right-click on the shape. Locate the shape you’ve just created on the canvas.
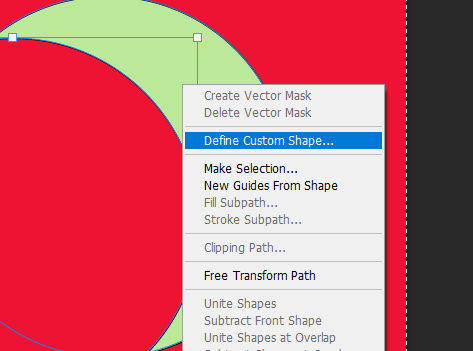
Step 2: Select “Define Custom Shape.” This action tells Photoshop that you want to save this shape as a custom one.


Name your shape. Give your crescent moon a memorable name, and click OK to save it.
FAQs Related to Crescent Moon in Photoshop
What is the significance of creating a crescent moon in Photoshop?
Creating a crescent moon in Photoshop is a fundamental skill for graphic designers and digital artists. It allows you to add a touch of celestial elegance to your designs, making them visually appealing and unique.
Can I use this crescent moon shape for commercial purposes?
Absolutely! Once you’ve created and saved your custom crescent moon shape in Photoshop, you can use it in both personal and commercial projects. Just ensure that you follow any licensing agreements or copyright rules that may apply to other resources you use in your designs.
Are there alternative methods to create a crescent moon in Photoshop?
While this tutorial provides a straightforward method for creating a crescent moon, there are alternative techniques available. However, the method described here is beginner-friendly and efficient for achieving excellent results.
How can I customize the crescent moon’s size and color?
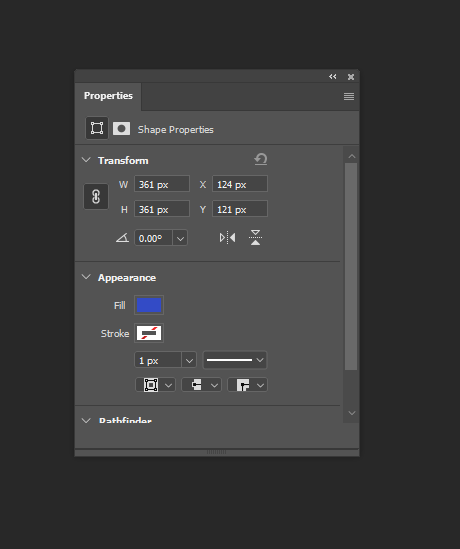
You can easily customize the crescent moon’s size and color by selecting the shape and adjusting its properties using the Shape Properties panel in Photoshop. Feel free to experiment with different colors and sizes to suit your design needs.
Conclusion
Creating a crescent moon in Photoshop is not only fun but also a valuable skill for any graphic designer or digital artist. This simple process, involving basic shapes and subtracting one from another, can yield fantastic results. Remember, practice makes perfect, so don’t hesitate to experiment and unleash your creativity with your newly acquired “crescent moon drawing” skills.
We can’t wait to see what you’ll design with this moon shape! Whether it’s for personal artwork or professional projects, your crescent moon will add a touch of celestial elegance to your designs.
