

Table of Contents
Double Exposure Portrait Effect in Adobe Illustrator
In the previous tutorial, we had created a Photo Frame Effect in Adobe Illustrator; which is an Adobe Photoshop effect.
Today also we are going to create a Photoshop effect in Adobe Illustrator that is Double Exposure Effect.

Follow the below steps to create a Double Exposure Portrait Effect in Adobe Illustrator:
Step 1
First of all, finalize the two images which you will be used to create the Double Exposure Portrait Effect. Then launch Adobe Illustrator and create a new document.
Now click on File in the Menu Bar and select Place. Browse the images from your computer and click on Place to add them to the artboard.

.

Among these two images, one image will be the background image.
Step 2
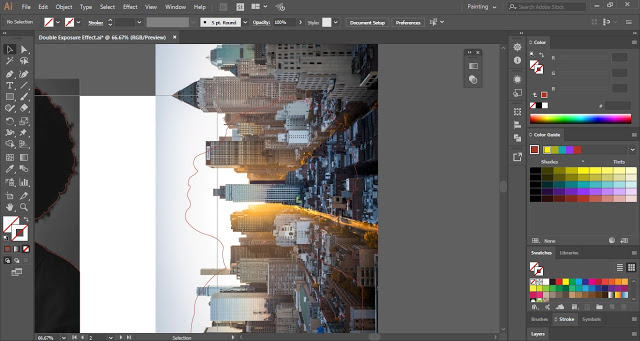
I have selected a portrait image and an image of buildings for the tutorial. Now I will select the Pen Tool and draw an outline on the portrait.

With the help of the Selection Tool, select the outline created. Now press the Alt key and drag the selection to create a duplicate copy.
I will place this duplicate copy on the second image covering the area which I want for creating the effect.
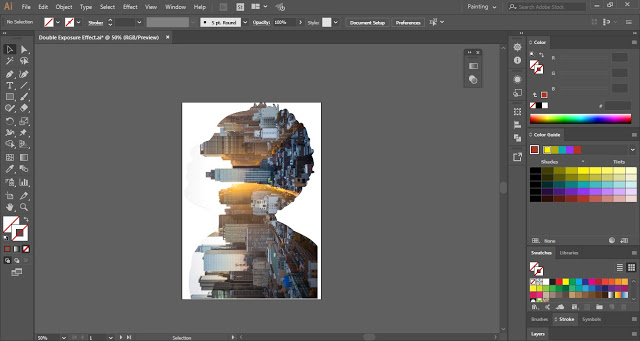
Step 3
Now Clipping Mask will be created on both the images.


Step 4
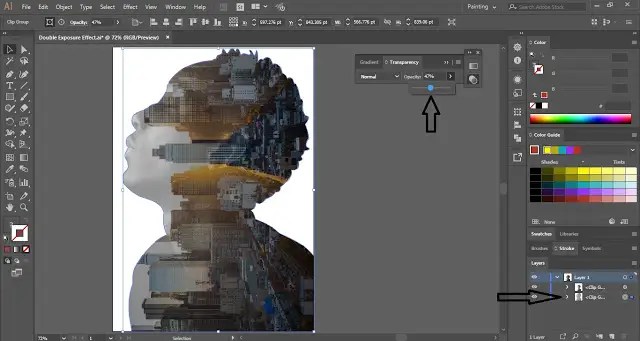
Select both the Clipping Mask and go to the Align Panel. Select Align to Artboard and then click on Horizontal Align Center & Vertical Align Center.
Select the image which is in the front and open the Transparency Panel (Shift + Ctrl + F10). In the Transparency Panel, select the blend mode as Darken.

Step 5
Now select the lower layer of the image and again go to the Transparency Panel. Reduce the Opacity of the image and the Double Exposure Effect in the Adobe Illustrator is ready.
.
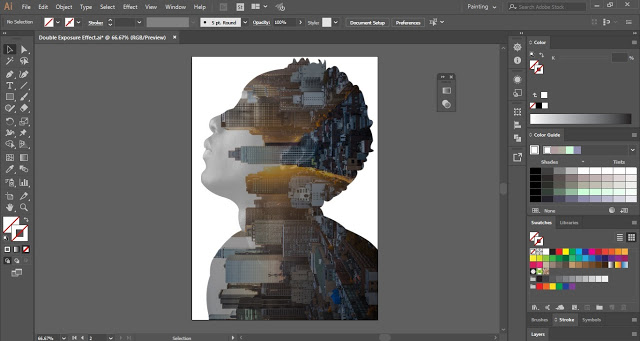
It is how you can create a Double Exposure Portrait effect without using Photoshop.
