
Pixelation can cause your favorite family photos, social media graphics, or creative projects to appear unprofessional and frustrating to work with. So, if you are in this situation and wondering how to make an image less pixelated in Photoshop, we’ll help you out.
In this article, we’ll discuss methods to sharpen your pictures using different tools in PS and provide step-by-step instructions to make them super clear. We’ll also share some tips and common mistakes that you need to avoid while editing your photos.
Table of Contents
Methods to Sharpen a Pixelated Picture in Photoshop
Photoshop has multiple tools to correct a pixelated image and sharpen it. Here are four methods along with their cons so you can select the right one for your needs:
Method 1: Gaussian Blur and Unsharp Mask Filter
The Gaussian Blur smooths out the harsh edges to reduce pixelation, while the Unsharp Mask brings out the clarity of the image. However, your image may look too soft or unnatural if you overdo the effect.
Method 2: Resampling Image
This method lets you manually increase the size of your picture and change the resolution using the “Bicubic Smoother” under resampling to reduce the blocky edges. The downside; you may end up seeing some effects like watercolor in your picture.
Method 3: Blending Mode
The Soft Light blending mode adjusts the exposure and contrast of an image by layering it with highlights and shadows to soften the pixelated area. This method can darken or overly brighten areas, depending on the image. It may also not be effective for images with severe pixelation.
Method 4: Camera Raw Filter
The Camera Raw filter can lower pixelation in your pics by adjusting details like sharpness, texture, and noise. The flip side is that it may not work well on images that weren’t originally RAW.
Steps on How to Make an Image Less Pixelated in Photoshop
Below are the steps on how to make a picture not pixelated in Photoshop using the Gaussian Blur and Unmask Filter.
Step 1: Import Your Pixelated Image
First, launch “Photoshop” on your computer, click “File” in the top right corner of the screen, and choose “Open.” Select the image in which you want to fix pixelation and click “Open.”

In the “Layers Panel,” right-click the “Background” layer and pick “Duplicate Layer.” Rename the layer to “Depixelate” and click “OK.”

Step 2: Apply Gaussian Blur
Click “Filter” in the top menu ribbon, choose “Blur,” and select “Gaussian Blur.” A new window will pop-up.

Drag the “Radius” slider to 3.0 or 10.0 to smooth out the edges, or enter the value in the given box and click “OK” to apply the filter.

Step 3: Apply “Unsharp Mask”
Now, click “Filter” again, choose “Sharpen,” and select “Unsharp Mask” from the sub-menu to open its window panel.

Increase the amount to 100 or 250, reduce the radius to 10 – 40, set the threshold level to 0 or 1, and click “OK” to save your changes.

Step 4: Export the Unpixelated Picture
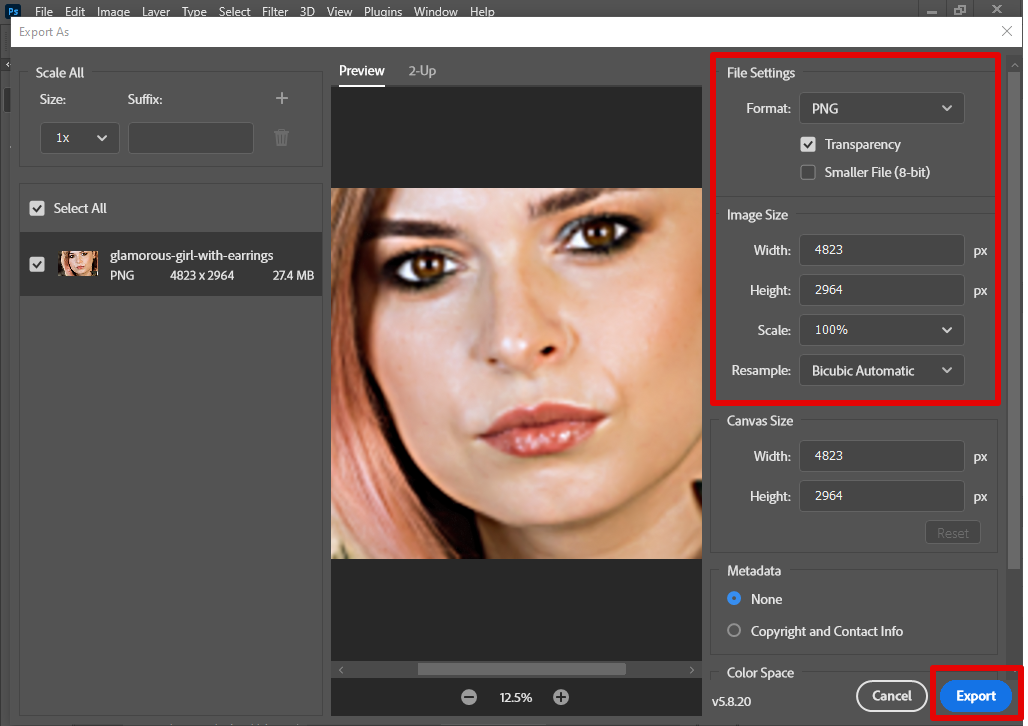
Click “File” in the top left corner of the screen, choose “Export,” and select “Export As” from the sub-menu.

Configure the “File Settings” & “Image Size,” and click “Export.”
Select the folder where you want to save the pixelated image and click “Save.”
Tips & Tricks
Work on a Duplicate Layer
Always duplicate your background layer before making any edits. This keeps your original image safe, so you can go back to it if needed.
Zoom In and Check Details
Zoom in on the parts of the image with the most pixelation while applying the filters. This helps you see how the adjustments are affecting the details and edges.
Tweak the Noise Reduction
If your image has a lot of noise, use the Reduce Noise filter before sharpening. Adjust the sliders for strength and detail preservation until the image looks smoother but still retains its details.
Common Mistakes to Avoid
Skipping Image Resolution Check
Starting with an image that has a very low resolution can limit how much improvement is possible. If the image is too small, consider enlarging it first using Photoshop’s Image Size tool, but use the Preserve Details 2.0 resampling option for better results.
Using the Same Settings for Every Image
Each image is different. Applying the same Gaussian Blur and Unsharp Mask values without adjusting for the specific needs of the photo can lead to poor results. Always preview your changes before clicking OK.
Using Excessive Blur Across the Whole Image
If you apply the Gaussian Blur to your entire image without masking, it can make it look soft and unrealistic. So, use a “Layer Mask” to blur only the pixelated areas and leave sharper details untouched.
FAQs
Why Does My Image Look Unnatural After Sharpening?
If you overuse the “Unsharp Mask” filter, it makes the image look artificial and unnatural. So, it’s best to keep the sharpening amount between 100 and 250 and use a radius between 1.0 and 2.0 for better results.
Should I Apply Noise Reduction Before Or After Sharpening?
Noise reduction should be applied before sharpening. Reducing noise first smooths out the image and makes sharpening more effective without amplifying unwanted grain.
Conclusion
That’s all about it! In this guide, you’ve learned about how to make an image less pixelated using the Gaussian Blur and Unsharp Mask filters in Photoshop.
Go on, start practicing with different adjustments to get the right balance and de-pixelate your pictures effectively.
