Table of Contents
Text with Wavy Lines in Adobe Illustrator
In today’s Illustrator tutorial, you will learn to create a typography design. Today’s Illustrator tutorial is about Filling Text with Wavy Lines in Illustrator. We will use Pen Tool, Type Tool, Pathfinder Panel, and a few other tools and effects.
At first, we will draw Wavy Lines in Illustrator with the help of the Pen Tool, and then we will type a text and place it on these Wavy Lines. With the help of the Pathfinder Panel, we will create our typography design.
Launch Adobe Illustrator and create a new document. Now follow the below-mentioned step by step easy drawing:
Step 1
Select the Pen Tool and draw a horizontal line on the artboard.
Step 2
Select the horizontal line and click on Object in the Menu Bar. Place the cursor on Transform and select Transform Each.
Transform Each dialogue box will appear on the artboard. In that dialogue box set the Vertical Move at 15 pt and click on Copy.
Now press Ctrl + D to create more copies.
Step 3
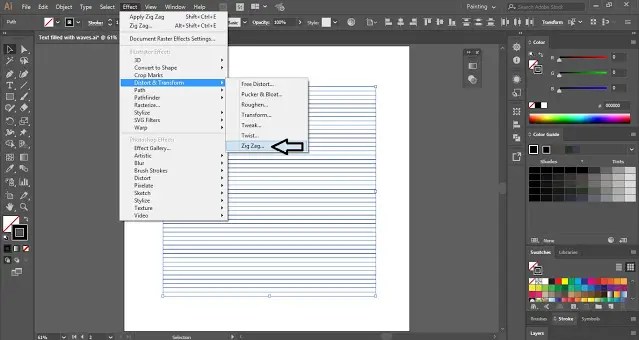
Now select all the lines with the help of the Selection Tool and click on Effect in the Menu Bar. Now place the cursor on Distort & Transform and select Zig Zag.
In the Zig Zag dialogue box, decrease the Size, and increase the Ridges per segment. Also, make the points Smooth. (See the below image)
After making the required changes, click OK.
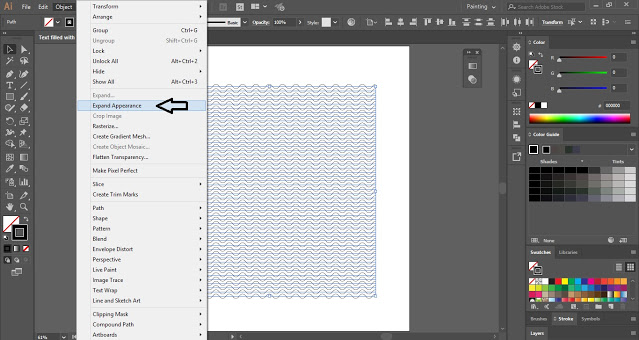
Now let the lines be selected and click on Object in the Menu Bar. Then select Expand Appearance.
Step 4
Now select the Type Tool and type your text. Then select the text and press Shift + Ctrl + O to make it an editable text. Place the text layer over the lines.
Step 5
Press Ctrl + A to select all the layers. Now go to the Pathfinder Panel and select Outline.
After clicking on the Outline, ungroup the selection.
Step 6
Select the Wavy Lines filled inside the text and increase the width of the stroke. In the Stroke Panel, select the round caps and corners for the strokes.
Similarly, repeat this in all the letters and remove all the other layers from the artboard. If you wish you can change the stroke color.
This is how you can Fill Text with Wavy Lines in Adobe Illustrator. Practice this tutorial and share your views in the comment section. Also, share this tutorial with others.


