
Table of Contents
- 1 How to Draw an Arrow in Illustrator: A Comprehensive Beginner’s Guide
- 2 Introduction: The Power of Arrows in Design
- 3 Tips for Perfecting Your Arrows
- 4 FAQs
- 4.1 1. What Are the Basic Tools I Need to Draw an Arrow in Illustrator?
- 4.2 2. Can You Walk Me Through the Step-by-Step Process of Drawing an Arrow in Illustrator?
- 4.3 3. What Are Some Tips for Achieving Sharp and Precise Arrowheads?
- 4.4 4. How Do I Create Curved or Bending Arrows in Illustrator?
- 4.5 5. Can I Customize the Color and Style of My Arrows in Illustrator?
- 4.6 6. How Do I Adjust the Size and Position of the Arrow in My Design?
- 4.7 7. Are There Keyboard Shortcuts or Hotkeys to Simplify Arrow Drawing in Illustrator?
- 5 Conclusion: Empower Your Designs with Arrows
- 6 Author
How to Draw an Arrow in Illustrator: A Comprehensive Beginner’s Guide
Welcome to the world of Adobe Illustrator, where creativity knows no bounds. In this beginner-friendly guide, we’re going to unravel the art of drawing arrows in Illustrator. Arrows might seem like simple elements, but they play a crucial role in graphic design. They guide the viewer’s eye, add emphasis, and enhance the overall visual appeal of your creations. By the end of this comprehensive guide, you’ll be well-equipped to draw arrows in Illustrator like a pro, making your designs more engaging and informative.
Introduction: The Power of Arrows in Design
Before we dive into the nitty-gritty of drawing arrows, let’s understand why they matter in the world of design. Arrows are like signposts in your artwork, providing direction, clarity, and visual interest. They’re not just symbols; they’re communication tools. Whether you’re crafting infographics and instructional materials, or simply sprucing up your illustrations, arrows can be your best friends. Now, let’s explore five distinct methods to create arrows in Adobe Illustrator, catering to various design preferences and levels of expertise.
Method 1: Using the Line Segment Tool/Stroke Style
Our first method involves the trusty Line Segment Tool, one of the simplest yet highly effective ways to create arrows:
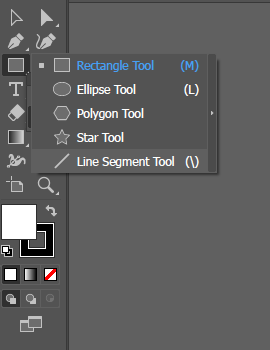
Step 1: Select the Line Segment Tool: In Illustrator, head to the toolbox and pick the Line Segment Tool.
Step 2: Draw a Line: Click and drag on your canvas to draw a straight line. This line will serve as the foundation for your arrow.

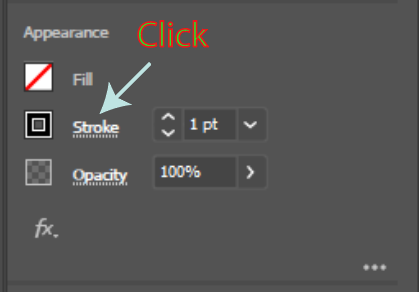
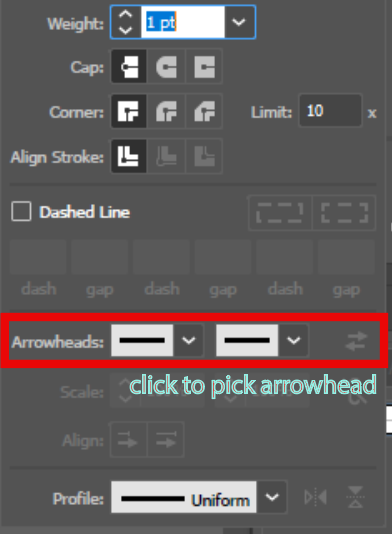
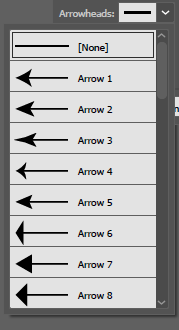
Step 3: Adjust Arrowheads: With your line selected, navigate to the “Stroke” panel on the right-hand side. Here, you can choose from a variety of arrowhead styles for the start and end of your line.
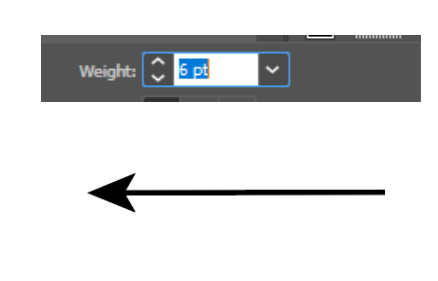
Step 4: Customize Your Arrow: Experiment with different arrowhead styles and adjust the stroke weight to achieve the desired look for your arrow.
This method is perfect for creating simple, straight arrows with ease. It’s a great starting point for beginners.

You can adjust the thickness of the arrow, you can make it thinner or thicker.
Want to Learn More? You Should Definitely Read. (Click Below)
Method 2: Combining Shapes for Custom Arrows
For those seeking more creative freedom, combining shapes is a more versatile approach:
Step 1: Use Shape Tools: Start by using shape tools like the Rectangle Tool and the Polygon Tool to create the individual components of your arrow.

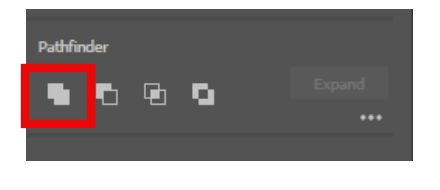
Step 2: Combine Shapes: Arrange and overlap these shapes to construct your arrow’s design. You may need to unite them using the Pathfinder panel for a seamless look.


Step 3: Customize Your Arrow: Adjust the size, color, and proportions of your custom arrow to fit your specific design requirements.

This method allows for limitless creativity, enabling you to craft unique arrows that match your distinct style.
Method 3: Mastering the Pen Tool for Curved Arrows
Sometimes, you need arrows with a bit of curve to them. That’s where the Pen Tool comes in:
Step 1: Select the Pen Tool: Locate and select the Pen Tool from the Illustrator toolbox.
Step 2: Create Anchor Points: Click on your canvas to create anchor points and use the Pen Tool to draw a curved path.


Step 3: Add Arrowheads: Similar to Method 1, you can enhance your arrow with arrowheads using the “Stroke” panel.
Step 4: Craft Custom Arrowheads: Feeling artistic? You can create your own arrowheads with the Pen Tool, adding a unique touch to your arrows.

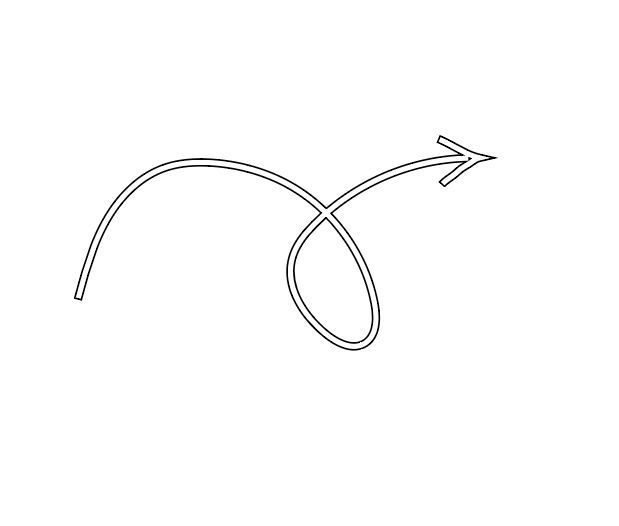
This method excels in producing graceful, curved arrows, perfect for adding flow and movement to your designs.
Method 4: Embracing Freehand Drawing with the Paintbrush/Pencil Tool
For a more organic, hand-drawn appearance, try your hand at freehand drawing:
Step 1: Select a Drawing Tool: Choose either the Paintbrush Tool or the Pencil Tool from the toolbox, depending on your preference.

Step 2: Draw Your Arrow: Start drawing your arrow freehand on the canvas, allowing your artistic instincts to guide you.

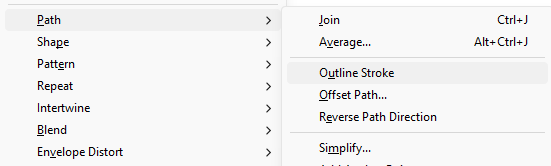
Step 3: Solidify Your Design: To solidify your arrow’s shape, convert the strokes to outlines. This step transforms your hand-drawn strokes into editable shapes.

Step 4: Combine Shapes: Utilize the Pathfinder panel to unite the shapes, creating a cohesive and well-defined arrow.
This method offers a unique, artistic flair, allowing you to infuse a personal touch into your designs.
Tips for Perfecting Your Arrows
Drawing arrows is one thing, but drawing them effectively is another. Here are some tips to ensure your arrows hit the mark:
– Size Matters: Consider the size of your arrow in relation to your overall design. An arrow that’s too small may go unnoticed, while an oversized arrow can overwhelm your composition.
– Color Coordination: Harmonize your arrow’s color with your design palette. Experiment with gradients and patterns to make your arrows pop.
– Directional Clarity: Arrows are directional indicators. Ensure that your arrow’s direction is crystal clear and aligned with your design’s purpose.
– Double-Ended Arrows: You can create double-ended arrows by adding arrowheads to both ends of a line. This versatility makes them invaluable tools in your design arsenal.
FAQs
1. What Are the Basic Tools I Need to Draw an Arrow in Illustrator?
To draw an arrow in Illustrator, you’ll want to use the Line Segment Tool, which allows you to create a straight line that forms the arrow’s shaft. Additionally, you can customize your arrow using the Stroke panel, where you can adjust attributes like line weight and color. To add arrowheads to your line, you can use the Arrowheads options in the Stroke panel.
2. Can You Walk Me Through the Step-by-Step Process of Drawing an Arrow in Illustrator?
Certainly! To draw an arrow in Illustrator, follow these steps:
– Select the Line Segment Tool from the Tools panel.
– Click and drag to draw a straight line, which will serve as the shaft of your arrow.
– Customize your arrow by opening the Stroke panel. Here, you can adjust line weight, color, and other stroke attributes.
– To add arrowheads, go to the Arrowheads options within the Stroke panel. Choose the desired style for both the start and end of the arrow.
3. What Are Some Tips for Achieving Sharp and Precise Arrowheads?
To ensure your arrowheads are sharp and precise, consider the following tips:
– Use the Stroke panel to set an appropriate line weight for your arrow.
– Select arrowhead styles that match your design intentions, whether it’s a simple arrow or a more complex shape.
– Pay attention to the alignment and orientation of the arrowheads to make sure they’re pointing in the desired direction.
4. How Do I Create Curved or Bending Arrows in Illustrator?
To create curved or bending arrows in Illustrator, use the Pen Tool to draw a curved path. After creating the path, you can apply arrowheads to both ends using the Stroke panel. This allows you to achieve arrows with curved shafts.
5. Can I Customize the Color and Style of My Arrows in Illustrator?
Yes, you can fully customize the color and style of your arrows in Illustrator. The Stroke panel allows you to change the color, line weight, and stroke style of your arrows. This customization gives you creative control over your arrow designs.
6. How Do I Adjust the Size and Position of the Arrow in My Design?
To adjust the size and position of an arrow in your design, select the arrow using the Selection Tool. You can then resize it by dragging the corners or sides. To change its position, simply click and drag the arrow to the desired location within your artwork.
7. Are There Keyboard Shortcuts or Hotkeys to Simplify Arrow Drawing in Illustrator?
Yes, there are keyboard shortcuts that can make arrow drawing in Illustrator more efficient. For example, you can press the “L” key to quickly select the Line Segment Tool, which is commonly used for drawing arrows. Utilizing shortcuts can help streamline your workflow.
Conclusion: Empower Your Designs with Arrows
Drawing arrows in Illustrator is more than just a technical skill; it’s an artistic choice that elevates your designs. With these five methods in your toolbox, you now possess the skills to add clarity, emphasis, and style to your artwork. Whether you’re guiding viewers through complex infographics, enhancing instructional materials, or adding a touch of creativity to your illustrations, arrows will be your reliable companions in Adobe Illustrator.
As you embark on your arrow-drawing journey, remember to practice, experiment, and let your creative instincts take the lead. Happy designing!
