

How to Fill Color in Adobe Illustrator
The good news is that filling colors in Adobe Illustrator doesn’t have to be intimidating. In this beginner-friendly guide, we’ll explore five easy methods to fill colors in Adobe Illustrator. Whether you’re coloring shapes, text, or drawings, you’ll find a solution that suits your needs.
Method 1: Fill & Stroke
Let’s start with the basics. When you create something in Adobe Illustrator, it often starts as a black-and-white version. Adding color is where the magic happens. Here’s how you can do it using the Fill & Stroke method:
Step 1: Locate the Fill and Stroke Options: These are found at the bottom of the toolbar in Adobe Illustrator.
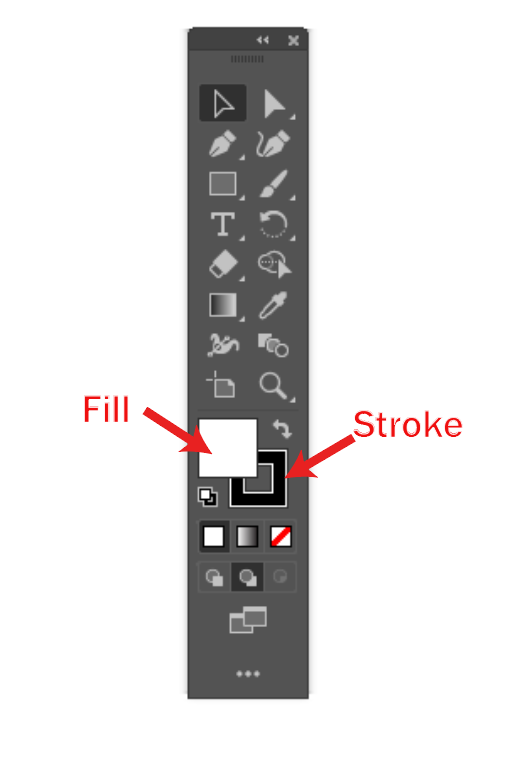
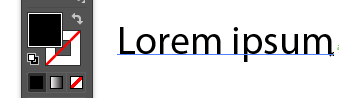
Step 2: Understanding Fill and Stroke Colors: By default, the Fill is white, and the Stroke is black. These colors can change depending on the tools you use. For instance, if you use the Type Tool to add text, the Stroke color will automatically change to “None,” and the Fill will become black.
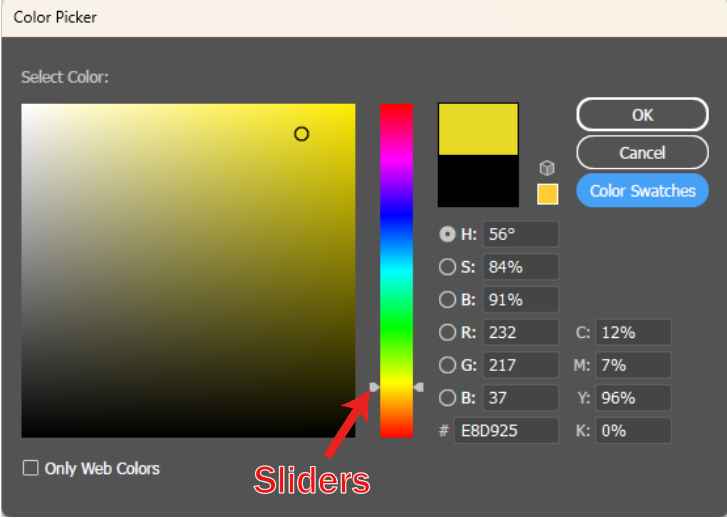
Step 3: Changing Fill Colors: To fill an object with a color, select the object and double-click on the Fill box. A Color Picker will appear, allowing you to choose the color you desire. If you have a specific color in mind and know its hex code, you can input it directly.

Step 4: Using Color Swatches: Another way to select colors is by clicking on “Color Swatches” and choosing a color from the available swatches.


Step 5: Working with Stroke: If you want only the stroke and no fill, click on the Fill box and select “None” under Fill color. (You can use the pencil or paintbrush tool to draw)


This method is handy when you want to have full control over the colors in your design.
Method 2: Eyedropper Tool
Sometimes, you may want to use colors from an image as a reference. The Eyedropper Tool can help you achieve this:
Step 1: Import the Image: First, place the image you want to sample colors from into Adobe Illustrator.
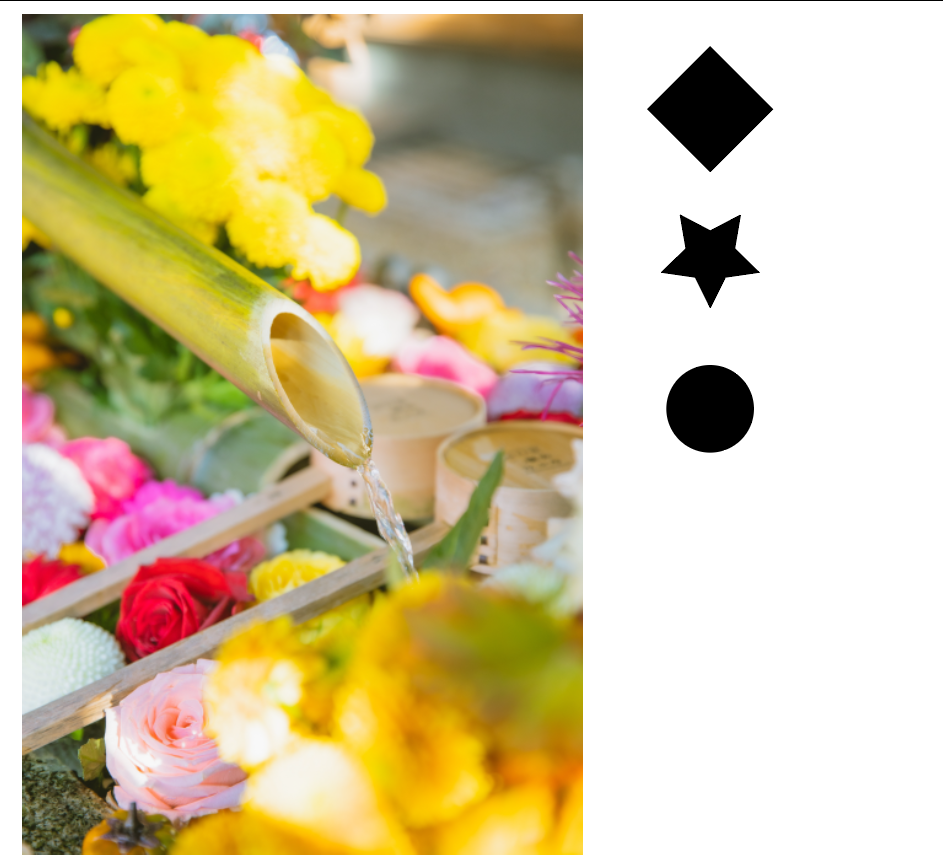
Step 2: Select the Object: Choose the object you want to fill with a color from the image.
Step 3: Activate the Eyedropper Tool: Select the Eyedropper Tool from the toolbar or use the keyboard shortcut “I.”

Step 4: Sample Colors: Click on a color you like within the imported image. The Eyedropper Tool will pick up that color.
Step 5: Repeat as Needed: You can repeat these steps to fill other objects with different colors from the image.

This method is particularly useful when you want to match the colors in your design to those in a reference image.
Method 3: Color Panel/Swatches
The Color Panel and Swatches offer a comprehensive way to choose and manage colors in Adobe Illustrator:
Step 1: Access the Color Panel: You can open the Color Panel by going to the “Window” menu and selecting “Color.”

Step 2: Choosing Fill Colors: Select an object, and then use the Color Panel to pick a color from a palette or input CMYK or RGB values. You can also double-click the color box to access the Color Picker.
Step 3: Stroke Colors: If you want to add a stroke color, simply click the flip button in the Color Panel.
Step 4: Using Swatches: Alternatively, you can open the Swatches panel from “Window” > “Swatches” and choose a color from the available swatches.

Step 5: Exploring Color Combinations: If you’re unsure about color combinations, consider trying the Color Guide, accessible through “Window” > “Color Guide.” It provides suggestions for color tones and combinations.

This method provides you with a wide range of color options and tools for precise color selection.
Method 4: Live Paint Bucket
The Live Paint Bucket is a handy tool that allows you to fill areas quickly:
Step 1: Select the Object: Begin by selecting the object you want to fill with color.
Step 2: Activate the Live Paint Bucket: Press the “K” key to activate the Live Paint Bucket tool. When you hover over the selected object, you’ll see the message “Click to make a Live Paint group.”

Step 3: Choose a Fill Color: Use the Color Picker to select a fill color, and then click on the object you want to fill. The Live Paint Bucket will fill the area with your chosen color.

This method is ideal for quickly filling shapes with colors and is especially useful for larger, complex designs.
Method 5: Paintbrush Tool
Do you remember using color pencils to fill within outlines during your early drawing classes? Adobe Illustrator’s Paintbrush Tool operates on a similar principle:

Step 1: Select the Paintbrush Tool: Activate the Paintbrush Tool by selecting it from the toolbar or using the keyboard shortcut “B.”
Step 2: Choose a Stroke Color and Style: Before you start coloring, pick a stroke color and brush style. You can even select a brush from the Brush Library.

Step 3: Begin Coloring: Start coloring by following the outlines of your design. The Paintbrush Tool is particularly effective when dealing with open paths.
Step 4: Creative Blending: Experiment with blending colors within the same shape to create unique effects.

(The Paintbrush Tool offers precise control and is a fantastic choice for adding colors to illustrations.)
Bonus Tip: Color Exploration
As a bonus tip, don’t be afraid to explore and experiment with colors in Adobe Illustrator. Sometimes, the most captivating designs are born out of creative color choices. Use the methods described above as a foundation, but don’t hesitate to push your boundaries and discover unique color combinations that make your artwork truly stand out.
Conclusion
Filling colors in Adobe Illustrator doesn’t have to be a challenge, even if you’re a beginner. With these five methods at your disposal, you can confidently add vibrant hues to your designs. Remember that there are no strict rules, and you can combine these methods to create truly unique and captivating artworks.
FAQs
What are the recommended color combinations for Adobe Illustrator projects?
When it comes to color combinations, it’s essential to understand color theory. You can start by exploring complementary, analogous, or triadic color schemes. Many online resources and color palette generators can help you find harmonious color combinations for your projects.
Can I change the color of a specific part of an image in Adobe Illustrator?
Yes, you can! In Adobe Illustrator, you can use various tools, such as the Live Paint Bucket or the Pen Tool, to select and modify specific areas within an image. These tools allow you to isolate and change the colors of specific regions in your artwork.
How do I save custom color swatches for future projects?
Saving custom color swatches is simple. After selecting a color, open the Swatches panel, and click the “New Swatch” button. Give your swatch a name, and it will be added to your swatch library for future use.
Yes, there are keyboard shortcuts to make your workflow more efficient. For example, “I” activates the Eyedropper Tool, and “B” selects the Paintbrush Tool. Familiarizing yourself with these shortcuts can save you valuable time.
What should I do if the colors I’ve chosen don’t look right together?
If you’re unsure about color combinations, don’t worry. You can experiment with different colors and consult the Color Guide panel in Adobe Illustrator (accessible through “Window” > “Color Guide”) for suggestions on harmonious color combinations. Remember, practice and experimentation are key to improving your color choices.
