Table of Contents
Introduction to Combining Objects in Adobe Illustrator
One fundamental skill within Illustrator’s toolkit is the ability to combine shapes and objects seamlessly. This process of merging elements is a cornerstone of design, enabling artists to craft intricate artworks, unique graphics, and captivating illustrations.
In this article, we’ll explore the significance of combining objects in Adobe Illustrator and shed light on the artistic possibilities that emerge from this versatile technique.
Importance of Combining Shapes and Objects:
Combining objects in Illustrator serves as the cornerstone of constructing complex visuals. Whether you’re designing a logo, an illustration, or a user interface, merging shapes allows you to create unified and cohesive elements that stand out. The importance lies in the ability to mold multiple individual components into a single entity, fostering clarity and a polished aesthetic.
Creative Possibilities Through Merging
When you combine shapes and objects in Illustrator, you open the door to an array of creative possibilities. Here’s a glimpse into what merging can offer.
Method 1: Using the Shape Builder Tool
Step 1: Open Your Illustrator Project.

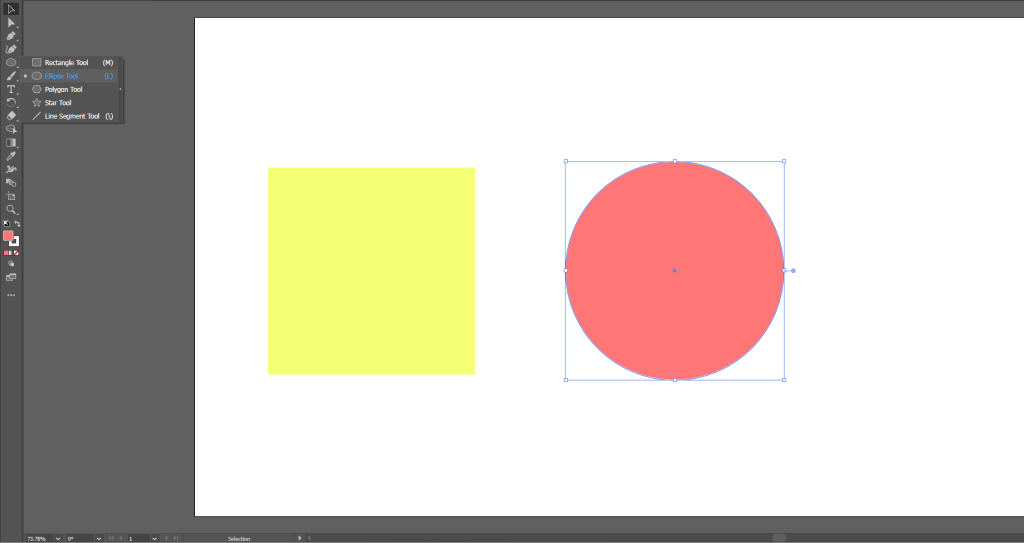
Step 2: Select the Objects to Combine and align them.

Step 3: Outline the image
View in Outline mode. View > Outline. It helps you avoid missing points and make sure the graphic surface is smooth.

Step 4: Adjust and merge the shapes.
Adjust the objects’ position. Don’t leave any empty space between lines and points.

Step 5: Adjust and Refine
Show how to adjust paths, remove unwanted sections, and split shapes if needed.


Step 6: Select the objects.
Select the objects you want to combine.
Step 7: Now click the Shape Builder Tool Using the shortcut Shift + M

Upon releasing the shapes will be combined.


Method 2: Using the Pathfinder Tool
You will not find the Pathfinder tool in the toolbar, rather, it is shown in the Properties panel once the object is selected. This is what it looks like.
If you cannot find this panel, you can open it from the overhead menu Windows > Pathfinder.
You can divide the objects into different pieces or selections using the Divide tool.
Step 1: Select your objects.

Step 2: Click on the Divide Tool icon.

Step 3: Then you have to ungroup the shapes and move the shapes around that you just divided.

Step 4: You need to crop the shape using the crop tool.

Method 3: Combine objects by grouping objects.
Step 1: Select the objects that you want to combine.

Step 2: Align the objects if needed.
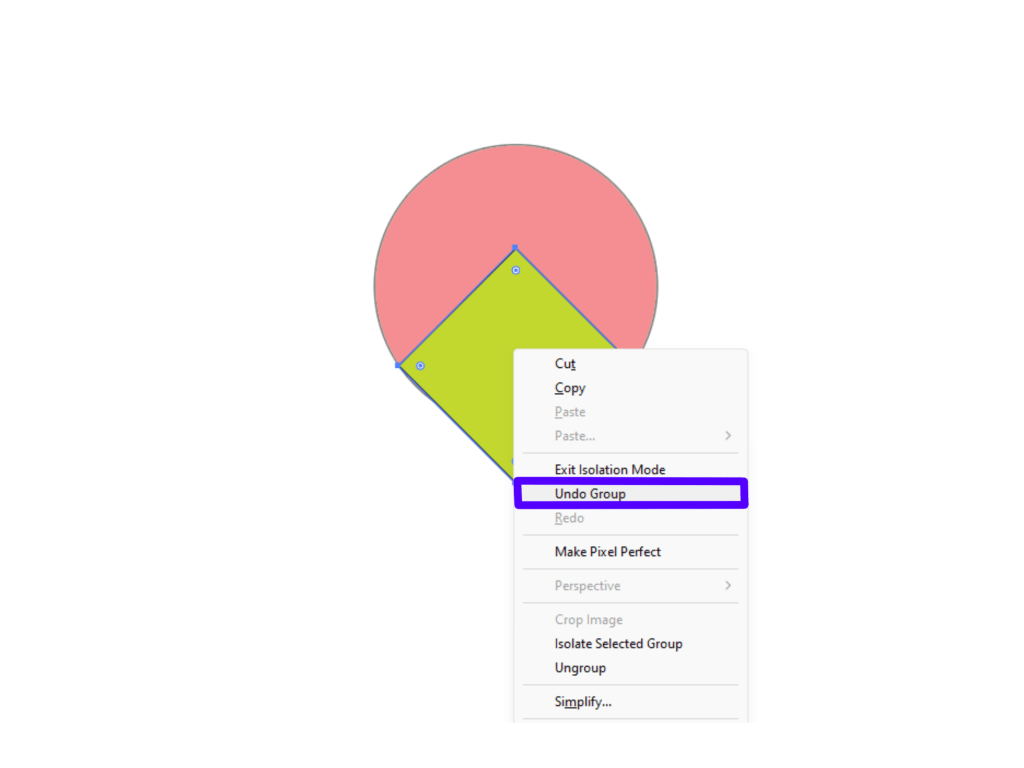
Step 3: Now group the objects by going to Object > Group.

If you wish to ungroup, right-click on the mouse and select Ungroup or use the keyboard shortcut:


Voila! There you go. These are the three methods we use to combine images in Adobe Illustrator.
Tips for Seamless Object Combination
Combining objects in Adobe Illustrator can transform simple shapes into captivating designs. To ensure a smooth and hassle-free merging process, consider these essential tips.
By following these guidelines, you’ll be able to harness the full potential of Illustrator’s object combination features while maintaining precision and creative control.
Keep Originals Intact
Before you begin combining objects, it’s wise to create a copy of the original shapes. This step ensures that you always have the unaltered components at hand.
Use Alignment Tools
Illustrator offers a range of alignment and distribution tools that make combining objects a breeze. When merging shapes, use the alignment options to ensure precise positioning. Aligning edges or centers can help you maintain symmetry and consistency in your design.
Maintain Object Hierarchy
If your design involves multiple layers or groups, it’s essential to maintain the hierarchy while combining objects. Merged elements can inherit the attributes of the topmost object, so arrange your layers or groups accordingly to achieve the desired appearance.
Utilize the Pathfinder Panel
The Pathfinder panel is a powerful ally for combining objects. Experiment with different Pathfinder operations like “Unite,” “Intersect,” or “Exclude” to achieve various merging effects. These operations can be accessed by selecting the objects and navigating to “Window” > “Pathfinder.”
Work with Compound Paths
For more intricate shapes, consider using compound paths. These paths allow you to create complex, intertwined designs by merging multiple objects into a single, editable unit. To create a compound path, select the objects and use the “Object” > “Compound Path” menu.
Group for Convenience
If you’re merging several objects to form a specific design element, consider grouping them before merging. Grouping keeps related objects together, making the merging process more organized and manageable.
Preview the Merge
Before finalizing the merge, use the “Preview” option available in various merging dialogs. This option provides a glimpse of how your objects will appear after merging, allowing you to make adjustments if needed.
Undo and Step Back
Illustrator’s “Undo” command (Ctrl + Z or Command + Z) is your friend. If you’re unsure about the merging outcome or want to backtrack, don’t hesitate to undo your actions. This allows you to step back and reevaluate your design without any permanent changes.
Practice Non-Destructive Editing
Whenever possible, strive for non-destructive editing. This means using techniques that allow you to edit or adjust your merged objects without losing the original shapes. Techniques like opacity masks and appearance attributes can help you achieve this flexibility.
Conclusion
In this comprehensive guide, we’ve unveiled the art and importance of combining objects in Adobe Illustrator. Whether you’re crafting logos, illustrations, or user interfaces, the ability to unify and refine your designs is crucial for achieving clarity and a polished aesthetic.
We’ve explored three distinct methods for combining objects: the Shape Builder Tool, the Pathfinder Tool, and the grouping technique. Each method offers its unique advantages, giving you the flexibility to choose the one that best suits your design needs.
To ensure a smooth merging process, we’ve also provided valuable tips, including preserving original shapes, using alignment tools, maintaining object hierarchy, utilizing the Pathfinder panel, working with compound paths, grouping for convenience, previewing merges, and practicing non-destructive editing.
Additionally, our FAQs have addressed common concerns about reversing the merging process, the impact on future editing, limitations of merging, and the best approach for complex shapes.
By mastering the art of combining objects in Illustrator and incorporating these techniques into your design workflow, you’ll be well-equipped to create captivating and intricate designs that leave a lasting impression. So, dive into your Illustrator projects with confidence, experiment, and let your creativity soar as you harness the full potential of object combination in your designs.
FAQs: Combining Objects in Illustrator
Can I reverse the merging process?
The merging process in Adobe Illustrator is generally irreversible, especially if you’ve used operations like “Unite” or “Intersect” from the Pathfinder panel.
However, you can employ certain strategies to regain some flexibility. One approach is to work with compound paths or use non-destructive editing techniques like opacity masks, which allow you to edit or adjust the merged objects while keeping the original shapes intact.
How does combining objects affect editing later?
Combining objects can have varying effects on editing later, depending on the method you’ve used.
If you’ve used traditional merging operations like “Unite,” the individual shapes become part of a single object, making it challenging to edit them separately.
This is why it’s crucial to keep copies of the original shapes and consider non-destructive editing techniques whenever possible.
Are there any limitations to the merging process?
Yes, there are limitations to the merging process in Illustrator.
For instance, some complex shapes may not merge as expected using basic operations, leading to unexpected results. Additionally, merging objects with varying attributes like stroke weights or opacity might result in unexpected appearance changes.
It’s essential to experiment, preview, and understand the specific limitations of the merging methods you’re using.
Which method is best for complex shapes?
When dealing with complex shapes, using compound paths can be highly effective. Compound paths allow you to create intricate designs by combining multiple objects while maintaining the individuality of the original shapes.
This method is especially useful when you need to create complex designs that involve overlapping shapes or intricate cutouts. Additionally, employing opacity masks or appearance attributes can help maintain flexibility when working with complex shapes.


