

Adding a vintage filter to your photos infuses them with nostalgia and the glamor that comes with it. Learning this skill can help you effortlessly achieve this classic aesthetic and quickly transform your modern snapshots into charming relics of the past.
In this tutorial, we’ll walk you through a few methods to add a retro style to your image using Adobe Photoshop and provide simple instructions so you can follow along.
Methods for Adding a Vintage Filter onto A Photo In Photoshop
In Adobe Photoshop, you have multiple methods for adding a retro effect to your photos. Each one has its own advantages and limitations.
Method 1: The Adjustment Layer
The Adjustments Layer is a powerful method to give your photos an eccentric yesteryear effect by manipulating their tonal range and adding filters. It provides you with complete control over the editing process. However, this method takes longer to add the effect to your pictures.
Method 2: Raw Camera Filter
The Raw Camera Filter includes a comprehensive set of tools for that retrogressive look you’re after. However, if you fail to adjust the tonal settings correctly for your image, you may get inconsistent results.
Method 3: Gradient Map Adjustment Layer
In this method, you have to create a Gradient Map adjustment layer and select a gradient that transitions through vintage hues. The catch, you need to experiment with several gradient presets and curve adjustments to get the desired retro look.
Steps for Adding a Retro Effect Onto Photos In Photoshop
Out of the above three methods, the Adjustment Layer approach provides a creative and simple way to add a vintage style to your images with these easy steps:
Step 1: Create a New Document
Open Photoshop on your computer and go to File > New.
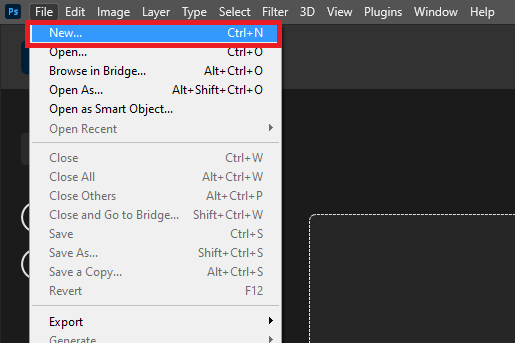
In the pop-up New Document window, set the width to 4500, height to 3000, and resolution to 300 pixels, and click Create.

Step 2: Create a Solid Base
Click Adjustment Layer or Create New Fill at the right corner of the Panel Dock and select Solid Color.

Choose a yellowish-to-orange color as the base, and click OK.

In the Layers panel, choose the layer mask, drag it to the delete icon, and click Delete.

Click the Create a New Layer option in the panel to add a layer on top of the base color one and rename it as Image.

Now right-click the Image layer and click Convert to Smart Objects.

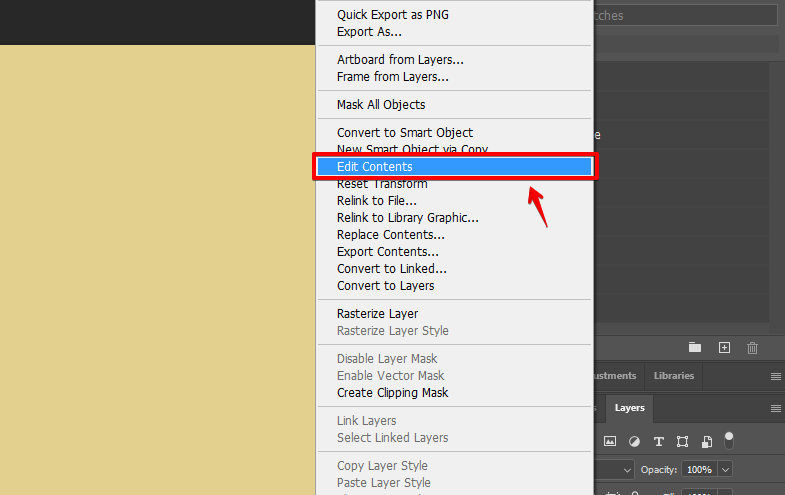
Step 3: Add the Photo
Right-click the Image layer and click Edit Contents to open a new tab.
Open the photo on your computer and drag and drop it in the new tab.

Click the Crossmark of the new tab, select Yes, and your photo will now appear in the layer panel above the Base layer.

Select the Image layer and press Ctrl/Cmd + J to duplicate it. Rename the duplicated layer as Color and hide it for now.

Step 4: Apply Adjustments and Filter
Click Image in the upper menu bar, choose Adjustments, and click Hue/Saturation.

In the Hue/Saturation window, set the Saturation to -100 and click OK.

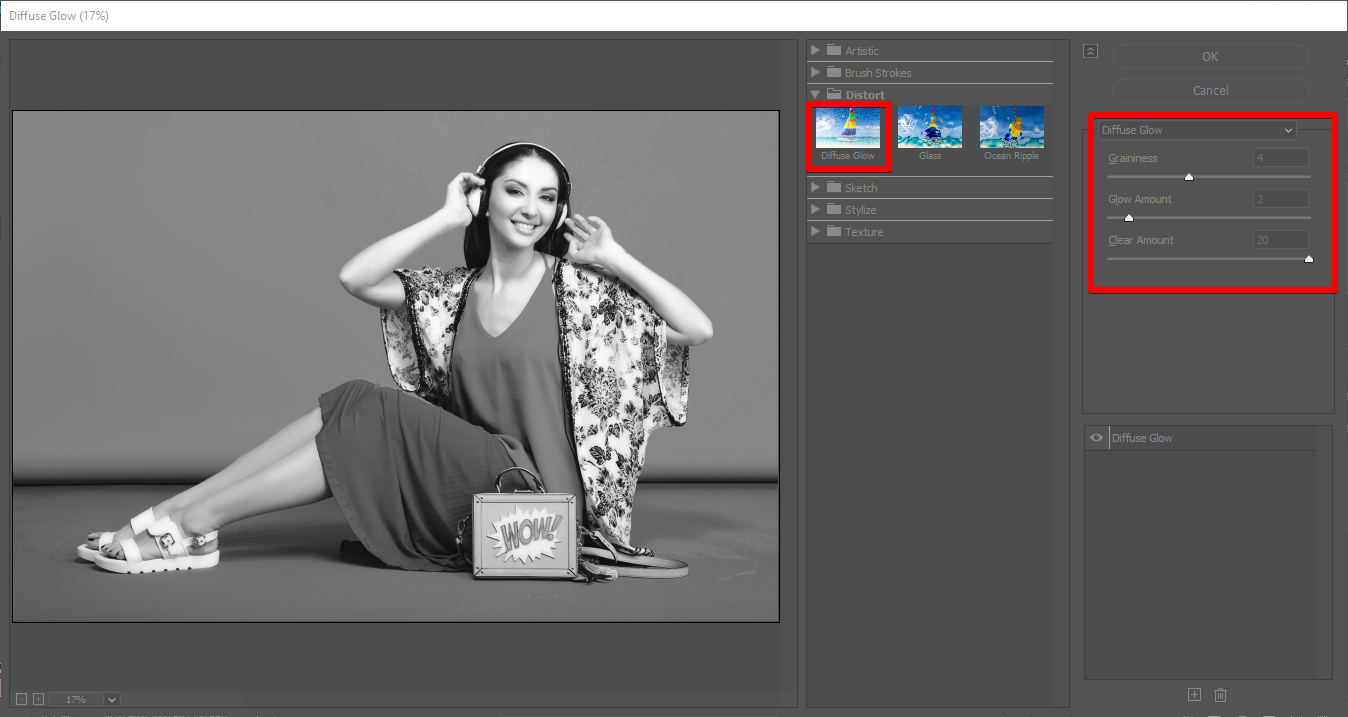
Now, click Filter in the upper menu panel and choose Filter Gallery.

Open the Distort folder, and choose the Diffuse Glow filter. Set the Graininess to 4, Glow Amount to 2, Clear Amount to 15-20, and click OK.
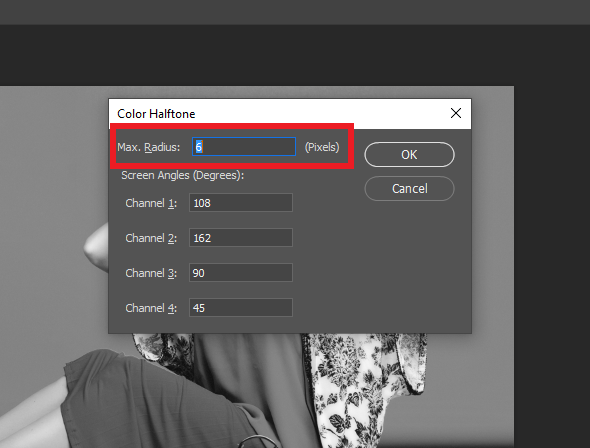
Click Filter again and select Pixelate > Color Halftone.

Set the Max. Radius to 6 and click OK.
Under Smart Filter in the Layers panel, click the Blending Options icon next to Color Halftone.

Change the Mode to Soft Light, set its opacity to 50-60, and click OK.

Step 5: Add Vignette Effect and Texture
Click the Filter option and select Lens Correction.

Go to the Custom tab, set the Vignette amount to -100, and click OK.

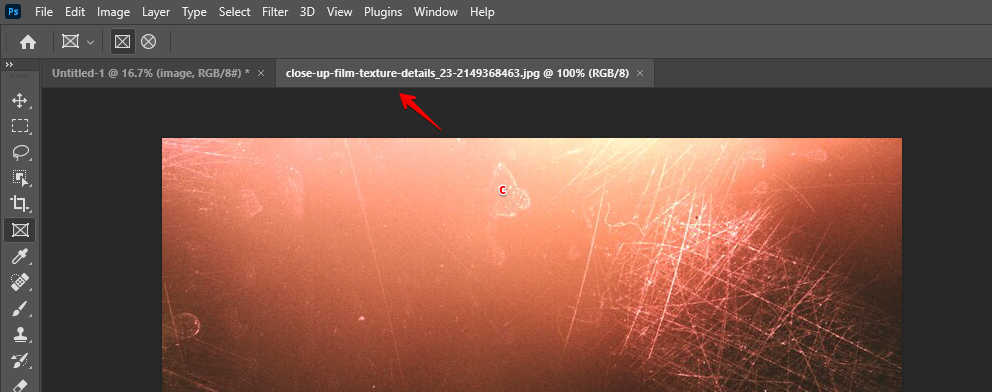
Now, open the texture images on your PC, select one, and drag and drop it into Photoshop to open it in a new tab.
Click Select, choose All, press Ctrl/Command + C, and close the new tab.

Click Add a Mask in the Layer panel to create one. Press Alt or Option, and click the thumbnail to open the Layer mask.

Press Ctrl/CMD + V to paste the texture you copied earlier, press Ctrl/Cmd +D to deselect the mask, press ALT again, and click on the Layer Mask in the layer panel.

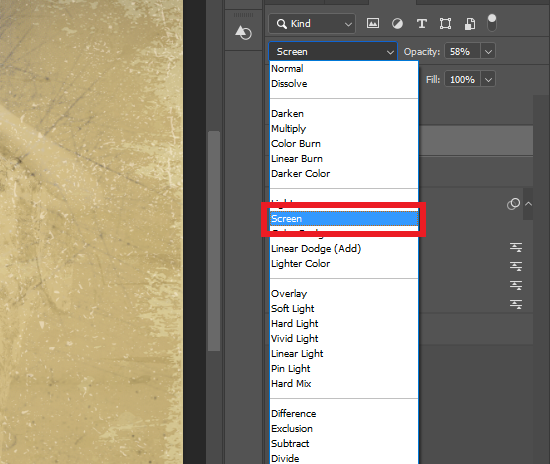
Select the second texture image from the folder on your PC and drop it above the image layer in PS.

Next, set the Blending Mode to Linear Burn and its opacity to 40%.

Do the same to add the third texture layer, but set its Blending Mode to Screen or Lighting.
Step 6: Add Adjustment and Tones
Click Create New Fill or Adjustment Layer > Levels.

Go to the Properties tab, select the arrow below the black color, and move it slightly to the right.

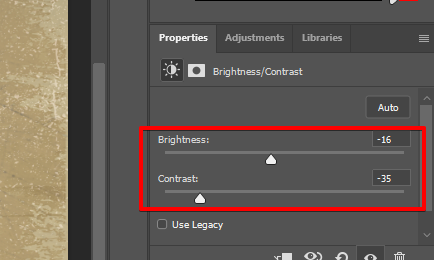
Click Create New Fill or Adjustment Layer. Then, select Brightness/Contrast.

Set the brightness to -16, configure contrast to -30-35, and click OK.
Choose Create New Fill or Adjustment Layer and select Color Lookup.

Select TealOrangePlusContrast.3DL and set its Opacity to 20% in the Layer Panel.

Go back to the Color Lookup tab and choose Candlelight CUBE. Set its opacity to 70% or 75%?

Step 7: Make the Duplicate Image Visible
Select the Eye icon next to the duplicate image in the Layers panel to make it visible again.

From the Blending Mode drop-down menu, choose Color and set the opacity to 30%-60%.

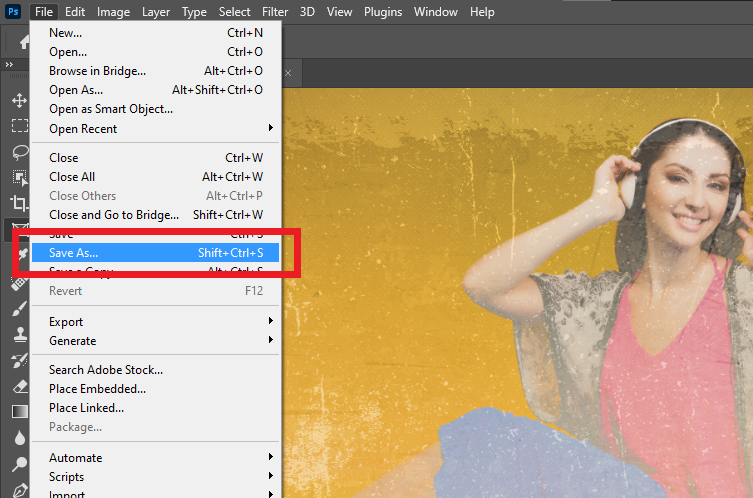
Finally, click File, and choose Save As… to save the image on your computer drive.
Tips and Tricks
Experiment with Different Textures
Try different vintage textures, such as grain, scratches, and a paper texture, to make it seem like the photo was taken decades ago.
Use Lower Opacity for Different Lookups
If you want a more subtle vintage style, reduce the opacity of the lookups and textures in the layer panel. For a more pronounced look, go for high opacity.
Play Around With Different Blending Modes on Texture Layer
Blending modes such as Overlay, Multiply, Soft Light, and Hard Light can help you achieve varied nostalgic effects.
Common Mistakes to Avoid
Overdoing the Diffuse Glow Effect
Set the intensity of the Graininess, Glow Amount, and Clear Amount according to the glow in your photo. Otherwise, it will look overly soft and unrealistic.
Not Converting Your Photo to Smart Object
Before applying the adjustment layers to your photo, make sure to convert it into a Smart Object. This will allow you to go back and tweak the adjustments at any time while editing.
Overusing Textures
Make sure to use only 3-5 textures depending on the look you want to achieve. Otherwise, they will overpower the main subject and appear more faded out.
FAQs
Can you save an adjustment layer as a preset?
Yes, you can easily save the settings on your adjustment layers into a new preset and apply them across multiple images.
What types of textures work best for a vintage effect?
Textures that imitate film grain, paper, scratches, and dust work great for creating a vintage feel.
What do I do if my photo looks too washed out after applying the vintage effect?
Tweak the opacity of the adjustment layers to reduce the intensity of the effect and use levels to increase the contrast.
Conclusion
In conclusion, you’ve learned the easy-to-follow instructions for adding a vintage filter to your modern photos using Adobe Photoshop’s Adjustment Layer tool.
Now, you can teleport your images back in time and make them stand out with new looks and feel.
