Table of Contents
Fingerprint Design in Adobe Illustrator
Fingerprint illustrations and designs can add a unique and personalized touch to your artwork, logos, or design projects. By incorporating the intricate patterns and details of fingerprints, you can create visually compelling compositions that convey a sense of identity, uniqueness, or mystery.
With the help of Adobe Illustrator, you can bring fingerprint designs to life. Illustrator’s vector-based tools and precision allow you to create smooth and scalable fingerprint illustrations with intricate details and precise lines.
By studying the characteristics of fingerprints, such as loops, whorls, and ridges, you can recreate their distinct patterns using Illustrator’s pen tool, shape tools, and brushes. These tools enable you to draw and manipulate shapes, curves, and lines to accurately represent the unique qualities of fingerprints.
Fingerprint logo designs can be particularly effective in industries related to security, identity, investigation, or forensic sciences. By incorporating fingerprint elements into your logo, you can communicate trust, reliability, and a sense of individuality.
To enhance your skills in creating fingerprint illustrations and designs, you can explore Illustrator tutorials that specifically focus on this subject. These tutorials offer step-by-step guidance, tips, and techniques to help you master the art of capturing and illustrating fingerprints effectively.
Additionally, browsing through online resources, studying real fingerprint patterns, and experimenting with different styles and color schemes can inspire your creativity and help you develop your own unique fingerprint designs.
Adobe Illustrator provides the necessary tools and flexibility to create captivating fingerprint illustrations and designs. By paying attention to the details, studying fingerprint patterns, and exploring tutorials and resources, you can master the art of incorporating fingerprint elements into your artwork, logos, or design projects. Fingerprint illustrations offer a visually intriguing and symbolic way to convey identity, uniqueness, and authenticity in your designs.

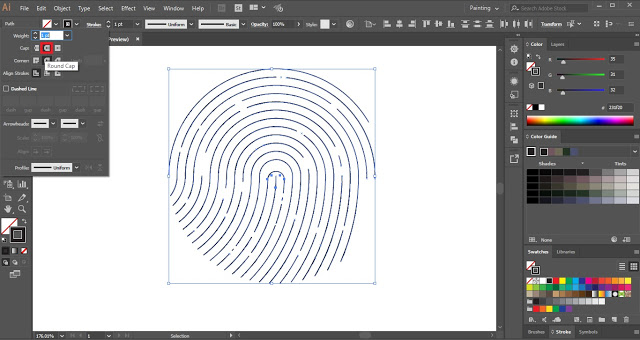
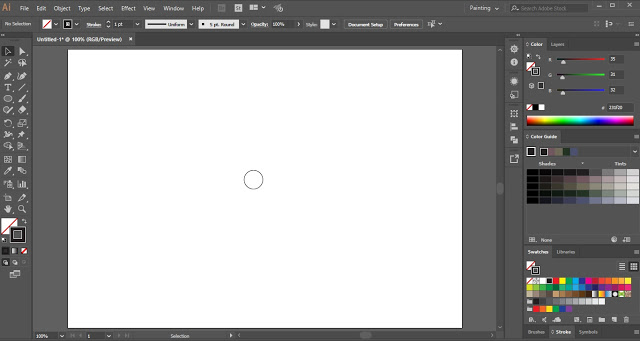
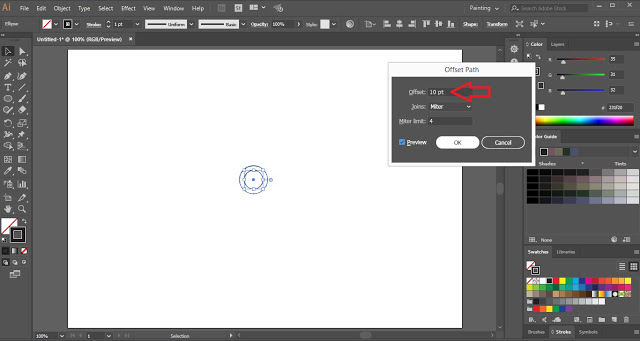
Step 1
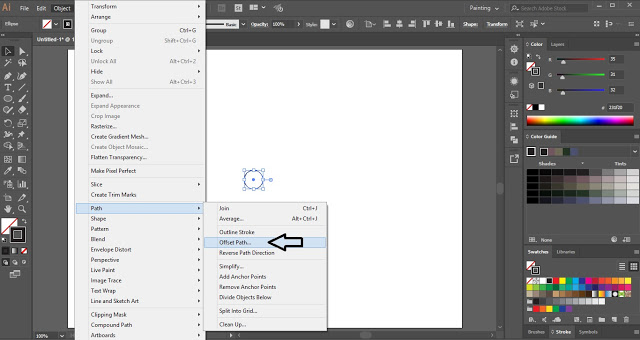
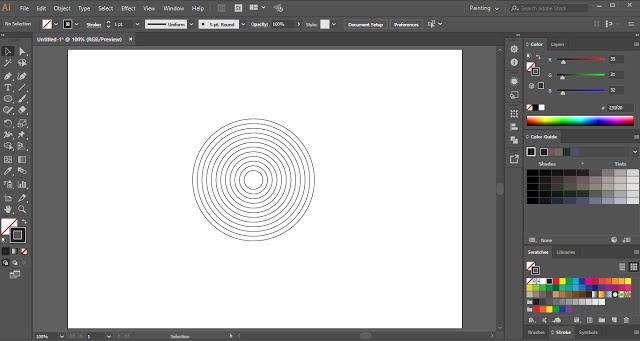
Step 2
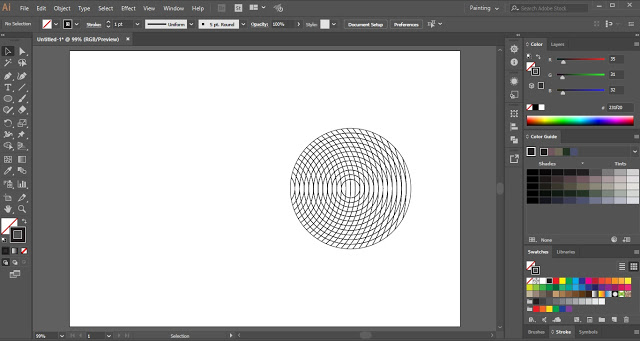
Step 3

Step 4


Step 5


Step 6

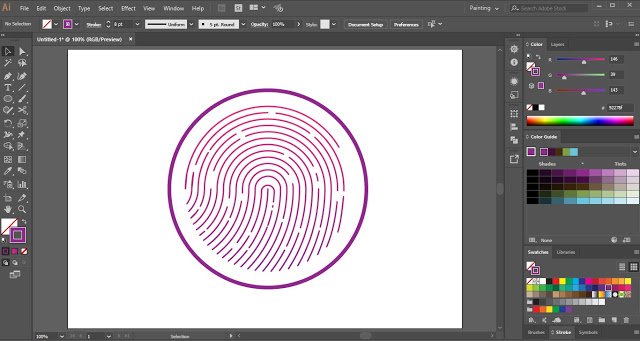
Step 7