

Table of Contents
- 1 Introduction to How to Draw Smoke in Illustrator
- 2 Creating Smoke Brushes in Adobe Illustrator
- 3 Copying and Moving Strokes for Smoke Illustration
- 4 Creating the Vector Smoke Effect in Adobe Illustrator
- 5 Exploring Advanced Techniques to Draw Smoke in Illustrator
- 6 Additional Resources for Smoke Illustrations
- 7 FAQs : Common Questions About Drawing Smoke in Illustrator
- 8 Conclusion
- 9 Author
Introduction to How to Draw Smoke in Illustrator
If you’ve ever marveled at the captivating allure of smoke in digital art, you’re not alone. Adding smoke effects to your compositions can infuse a sense of atmosphere and mystique into your designs. While capturing photographs of smoke and making them transparent for versatile use might sound like a daunting task, we’re here to tell you that it’s not. And the best part? You can achieve it in less than 10 minutes, all within the comfortable realm of Adobe Illustrator. Welcome to our beginner-friendly guide on “How to Draw Smoke in Illustrator.”
Creating Smoke Brushes in Adobe Illustrator
In this section, we’ll explore the process of creating smoke brushes in Illustrator. These brushes will become your companions for crafting stunning smoke designs.
Setting Up Your Workspace
Step 1: Before we dive into the art of crafting smoke brushes, let’s get our workspace ready. In Illustrator, open a new file with any dimensions you prefer.
For this guide, we’ll go with a canvas size of 1200 x 800 pixels. Creating an ample workspace gives you room to experiment and refine your smoke designs.
Creating the Background and Vertical Stroke
Step 2: To create a captivating smoke effect, we’ll start by setting the stage. Use the Rectangle Tool (M) to draw a rectangle that covers the entire artboard.
Step 3: Make it black to create a dark backdrop. With your background selected, navigate to “Object” > “Lock” > “Selection” (Ctrl/Command-2). This will lock the background, ensuring it won’t get in the way as we work. A well-structured workspace allows for focused creativity.
Step 4: Now, take the Pen Tool (P) and craft a vertical stroke. Click to establish a starting point, then click again above or below the starting point while holding Shift to create a straight vertical line.

Step 5: Make this stroke white and fill it with nothing. Adjust the stroke weight to a delicate 0.05 mm. The choice of colors and stroke thickness plays a vital role in smoke creation.

Copying and Moving Strokes for Smoke Illustration
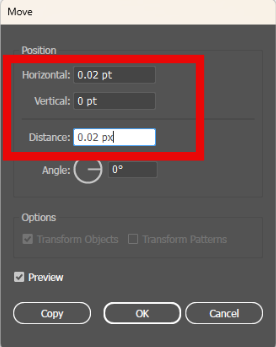
Step 1: With your stroke selected, switch to the Selection Tool (V) and hit the “Enter” key on your keyboard. In the Move window, input the following settings: Horizontal 0.05 mm and Vertical 0.
Press “Copy.” This simple step allows you to create symmetrical smoke elements effortlessly. Now, hold down Ctrl+D (Object > Transform > Transform Again) for about 20 seconds.
This action will duplicate the lines multiple times, creating the foundation of your smoke. Repetition and patience are key to perfecting your smoke design.
Adjusting Transparency for Realistic Smoke Texture
Step 2: Select all your strokes and set the Blending Mode to “Screen” and Opacity to 8%. These adjustments simulate the ethereal quality of smoke.
Group them together using Ctrl/Command & G for more straightforward management from here onwards. Grouping ensures that you can handle multiple elements as a single unit, simplifying your workflow.
Crafting a Smoke Design Shape
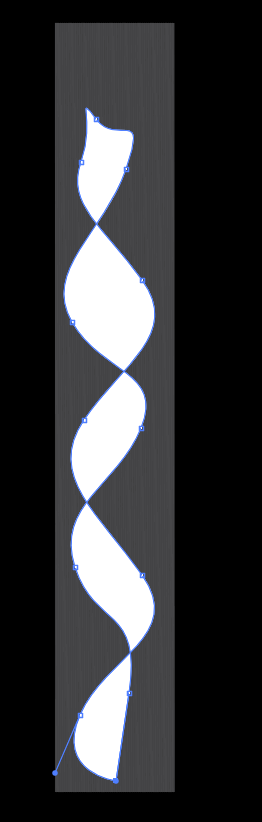
Step 3: To give your smoke its unique form, use the Pen Tool (P) to draw a random smoke shape. This shape will be the canvas on which we create our vector smoke effect.
Feel free to let your imagination run wild. There are no strict rules when it comes to smoke design. The Pen Tool gives you the flexibility to create any shape you desire.
Creating the Vector Smoke Effect in Adobe Illustrator
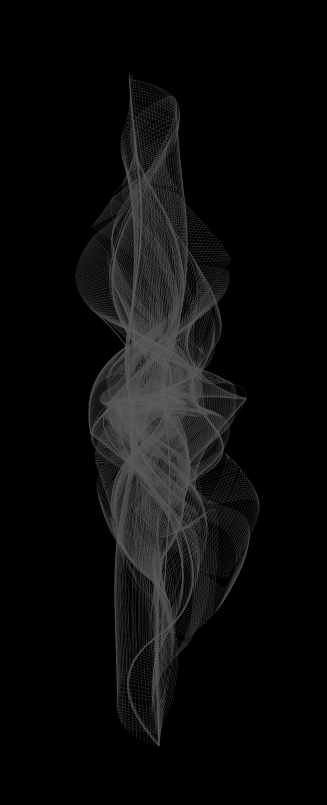
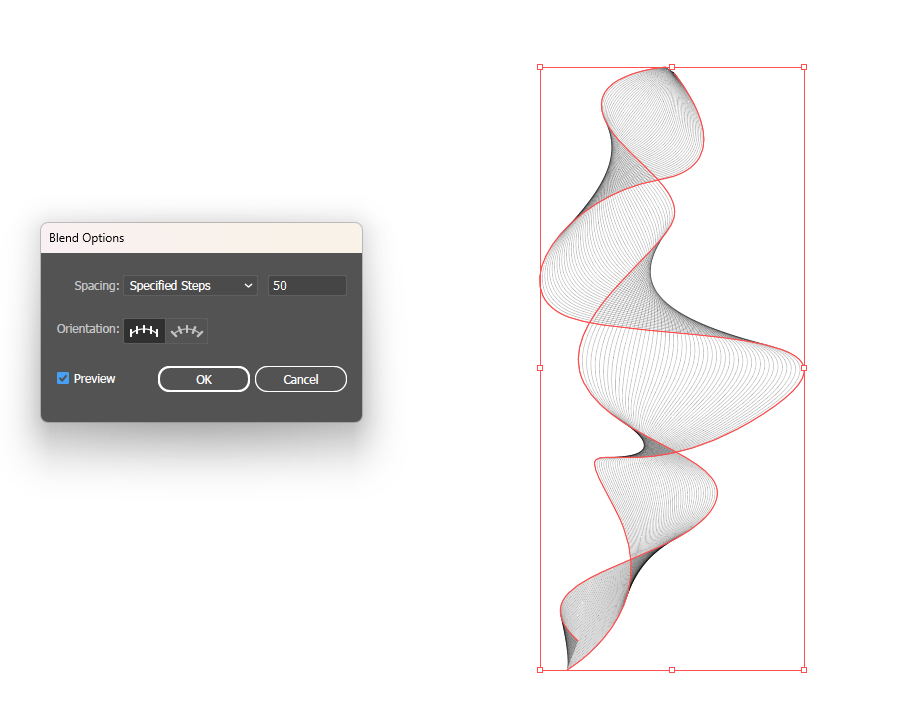
Now, let’s work the magic of crafting vector smoke in Illustrator. Ensure that the shape you’ve just drawn is on top, then click it. Hit Ctrl/Command-Shift-Right Bracket key (Object > Arrange > Bring to Front). Select the path and strokes, then proceed to Object > Envelope Distort > Make With Top Object (Ctrl/Command-Alt-C).

This step transforms your simple shape into intricate smoke tendrils. Ensure that the Blend Fidelity is set to 100 in Object > Envelope Distort > Envelope Options. Attention to detail is crucial for achieving a realistic smoke effect.


Exploring Advanced Techniques to Draw Smoke in Illustrator
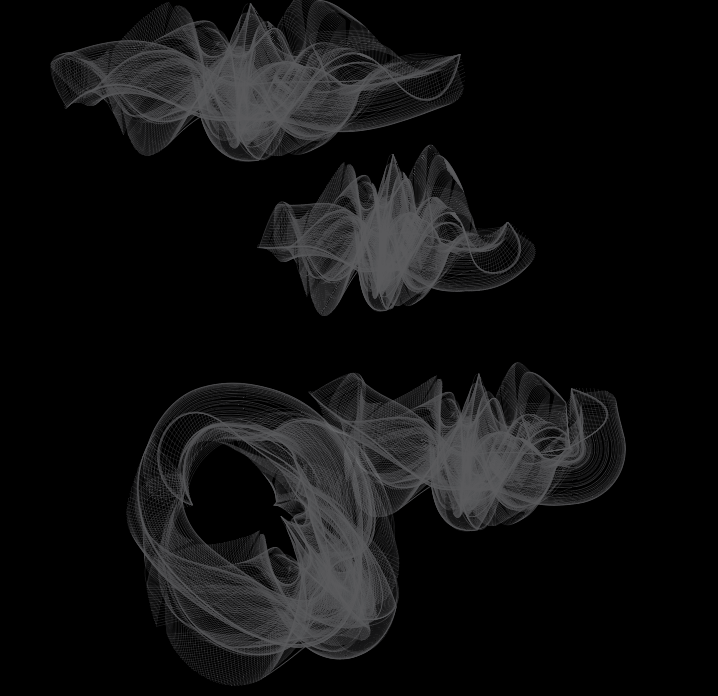
As you become more comfortable with smoke design, you can explore advanced techniques such as blending modes, opacity adjustments, and layering. These techniques allow you to fine-tune the appearance of your smoke and integrate it seamlessly into your compositions.
Additional Resources for Smoke Illustrations
Enhance your smoke designs further with premium resources available on Envato Elements. Explore options for smoke text effects, textures, and overlays to elevate your artistry. These resources can save you time and provide additional creative possibilities for your projects.
FAQs : Common Questions About Drawing Smoke in Illustrator
How can I make smoke letters in Illustrator?
Creating smoke letters is a captivating way to add a smoky, ethereal touch to your typography. To achieve this effect, follow these steps:
1. Choose your desired font and type out the letters you want to turn into smoke.
2. Select the Paintbrush Tool (B) and pick the Smoke Brush you’ve created.
3. Carefully trace over the letters, adjusting the brush size as needed to maintain readability.
4. Experiment with opacity settings to achieve the desired level of smokiness.
5. Enjoy your custom smoke letters that can add a touch of intrigue to your designs.
How do I create steamed coffee in Illustrator?
Adding steam to a cup of coffee in Illustrator can create a warm and inviting atmosphere in your designs. Here’s how you can do it:
1. Find a suitable image of steam or smoke (preferably with a similar background color).
2. Embed the image in your Illustrator project.
3. Scale and position the steam image where you want it to appear over your coffee cup.
4. Adjust the opacity and blending mode of the steam image to make it blend seamlessly with your coffee cup.
5. Experiment with different images and settings to achieve the desired steamed coffee effect.
How can I make cartoon smoke in Illustrator?
Creating cartoonish smoke in Illustrator allows you to add a playful and whimsical touch to your designs. Here are two methods to achieve this effect:
1. Vectorize Raster Cloud/Smoke Images:
– Import a raster cloud or smoke image into Illustrator.
– Use the Image Trace feature to convert it into a vector illustration.
– Adjust the vectorized smoke to achieve a cartoonish look by simplifying shapes and adding bold outlines.
2. Draw Smoke Manually:
– Use the Pen Tool or Brush Tool to draw smoke shapes.
– Emphasize curves, swirls, and exaggerated features to create a cartoonish appearance.
– Experiment with vibrant colors and playful details to enhance the cartoon effect.
Conclusion
In conclusion, you’ve learned the art of crafting smoke brushes in Adobe Illustrator, a valuable skill for infusing atmosphere and intrigue into your digital art. Experiment, explore, and leverage the versatility of smoke effects in various creative projects. Remember that practice and creativity are your best allies in mastering the art of drawing smoke in Illustrator.
With this expanded guide, you now possess a comprehensive understanding of creating smoke effects in Illustrator, from the basics to advanced techniques. The possibilities are limitless, and your creativity is the only constraint. Embrace the world of digital smoke design and let your imagination flow like wisps of smoke in the digital realm.
