Table of Contents
3D Wine Glass in Adobe Illustrator
Adobe Illustrator provides a powerful platform to bring your 3D wine glass designs to life. With its versatile tools and features, you can construct, manipulate, and customize realistic wine glass illustrations with precision and artistic flair.
The 3D wine glass is a visually appealing object that adds elegance and sophistication to your designs. Whether you’re creating promotional materials for wineries, designing beverage packaging, or crafting sophisticated illustrations, incorporating 3D wine glasses can enhance the overall aesthetic and convey a sense of luxury.
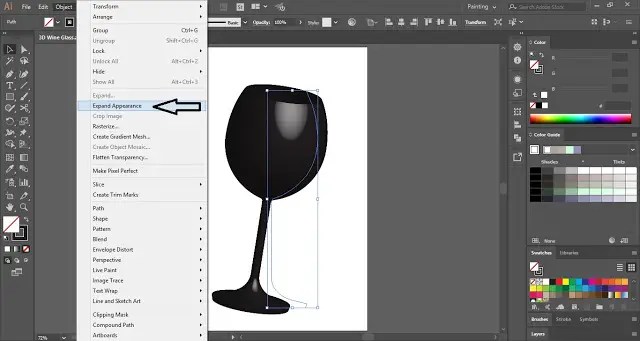
In Illustrator, you can leverage various techniques to construct 3D wine glasses. By utilizing shape tools, gradients, transparency effects, and shading, you can achieve realistic glass textures, reflections, and refractions.
Exploring the creative possibilities of 3D wine glass design in Illustrator allows you to experiment with different angles, lighting conditions, and glass styles. Whether you’re aiming for a classic stemmed wine glass, a contemporary stemless design, or an artistic interpretation, Illustrator’s extensive toolset empowers you to create stunning wine glass renderings.
Online tutorials, design communities, and resources dedicated to 3D wine glass design provide a wealth of inspiration and knowledge. They offer valuable insights, tips, and techniques to help you refine your skills and master the art of creating striking wine glass illustrations.
Adobe Illustrator enables you to unleash your creativity and craft captivating 3D wine glass renderings. By utilizing the software’s versatile tools and features, you can construct, customize, and bring to life realistic wine glass designs. Whether you’re showcasing wine-related products, designing visual branding elements, or simply exploring the beauty of glassware, 3D wine glass renderings in Illustrator can elevate your designs and leave a lasting impression.
Step 1

Step 2
Step 3


