

Introduction to Flattening Images in Photoshop
In the world of digital imagery, where every pixel matters, the process of flattening images in Photoshop emerges as a crucial technique. As you go through this article, you’ll know the importance of this technique and how it contributes to improving your visual masterpieces.
Why Flatten an Image in Photoshop?
Imagine your image as a puzzle, composed of multiple layers, each contributing to the final picture. Flattening, in essence, is the act of merging these layers into a single, cohesive layer. This has several benefits, such as reducing file size, streamlining editing processes, and ensuring compatibility with various platforms.
Let’s delve into the benefits and challenges of this action:
Benefits of Flattening an Image:
Simplified Workflow: Flattening condenses multiple layers into a single layer, making the image easier to handle and manage.
File Size Reduction: Multiple layers, especially with various effects and adjustments, can significantly increase an image’s file size. Flattening reduces the file size, making it more manageable for storage and faster for sharing.
Compatibility: Not all software or platforms support Photoshop’s layered PSD format. Flattening the image converts it to a universally supported format, such as JPEG or PNG, ensuring it can be viewed and edited in other applications.
Final Presentation: When you’re satisfied with your edits, flattening provides a neat, finished product, free from the clutter of multiple layers.
Challenges of Flattening an Image:
Permanent Changes: Once flattened, the separate layers and their individual adjustments become irretrievable. Any mistakes or changes you wish to revert will require you to start from scratch or use a previously saved version.
Limited Editing Options: Flattening restricts further nuanced edits. For instance, if you want to tweak the opacity of a particular layer after flattening, it would be impossible.
Potential Quality Loss: If you save the flattened image in a lossy format like JPEG, there might be a compromise in the image quality due to compression.
In this article, we’ll navigate these benefits and challenges, equipping you with the know-how to make the best decisions for your imaging needs.
The aim? Make the most of Photoshop’s flattening feature without compromising your creative vision.
Methods for Flattening an Image in Photoshop
When it comes to the art of flattening images in Photoshop, there are two main paths to follow.
Method 1: Using the Layers Panel
This method involves a few simple clicks to merge all your layers into one unit. By merging your layers together, you create a single-layered masterpiece ready to be shared or saved.
Method 2: Using Keyboard Shortcut
In this method instead of navigating menus, you can use a keyboard shortcut to flatten your creation instantly. With the help of shortcuts, you transform your layered canvas into a single-layered final canvas with just a few swift keypresses.
Let’s look at the methods in detail.
Method 1: Flattening Using the Layers Panel
Step 1: Open a New Document
Launch Photoshop and create a new document with the appropriate canvas size.

Step 2: Select Flatten Image under the Layer tab.
Locate Flatten Image at the bottom of the Layer drop-down menu.


Step 3: Discard Hidden Layers Warning
There will be a pop message asking you to “Discard hidden layers?”
This message means that layers with the visibility turned off will be discarded and only the visible layers will be considered to have an effect in the final image.

Step 4: Invisible layer
In this image “Layer 0 copy” is not visible. As shown below, the missing eye icon on the left-hand side of the layer shows its visibility/non-visibility. This layer will be discarded when we flatten the image.

Step 5: Flatten the image with discarded layers.
The below image shows what will be left after we flatten the image.

Step 6: Final Flatten Image

You must also learn: DIY Photo Mosaic Photoshop
Method 2: Flattening Using Keyboard Shortcut
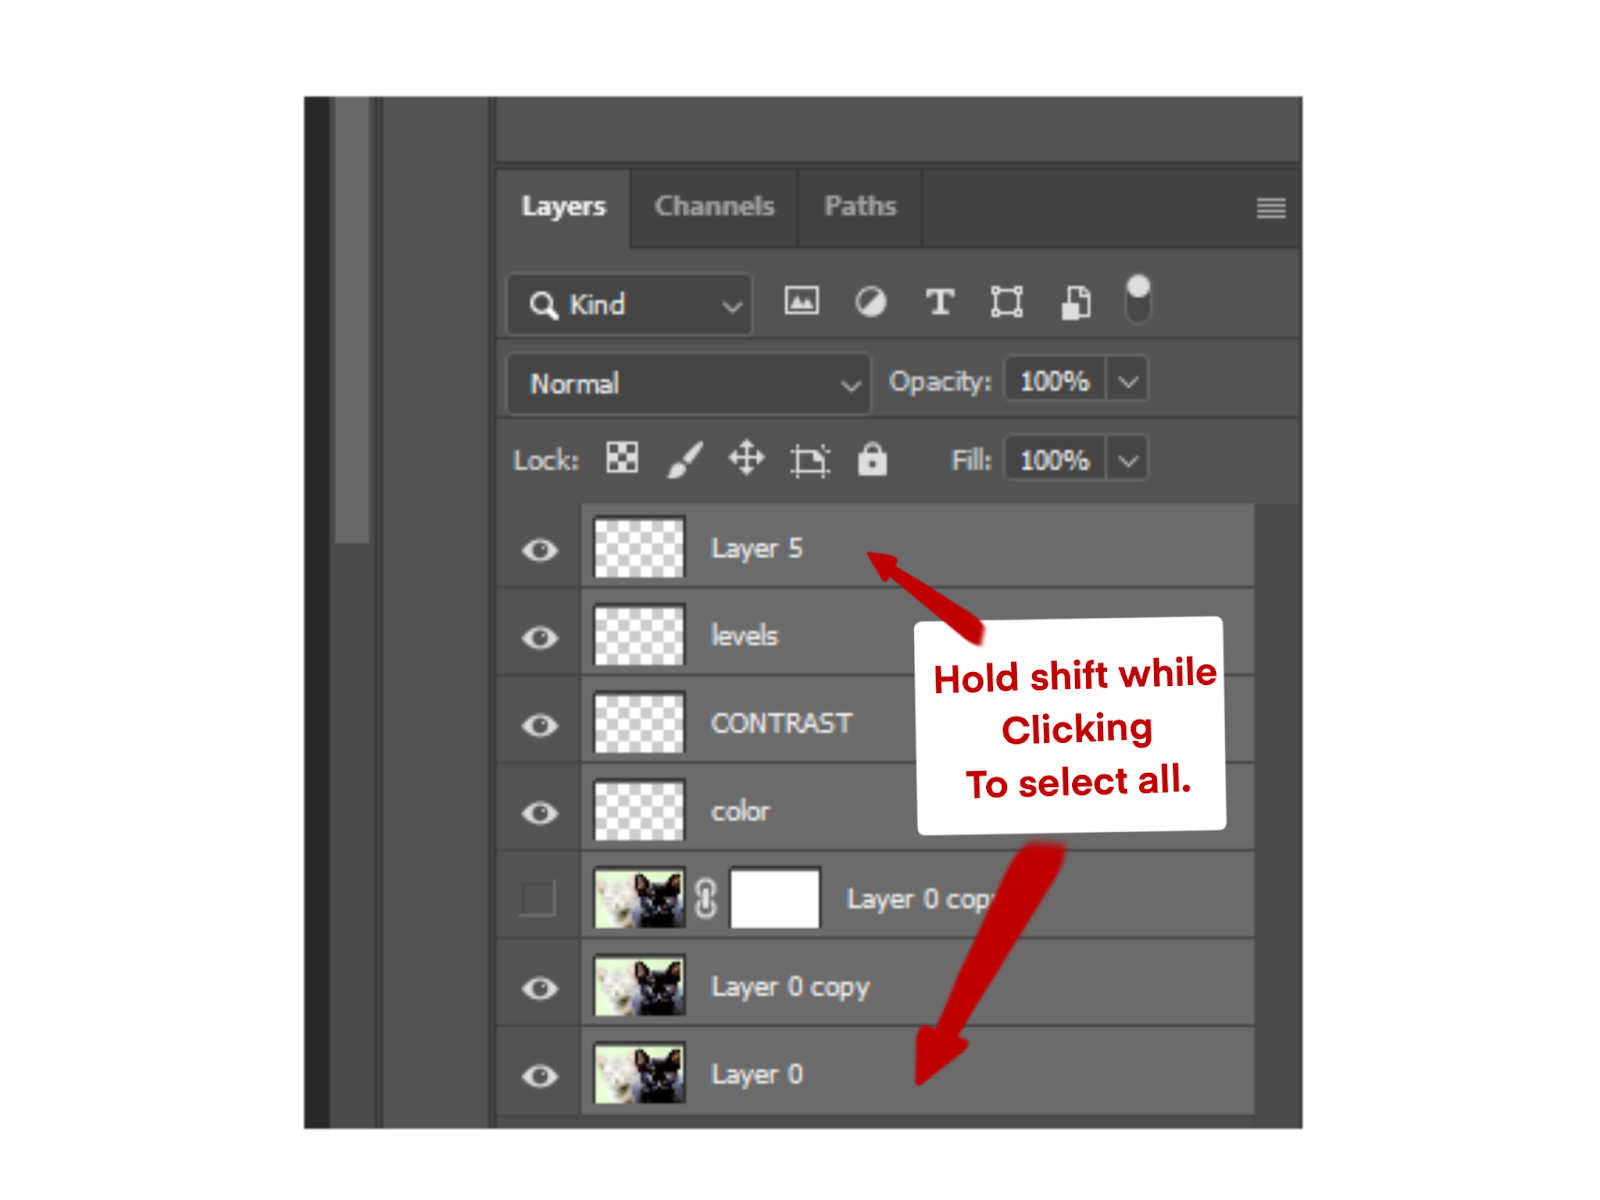
Step 1: Open Your Image in Photoshop and select all the layers by clicking on the first layer, holding the Shift key, and clicking on the last layer.
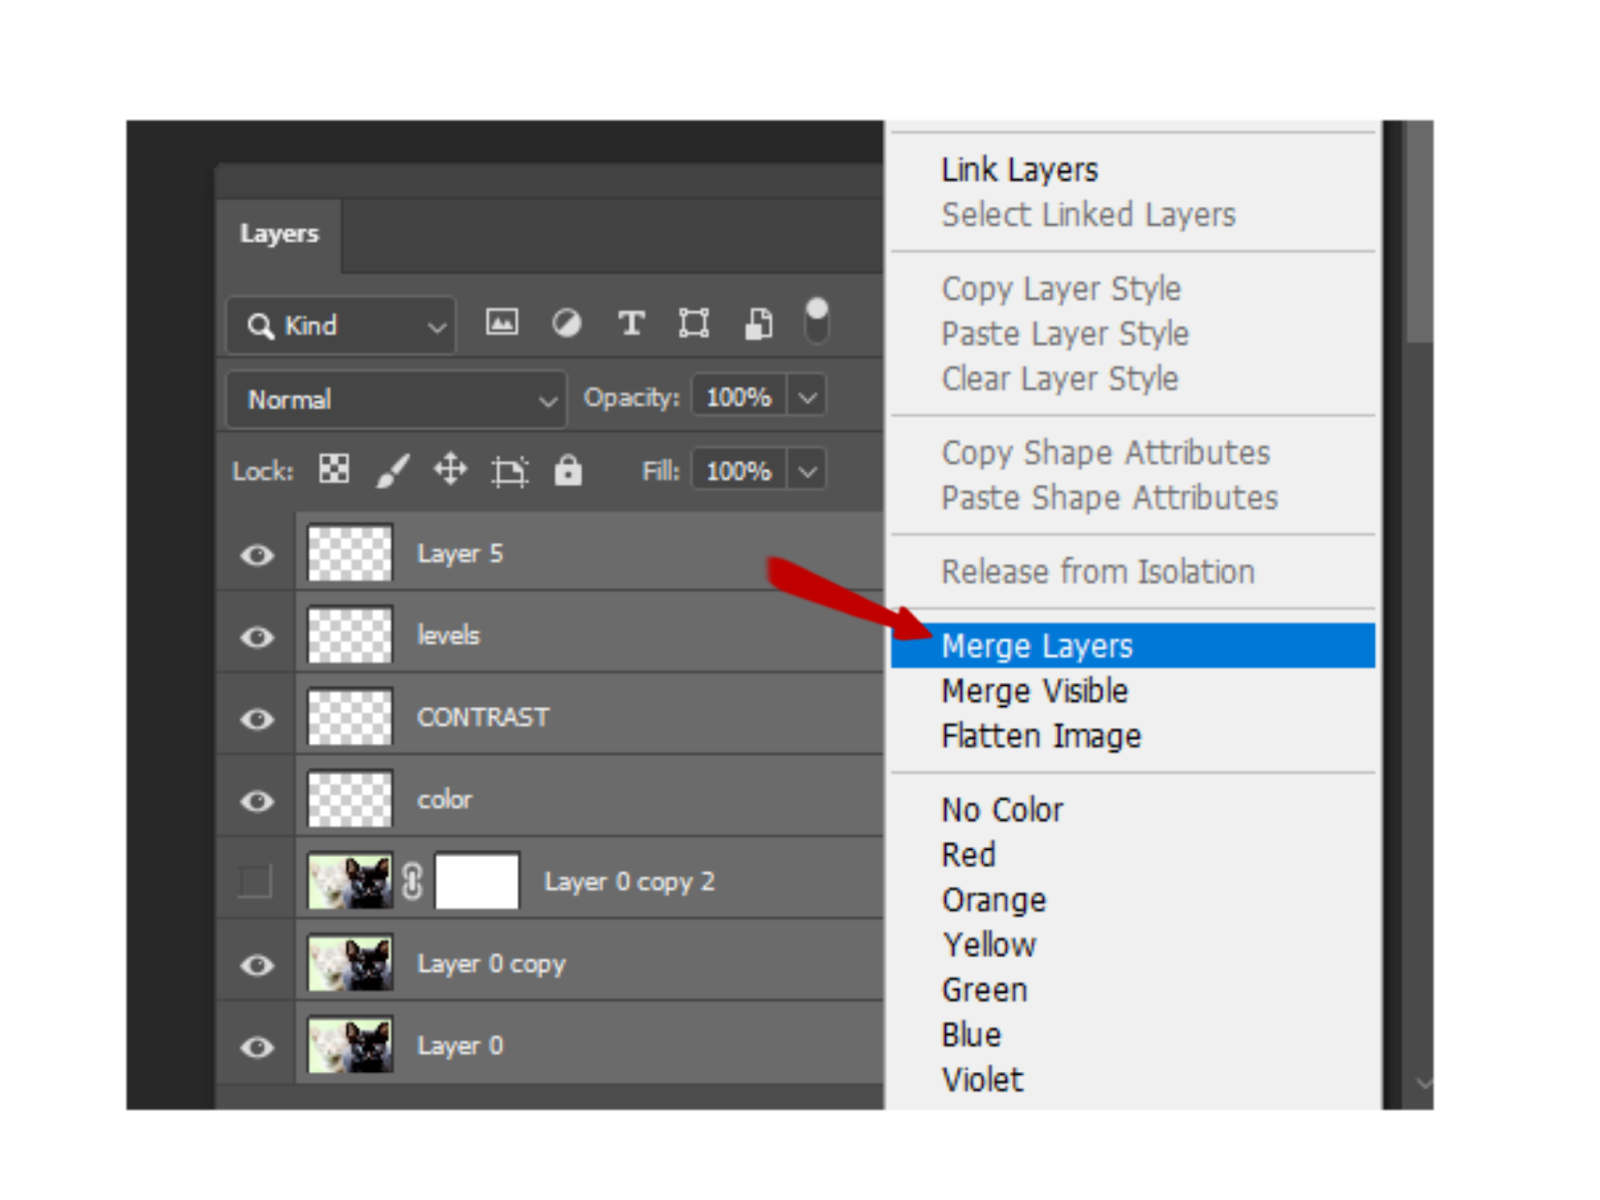
Step 2: Now right-click on the layers and select merge layers.
Step 3: The final flattened image is ready. If you work on any image that has a transparent background, you can preserve the transparency in the final image by turning off the fill layer and merging layers.

Tips for Successful Image Flattening
While flattening an image is relatively straightforward, a few pointers can help you ensure a seamless process:
- Save a Copy Before Flattening: Before you initiate the flattening process, make sure to save a copy of your original image. This precautionary step ensures that you can revert back to the layered version if needed.
- Check for Hidden Layers: Occasionally, an image might contain hidden layers that aren’t immediately visible. Double-check your layers palette to make sure you’re aware of all elements.
FAQs: Flattening Images in Photoshop
Can I Undo Flattening If Needed?
Unfortunately, once an image is flattened, the process cannot be undone. It’s always a good practice to create a duplicate before flattening if you anticipate needing the original layers again.
What Happens to Layers After Flattening?
When you flatten an image, all the individual layers are merged into a single background layer. This streamlines the image and reduces its complexity.
Does Flattening Affect Image Quality?
Flattening itself doesn’t impact image quality. However, the loss of individual layers means that you won’t be able to make non-destructive edits. Always keep a backup of the layered version for future adjustments.
Is There a Way to Flatten Specific Layers While Keeping Others?
Yes, Photoshop provides the option to merge selected layers while keeping others intact. This is useful when you want to flatten specific elements without affecting the entire composition.
Conclusion
Flattening an image in Photoshop is a critical skill that can significantly influence the final outcome of your image. Whether you’re preparing an image for printing, archiving, or sharing online, the ability to merge layers efficiently offers benefits in terms of file size reduction and optimized printability. By following the methods outlined in this guide, you’ll be able to master the art of flattening images in Photoshop and harness its potential to enhance your visual projects.
Learn more techniques such as creating Water Droplets in Photoshop. I am sure this would help you a lot in your Photoshop learning journey.
