The weave tool in Adobe Illustrator is a powerful feature that allows you to create intricate and captivating weave patterns. With this tool, you can add depth and texture to your designs, bringing them to life. In this article, we will explore keywords such as Illustrator weave tool, weave pattern Illustrator, pattern drafting in Illustrator, create weave pattern Illustrator, how to create weave pattern, new weave pattern Illustrator, pattern in weave Illustrator, Adobe Illustrator weave pattern design, weave pattern design in Adobe Illustrator, and create a weave pattern on Illustrator. By incorporating these techniques, you can unlock a world of creative possibilities and enhance your designs with visually stunning weave patterns.
The weave tool in Illustrator enables you to create complex patterns that simulate the appearance of interlaced threads or fibers. By adjusting parameters such as the weave density, yarn thickness, and yarn color, you can achieve a wide range of weave patterns, from simple to intricate designs.
Creating weave patterns in Illustrator involves the process of pattern drafting. This technique allows you to define the repeatable elements of the weave and generate a seamless pattern. By utilizing the pattern options and swatches in Illustrator, you can easily apply your weave pattern to larger areas, objects, or text.
The versatility of Illustrator’s weave tool allows you to experiment with various weave patterns. Whether you’re looking to create a classic herringbone weave, a basket weave, or a custom design, Illustrator provides the tools and flexibility to bring your vision to life.
Weave patterns can be used in a variety of design applications, such as textiles, backgrounds, illustrations, or even typography. By incorporating weave patterns into your designs, you can add visual interest, texture, and depth, elevating the overall aesthetic appeal.
Adobe Illustrator’s weave tool is a powerful asset for creating visually stunning weave patterns. Whether you’re exploring classic designs or pushing the boundaries of creativity with custom weaves, Illustrator provides the tools and resources to bring your ideas to life. Embrace the potential of weave patterns, experiment with different parameters, and let your designs flourish with captivating textures using Adobe Illustrator.
In today’s tutorial, you will learn to create Weave Pattern in Adobe Illustrator. Tools that will be used while creating this pattern are Rectangle Tool, Transform Tool, and Shape Builder Tool.
Launch Adobe Illustrator and create a new document. Now follow the below steps:
Step 1
Select the Rectangle Tool from the Tool Panel and draw a narrow rectangle on the artboard.
Step 2
Now select the rectangle drawn and click on Object in the Menu Bar. Place the cursor on Transform and select Move.
A dialogue box will appear on the artboard. In that dialogue box, put a checkmark on Preview and then vertically move the rectangle. Then click on Copy.
Step 3
Now select the second rectangle and increase its height. Also, change the Fill color of the rectangle.
Now select both the rectangles and create few duplicate copies with the help of the Alt key.
Step 4
Press Ctrl + A to select all the rectangles. Now press Ctrl + C to copy the rectangles and then press Ctrl + F to paste those rectangles in front.
Select the rectangles pasted in front and rotate them to a 90o angle.
Step 5
Again press Ctrl + A to select all the rectangles. Then select the Shape Builder Tool from the Tool Panel.
Now start adding the paths to create the Weave Shape.
.
.
After getting this shape, eliminate the unwanted paths.
Step 6
Before creating the pattern of these Weave Shapeswe will change the fill color. Fill the shapes with a gradient to give them a realistic view. Select all the shapes and press Ctrl + G to group them.
Now select the group and press Ctrl + C and then press Ctrl + F. Select the group pasted in front and change the fill color.
Now go to the Transparency Panel and change the blend mode to hard light and reduce the opacity.
Step 7
Now select the group of shapes filled with brown gradient and press Ctrl + C and then press Ctrl + F. Then open the Transparency Panel and change the blend mode to overlay.
Select all the three groups and press Ctrl + G to group them together.
Step 8
Now select the Weave Shapes from the artboard and drag them into the Swatches Panel.
Now double click on the new swatch created. Pattern Options dialogue box will appear on the artboard.
In the dialogue box, select the Tile Type as Grid and then put a checkmark on Size Tile to Art.
Now set the values of H Spacing and V Spacing to reduce the gaps between the grids.
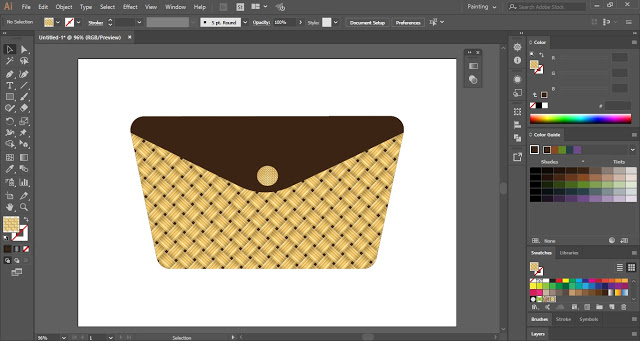
Click on Done and your Weave Pattern in Adobe Illustrator is created. Now draw any shape and select the Weave Pattern Swatch as the fill color.
.
Now practice this tutorial and create your own Weave Pattern in Adobe Illustrator.
Share this tutorial with others and also, share your views in the comment section.
Vivi Designing is a platform for people who are in love with design and are eager to learn for creativity and inspiration. We provide free design resources, articles, tutorials, techniques, and the latest trends in Adobe Illustration and Adobe Photoshop.