Table of Contents
Multi-line Text Effect in Adobe Illustrator
Adobe Illustrator offers a versatile set of tools and features that allow you to create intricate multi-line artwork with ease. By leveraging these tools, you can achieve stunning effects and produce captivating designs that incorporate multiple lines.
One of the key tools for drawing multi-line artwork in Illustrator is the Pen Tool. With the Pen Tool, you can manually draw and manipulate anchor points to create complex shapes and paths composed of multiple lines. This tool provides you with precise control over the curves and angles of your lines, allowing you to craft intricate and detailed designs.
In addition to the Pen Tool, Illustrator offers other shape tools like the Line Segment Tool and the Arc Tool, which allow you to draw straight lines and curved lines, respectively. By combining these tools, you can create multi-line shapes and objects that form the basis of your artwork.
Illustrator also provides various options for customizing your multi-line artwork. You can adjust the stroke width, color, and style of your lines to achieve different visual effects. Additionally, you can apply gradients, patterns, or brushes to add depth and texture to your artwork, giving it a unique and eye-catching appearance.
To enhance your workflow when working with multi-line artwork, Illustrator offers features like the Align and Distribute tools, which help you precisely position and arrange your lines. You can also use the Pathfinder panel to combine or divide shapes and lines, allowing you to create intricate and complex compositions.
By experimenting with different techniques and tools in Illustrator, you can unleash your creativity and create stunning multi-line artwork. Whether you’re designing logos, illustrations, or any other graphic elements, the ability to draw multi-line shapes and paths opens up a world of creative possibilities.
Adobe Illustrator provides a range of tools and features that enable you to draw multi-line artwork with precision and creativity. By utilizing tools like the Pen Tool, shape tools, and customization options, you can create intricate designs and bring your artistic vision to life. Let your imagination guide you as you explore the possibilities of multi-line artwork in Illustrator.
This tutorial will help beginners to get friendly with various tools of Adobe Illustrator. You can create various types of text effects in Adobe Illustrator. Among those various types, today we are going to learn about making Multi-line Text Effect in Adobe Illustrator.
Launch Adobe Illustrator and create a new document. Now follow the below steps:
Step 1
Select the Type Tool from the Tool Panel and type the text on the artboard.
Step 2
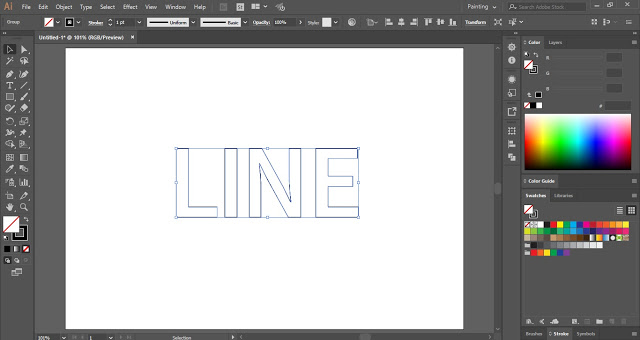
Select the text and press Shift + Ctrl + O to make it an editable text. Then press Shift + X to Swap Fill & Stroke.
Step 3
Now select the Pen Tool from the Tool Panel and draw Stroke lines inside the letters. Make sure the lines are not joined.
Step 4
After drawing the stroke lines, remove the text.
Step 5
With the help of the Selection Tool, select a stroke line and click on Object in the Menu Bar. Place the cursor on Path and select Offset Path.
In the Offset Path dialogue box, set the Offset Point and select Round Joins.
Check the Preview and click OK.
Now select the Offset Path created and fills it with white color. This will help in creating a clear overlapping effect.
Now create few more Offset Paths and repeat this process with every Stroke Line.
So this is how you can create a Multi-line Text Effect in Adobe Illustrator.
Practice this tutorial and share your views in the comment section. Also, share this tutorial with others.
You may also be interested in below:
- Flat Vector Character in AdobeIllustrator
- Triquetra Knot in Adobe Illustrator
- Overlapping Pattern in Adobe Illustrator
- Shortcut Keys in Adobe Illustrator
- Cloud Shape in Adobe Illustrator


