

Table of Contents
Taiji Symbol in Adobe Illustrator
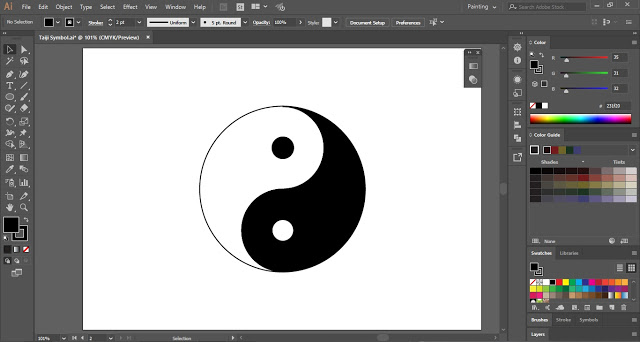
In today’s Illustrator tutorial, you will learn to create Taiji Symbol in Adobe Illustrator. This symbol is also known as Yin and Yang Symbol. The tools which will be used in this Adobe Illustrator tutorial are the Ellipse Tool, Pen Tool, and Shape Builder Tool.

Launch Adobe Illustrator and create a new document. Now follow the below-mentioned step-by-step process:
Step 1
Select the Ellipse Tool and draw a circle on the artboard. The size of the circle is 350 pt X 350 pt. The Stroke color is #231f20. (Fill color is deselected)

Step 2
Now we will draw 2 circles and place them inside the larger circle. The 2 circles (174 pt X 174 pt each) will be placed in such a way that it will form the shape of the digit 8. (See the image below)
You can also use Grids to place the circles correctly at the center.

Step 3
Now draw two small size circles and place them at the center point of the circles drawn in Step 2.

Now select the Pen Tool and draw a vertical line at the center of the circle as shown in the below image.

Step 4
Press Ctrl + A to select all the circles and the line. Now select the Shape Builder Tool from the Tool Bar.
With the help of Shape Builder Tool, we will add the shapes to create the Taiji Symbol.

.


Color Time
Now we will fill color in the shapes and after that the Taiji Symbol in Adobe Illustrator will be ready. Correct use of the Shape Builder Tool makes it so easy to create Taiji Symbol.
Practice this Illustrator tutorial and share your views in the comment section. Also, share this Taiji Symbol in the Adobe Illustrator tutorial with others.
