Table of Contents
Chocolate Ripple Effect in Adobe Illustrator
In today’s tutorial, you will learn to create Chocolate Ripple Effect in Adobe Illustrator. We will use Pencil Tool and 3D Revolve Effect to create the Ripple Effect.
Launch Adobe Illustrator and create a new document. Now follow the below steps-
Step 1
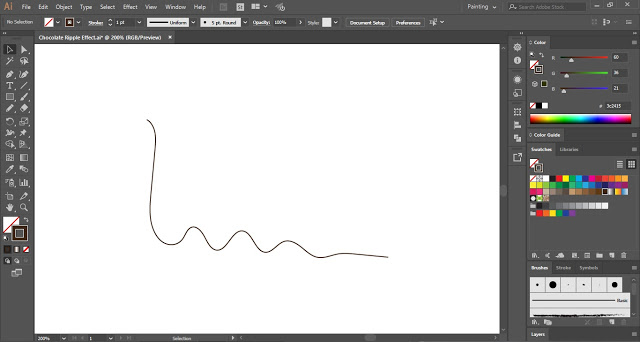
Firstly, turn off the Fill color and select #3c2415 as Stroke color.
Now select the Pencil Tool and draw the shape as shown in the below image.
Step 2
Now select the shape and click on Effect in the Menu Bar. Place the cursor on 3D and select Revolve.
3D Revolve Options dialogue box will appear on the artboard. In that dialogue box, put the checkmark on Preview and you will see that the stroke line will get converted into Chocolate Ripple Effect.
Now if you want you can change the position of the Ripple Effect by making changes in the axis. To make the effect more realistic, click on More Options and add one more light to the effect by clicking of New Light icon.
After making the required changes, click OK.
Step 3
Now add some creativity to your artwork and draw a melting chocolate bar.
So this is how you can create Chocolate Ripple Effect in Adobe Illustrator.
Practice this tutorial and share your views in the comment section. Also, share this tutorial with others.


