

Sometimes, you need to remove the background in a photo to add a new one for a distinctive look. However, learning to isolate subjects carefully for a clean and refined outcome is crucial.
In this guide, we’ll show you a few ways to make the background transparent in your images using Adobe Photoshop, along with some tips and tricks and common mistakes to avoid.
Table of Contents
Methods To Delete Background Using Photoshop
Photoshop is an intuitive background remover that offers three ways to delete and add backdrops to your picture, each with its own advantages and limitations.
Method 1: The Quick Actions Tool
Using the Quick Actions tool in Photoshop is one of the easiest ways to instantly remove the backdrop. However, since this tool uses Adobe Sensei AI, you‘ll have to refine it further to get the best results.
Method 2: The Background Eraser Tool
The Background Eraser tool lets you manually delete the backdrop of your images that has a complex background. The catch is that the tool selects and deletes similar color pixels and, sometimes, erases parts of the subject.
Method 3: The Lasso Tool
Using the Lasso tool, you can draw around the subject you want to keep, save your selection from the upper menu, and delete the background from your images. However, this method is not ideal for images with fine details.
Step-by-step Method To Remove Background in an Image With Adobe Photoshop
The Quick Actions toolbar in Photoshop has a dedicated background remover option that quickly makes your photo transparent with these easy steps:
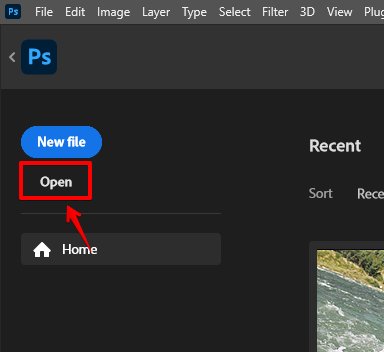
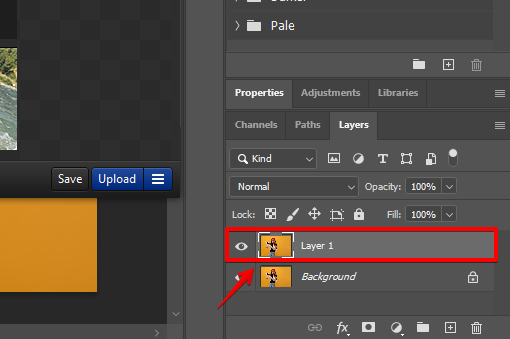
Step 1: Open and Duplicate Your Photo in Photoshop
Drag and drop your photo or click Open on the main dashboard in Photoshop and select the file you want to upload.
Select the Layer panel and press Ctrl/Cmd + J to duplicate the background layer.
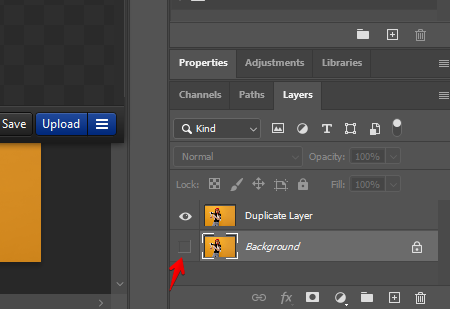
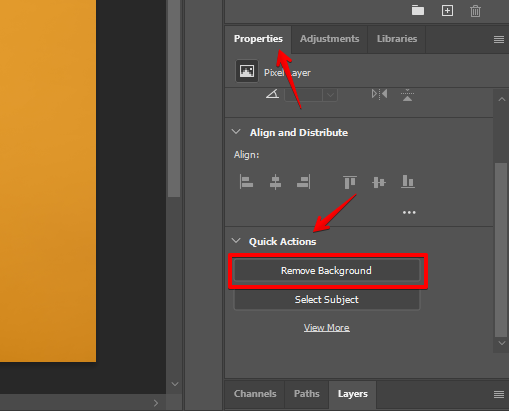
Step 2: Remove the Background
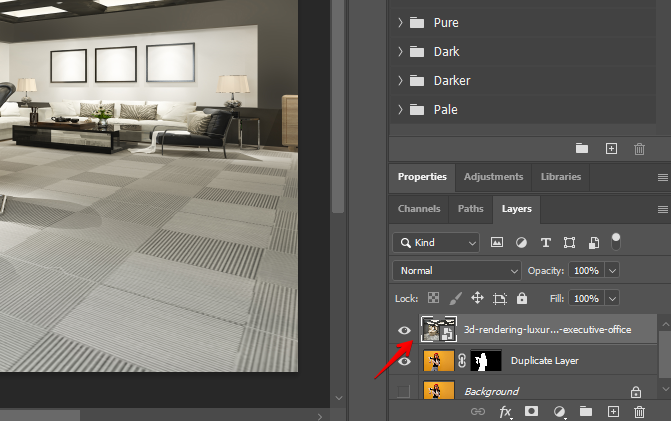
Rename the layer as a Duplicate Layer. Next up, click the Eye icon next to the Background layer to hide the original image.
Go to the Properties panel on the right side of the editing interface, and choose Remove Background under the Quick Action section.
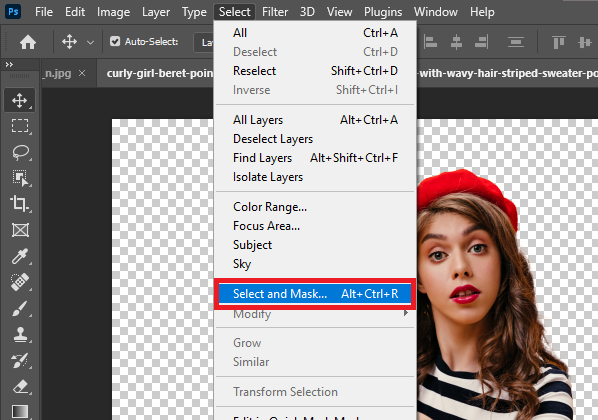
Step 3: Refine the Subject
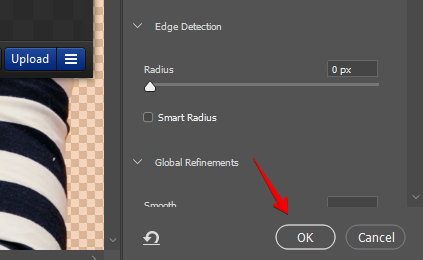
After the background is removed, click Select in the upper menu panel and choose Select and Mask.
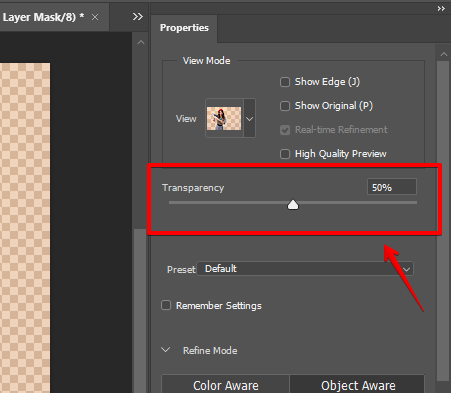
In the dedicated Select and Mask workspace, set the Transparency up to 50% from the right panel.
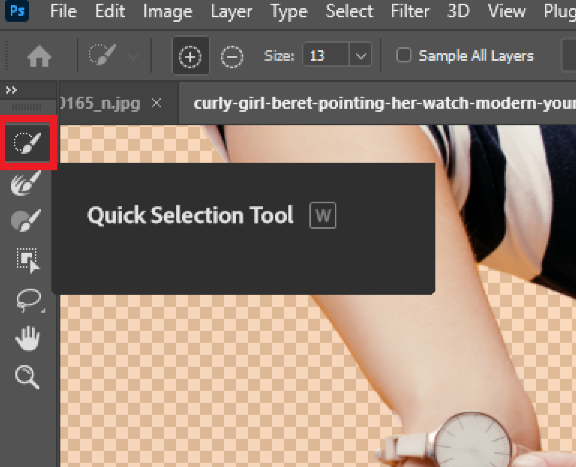
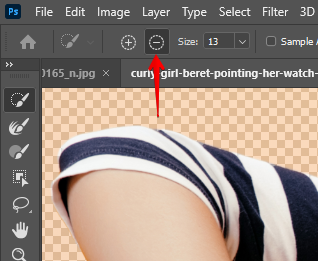
Choose the Quick Selection Tool from the left menu panel.
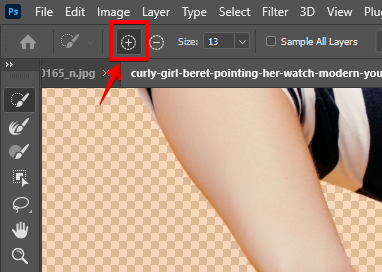
Now, use the + option to add a selection from the background.
After that, use the – option/brush to remove the extra background that the Photoshop missed.
Click OK in the left panel to confirm the action.
Step 4: Add New Backdrop and Export
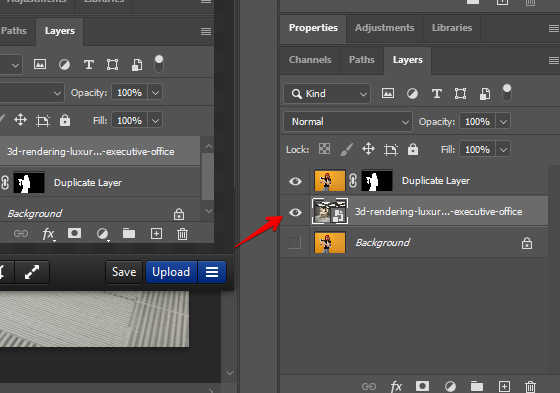
Now, simply drag a new background image from your PC, drop it in Photoshop, and press Enter.
Next, drag and drop the new image layer below the duplicate layer.
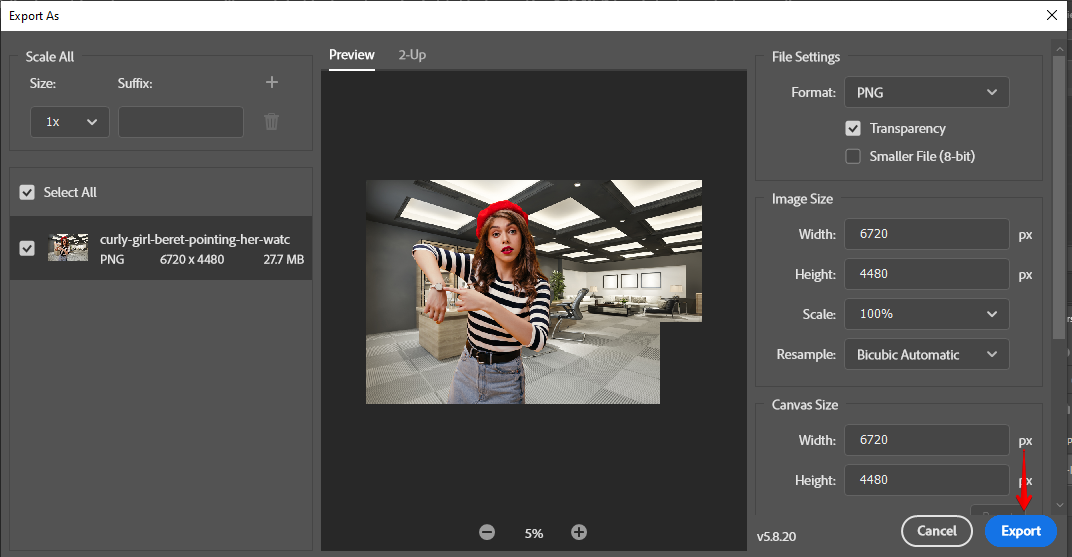
Finally, click File in the upper menu panel and choose Export > Export As.
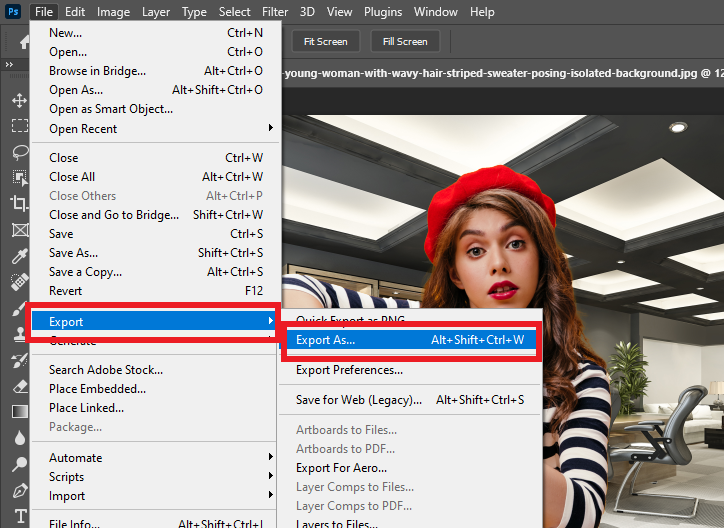
Select the image format, make any other necessary settings, and click Export to save the photo on your computer.
Tips and Tricks
Always Duplicate the Original Image
For a non-destructively transparent backdrop, always duplicate the original image in the layer panel to preserve it in case you want to start over.
Adjust the Transparency Slider
In the dedicated Select and Mask workspace, adjust the Transparency slider to 50%- 60% to see both the removed background and the subject clearly. This will help you make accurate selections while adding or subtracting the backdrop.
Common Mistakes To Avoid
Not Keeping the Background Layer Hidden
Do hide the original image layer before making the backdrop transparent. Otherwise, you won’t be able to see and refine the areas where the background was removed.
Ignoring the Image Quality
Make sure you start with high-resolution images. This will help the Adobe Sensei AI perform better and remove the background accurately.
Not Refining the Edges
Try to refine the edges in the Select and Mask workspace to handle intricate details. Otherwise, your subject will lose its aesthetics.
FAQs
Why Can I Not Find the Properties Panel in Photoshop When Removing the Background?
Click the Windows option in Photoshop’s top menu and choose Properties to enable it and make it visible in the right panel.
Why Can’t I See the Remove Background in Photoshop?
Click the View More option under Quick Actions, search for the Remove Background tool, and select it.
Why Is the Remove Background Option Grayed Out in the Quick Actions Section?
It’s possible you have not selected a layer or locked it unknowingly in Photoshop, which grays out the background removal option.
Conclusion
As we conclude this article, you now have detailed instructions on how to delete background using photoshop with the Quick Actions tool.
Remember to practice with different images while exploring various features to make them as appealing as possible for your audience.
