
The ability to turn a photo into a painting is a highly sought-after skill in digital artistry. Mastering it can help you fill your images with the expressive quality of traditional portrayals.
In this tutorial, we’ll show you how to make a painting from a photo using Photoshop and bring it to life!
Table of Contents
Methods To Turn a Photo into a Painting Using Photoshop
Photoshop offers three ways to transform your picture into a painting. Let’s discuss them below:
Method 1: Filter Gallery
Filter Gallery has several artistic filters you can apply to your photo to make it look like artwork. The flip side is the filters provide limited control over the final result.
Method 2: Generative Fill
Powered by Adobe Firefly generative AI, the Generative Fill adds content like a paint effect to your photos using simple text prompts. However, since it’s still under development, you have to install the Photoshop Beta version to access it.
Method 3: Using Brushes To Manually Paint Over Photo
Brushes in Photoshop give you more control to manually paint your picture. The limitation here is that it requires more time and skills to handle the intricate details.
Steps To Make a Painting from a Photo Using Photoshop
The Filter Gallery technique is a quicker and easier way than the other methods to convert a photo into a painting. Here’s how:
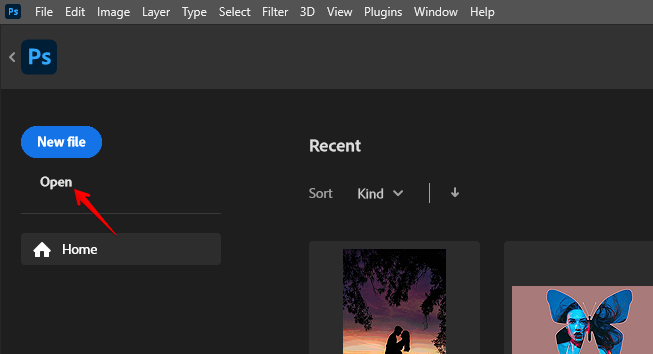
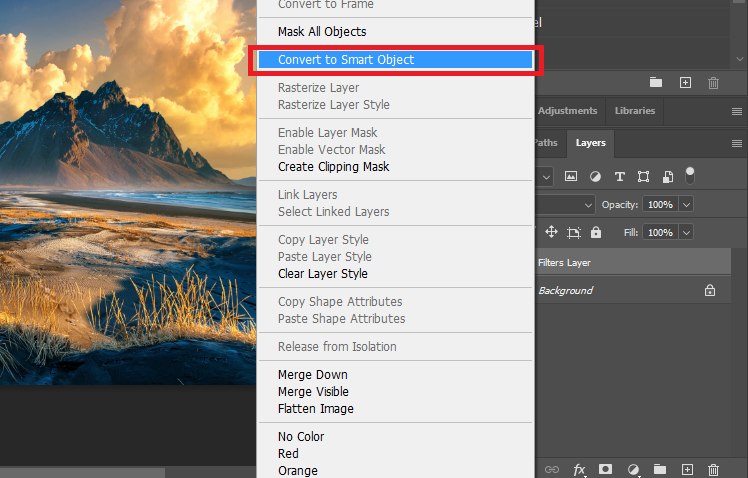
Step 1: Open Your Photo and Turn It Into Smart Object
Click Open on Photoshop’s Home page and select the photo you want to upload.
Click the Layers panel and press Ctrl/Cmd + J to duplicate the original layer and rename it as Filters Layer.
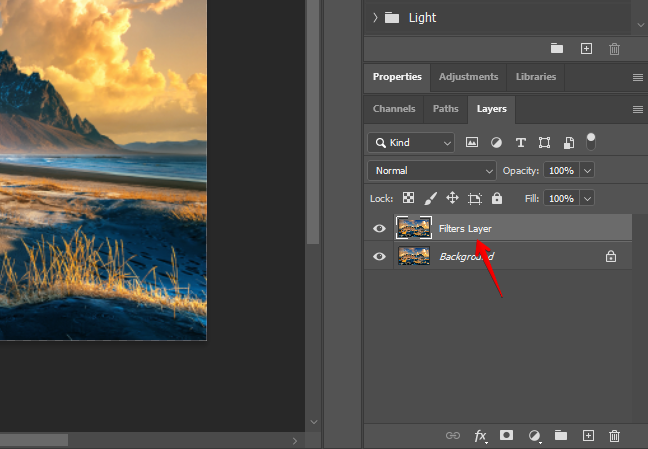
Right-click the Filters Layer in the Layers panel and choose Convert to Smart Object.
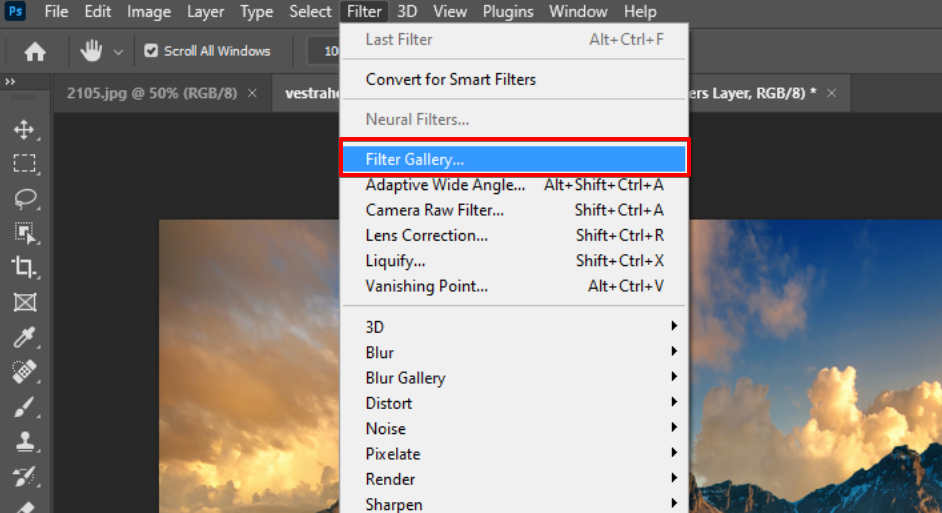
Step 2: Open Filter Gallery
Select Filter in the upper menu panel and click Filter Gallery.
Click the Artistic folder to open it and choose Paint Daubs.
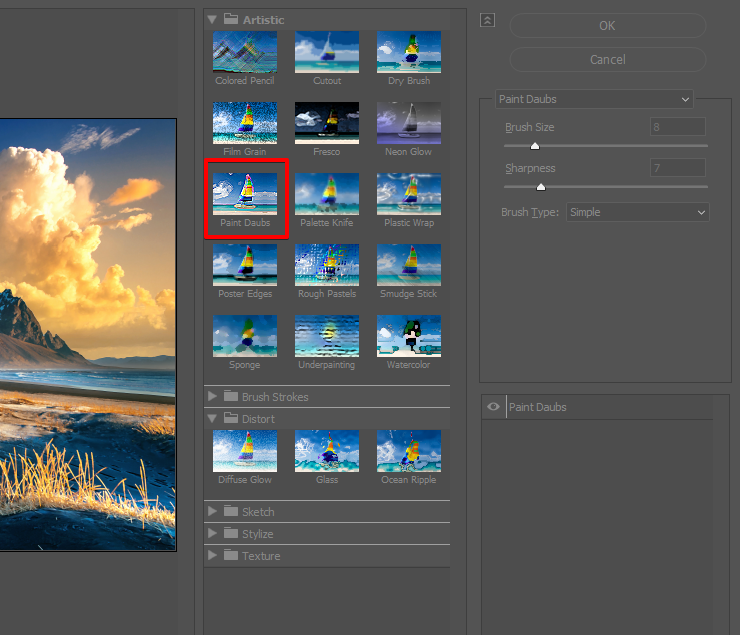
In the right panel, set the Brush Size to 17 and adjust the Sharpness to 7.
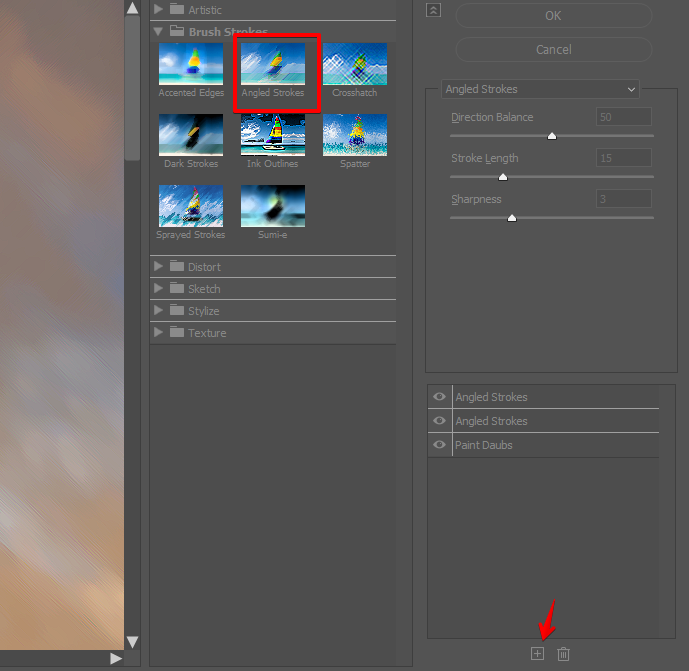
Click the + icon at the bottom of the panel, and choose Angled Strokes in the Brush Stokes folder.
Click OK.
Step 3: Reduce Details
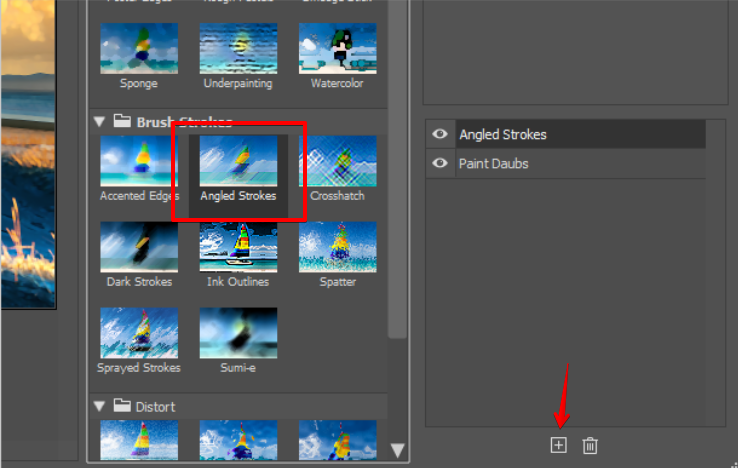
Now, select the Filters Layer, press Ctrl/Cmd + J to duplicate it, and rename it as Details Layer.
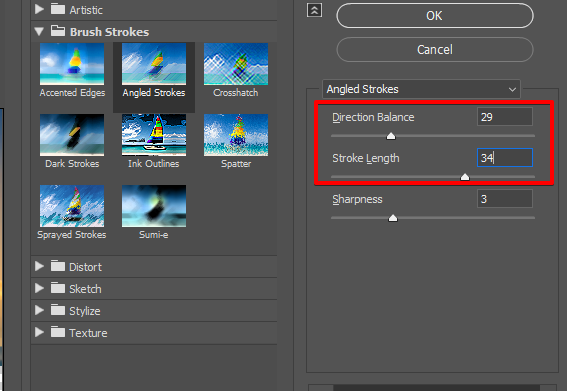
Double-click on Filter Gallery below the Details Layer to open it. Click Angled Strokes and choose the + icon in the right panel.
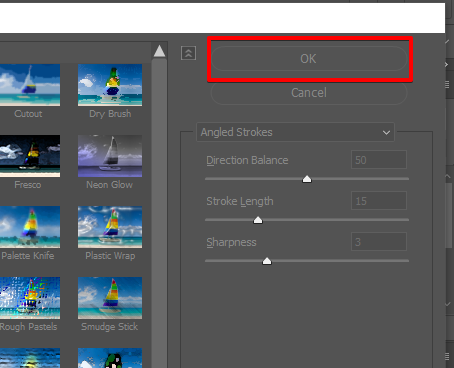
Drag the slider below Direction Balance to 29 and Stroke Length to 34.
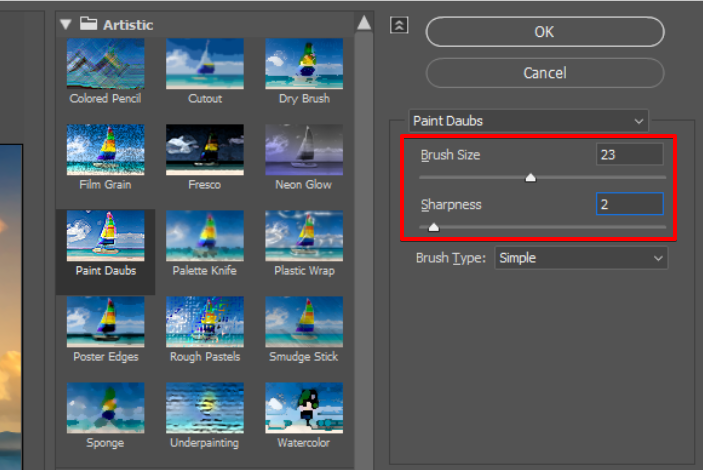
Select Paint Daubs in the right-side panel, increase the Brush Size to 23, and lower the Sharpness to 2.
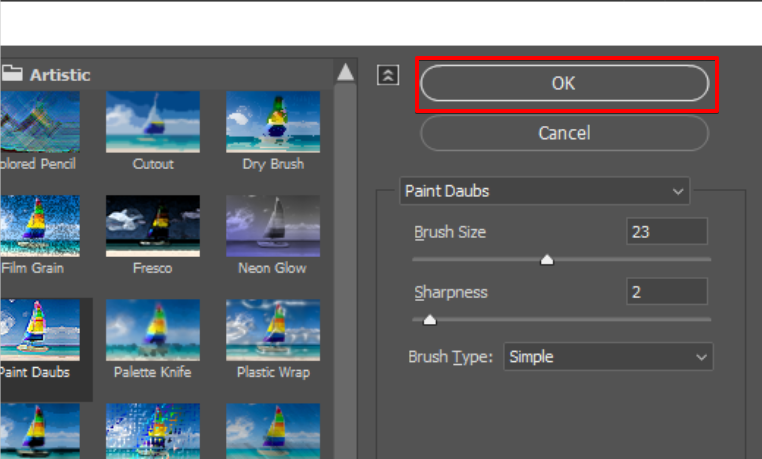
Click OK.
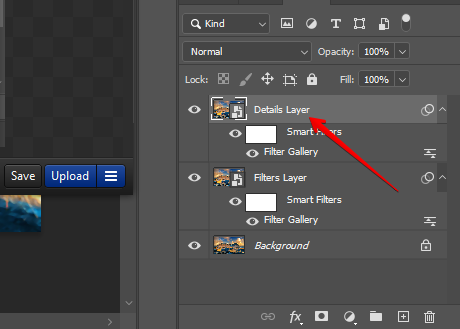
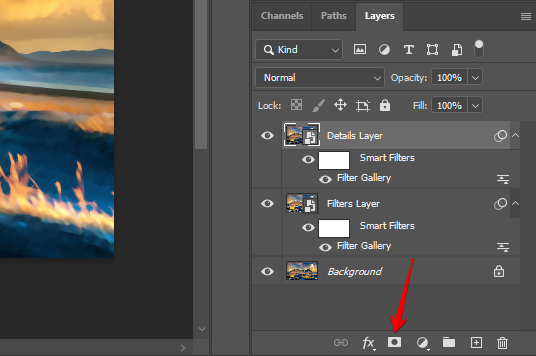
Step 4: Add Layer Mask
Select the Details Layer and click the Layer Mask option at the bottom.
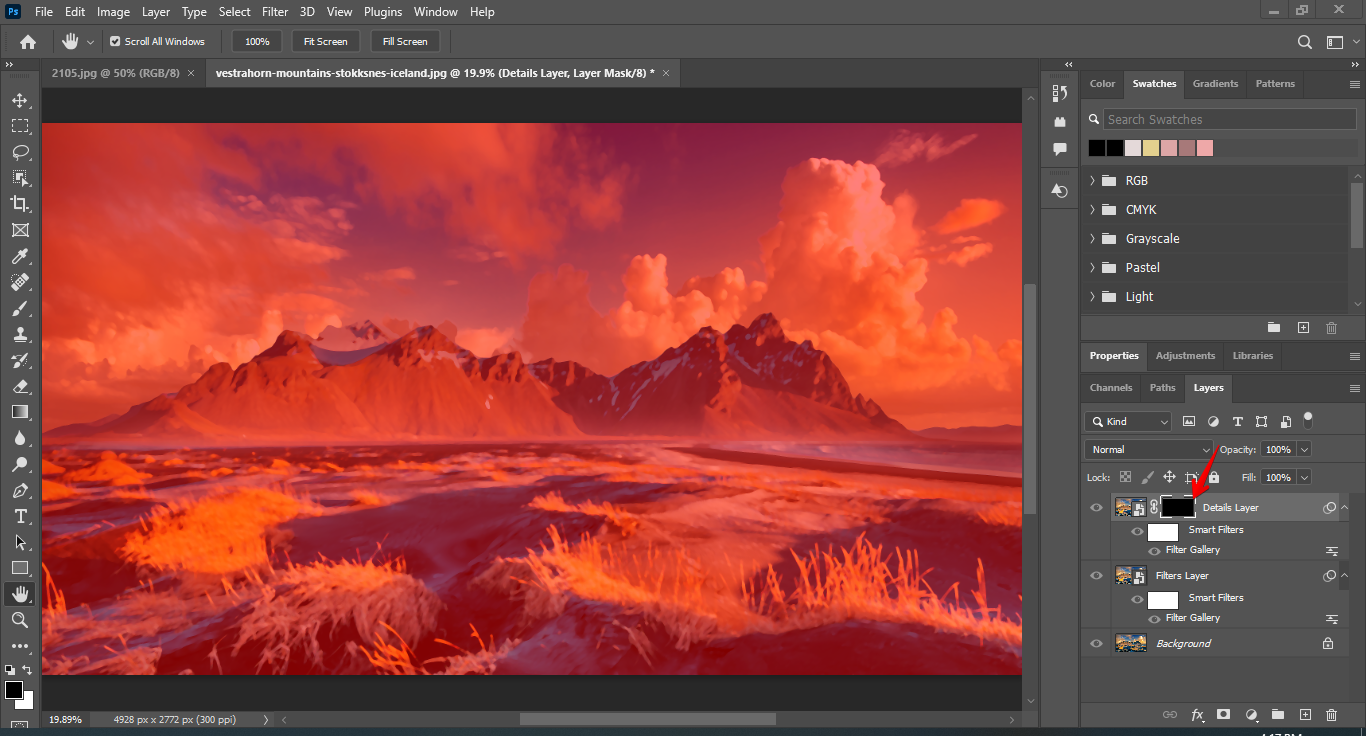
Press the ALT key and click the Layer Mask to open it.
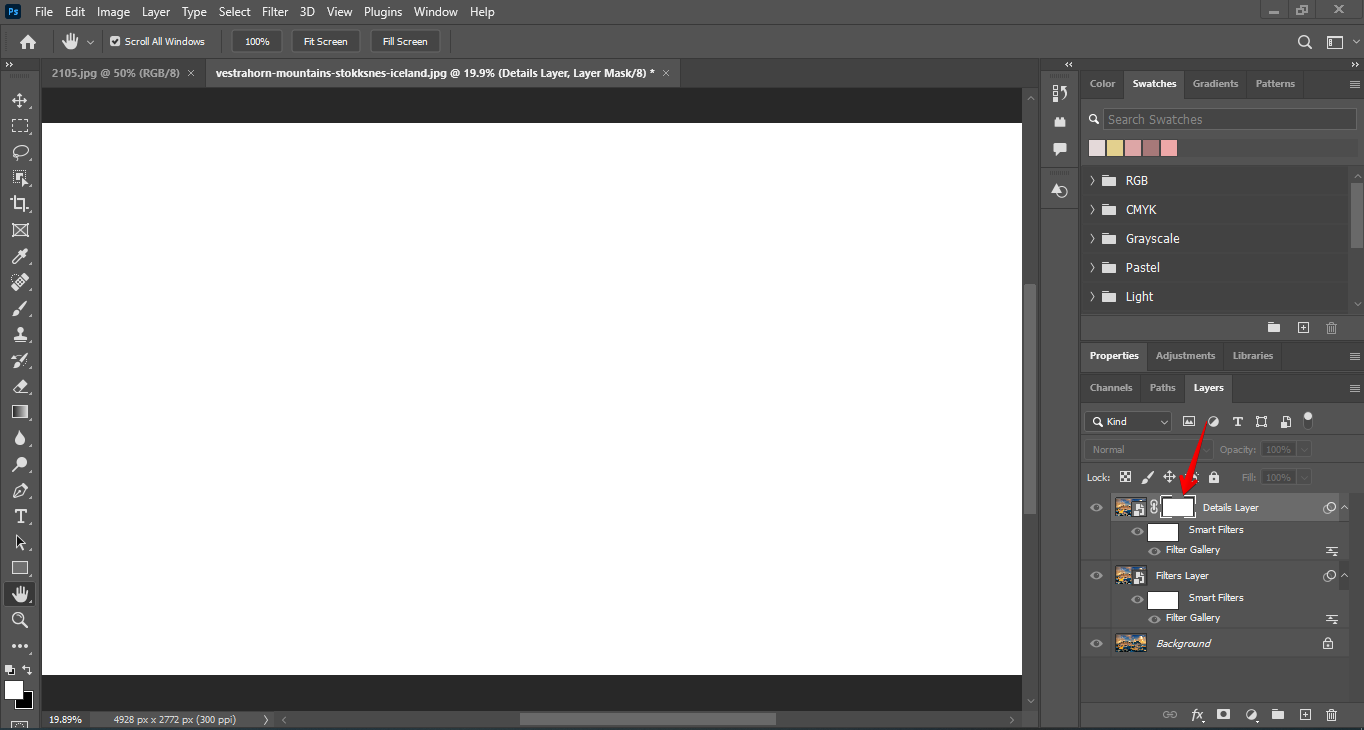
Press Alt + Del to fill the Layer Mask with black color and press Alt + Click to close it.
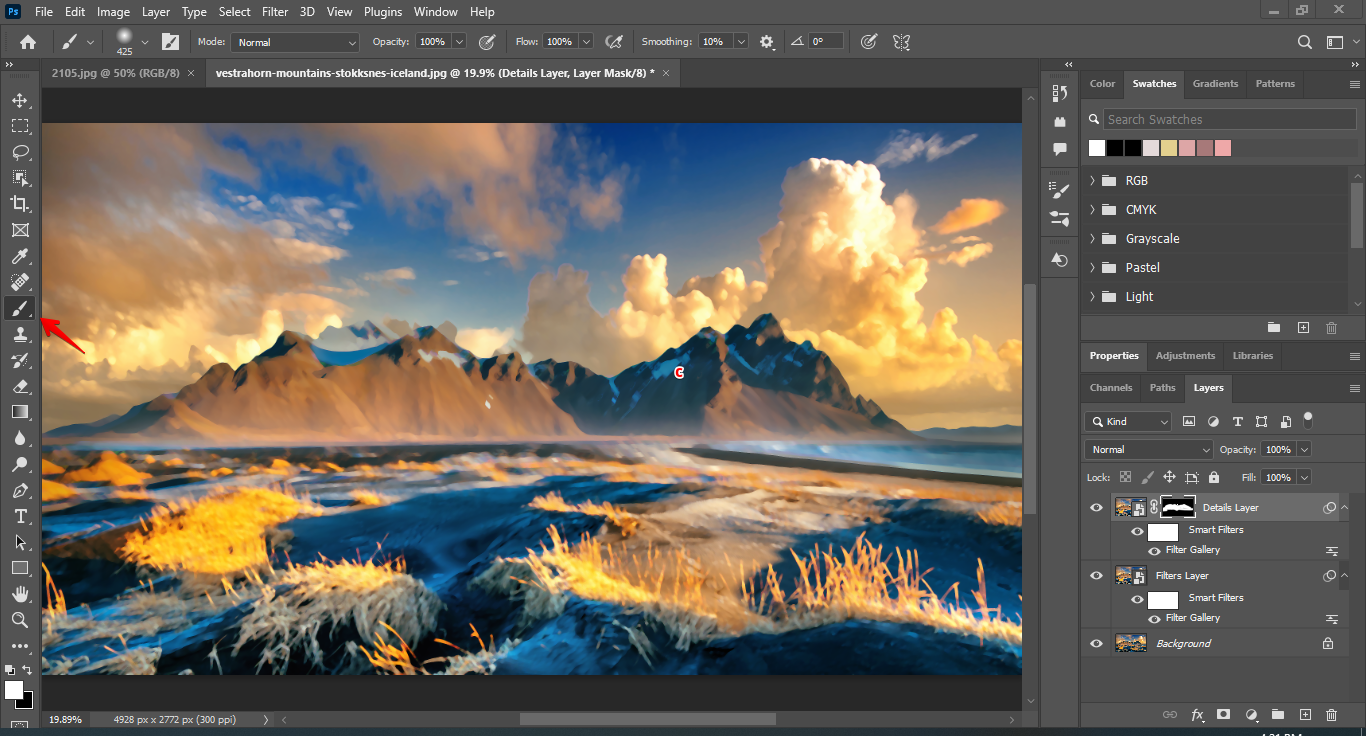
Click the Brush Tool in the left menu and paint white on the layer mask to lower the details in the background.
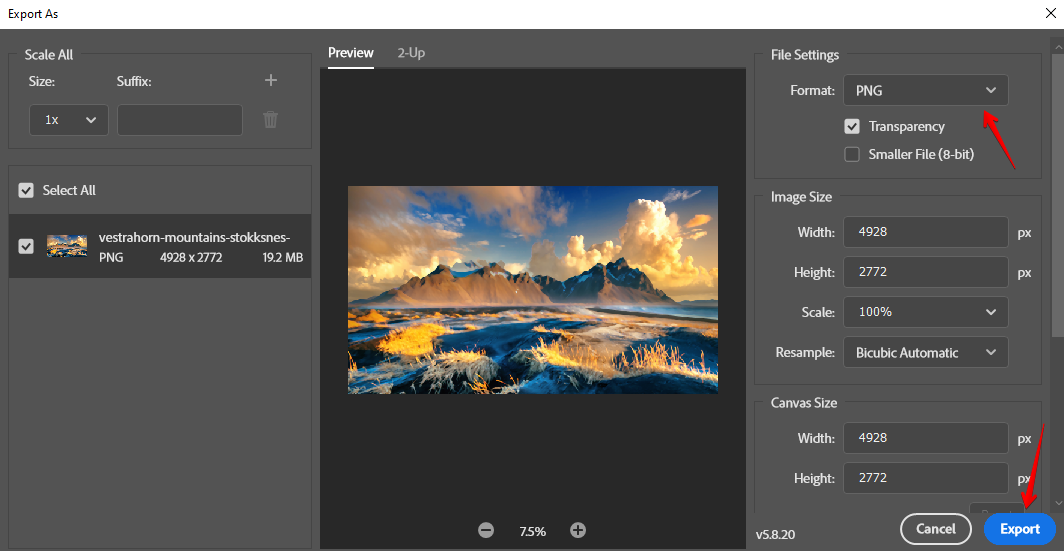
Step 5: Export
Lastly, click File > Export and select Export As.
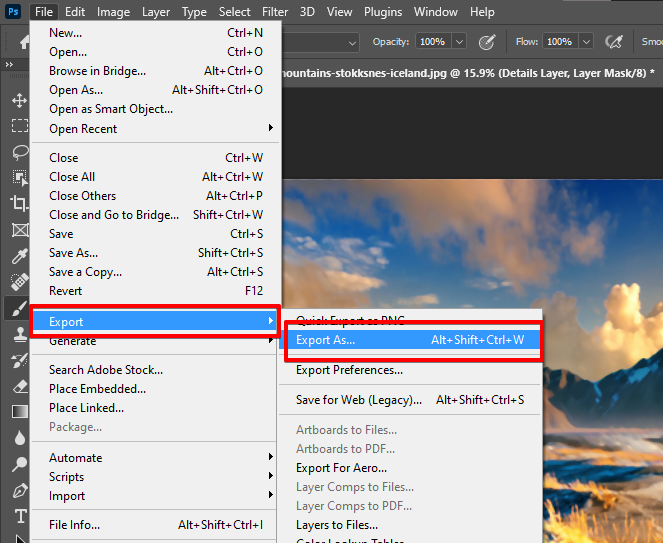
Select the photo format, do other settings, and choose Export to save your photo on your PC.
Tips And Tricks
Experiment With Direction and Stroke Length
When using the Angled Stroke filter, experiment with different direction and stroke length values to fine-tune the effect and get the desired style.
Combine Filters for Unique Effects
Do not limit yourself to one filter. Combine 2 to 3 of them in the Filter Gallery to create a truly unique artistic painting effect in your photo.
Play Around With the Brush Size for Paint Daubs
You can increase/decrease the Brush Size for the Paint Daubs filter depending on how much detail you like in your finished image.
Common Mistakes To Avoid
Neglecting Layer Organization
Label and organize the layers correctly to avoid any confusion and make it easier to apply the filters and other adjustments.
Overusing Filters
Don’t use excessive filter intensity because this can result in artificial or overly manipulated painting effects in your photo. Instead, adjust the settings subtly to maintain a natural appearance.
Not Converting the Layer to Smart Object
Always convert the Filter Layer to Smart Object before applying any filter. Otherwise, you won’t be able to easily edit the filter settings later without starting over.
FAQs
How To Apply the Painting Effect to a Selected Area in Photoshop?
Make a selection using the Lasso Tool and add a Layer Mask to hide everything outside the selected area. Then, apply the painting effect to the selected parts from the Filter Gallery.
What Is the Best Format To Save Painted Pictures From Photoshop?
TIFF is the best format to save the painted picture if you want to maintain the image integrity and get lossless compression. For sharing or online display, export your photo in PNG or JPEG.
Can I Revert Back to the Original Photo After Applying Filters?
Yes, you can hide the filter layer or delete it to go back to the original photo.
Conclusion
You’ve now learned how to transform a picture to painting using Photoshop’s Filter Gallery in just a few simple steps. Go on, express your creativity, and turn your photos into stunning works of art in no time!
