

Table of Contents
Posterizing Images in Adobe Photoshop
Posterizing an image with Adobe Photoshop helps you add an artistic effect and give it a more stylized, airbrush, or poster-like appearance.
To help you get this done, we will discuss different methods to posterize an image and explore step-by-step instructions on the best way to achieve a retro aesthetic or add a modern twist to your visuals in Adobe Photoshop.
What Are the 2 Ways To Posterize an Image With Adobe Photoshop?
There are a couple of ways you can posterize any image using Adobe Photoshop:
Method 1: Posterize Tool
The posterize tool is part of the Adjustments panel under the Image menu in Photoshop that immediately applies the posterization filter on your photo as you adjust the levels. However, it lacks advanced options to fine-tune the effect.
Method 2: Poster Edges Effect
The poster edges effect in Photoshop provides mode control over the posterization effect as you can effectively enhance the edges and adjust the tonal level of the image. But this method requires more experimentation to achieve the desired effect.
Steps to Posterize an Image with Photoshop
The use of the Posterize tool in Adobe Photoshop is the simplest way to posterize your images, and here are the step-by-step instructions for this method:
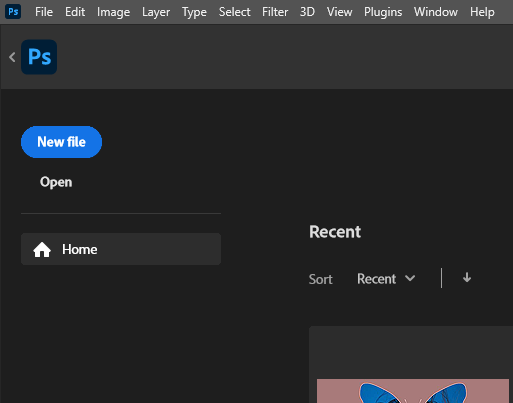
Step 1: Open The Photo in Adobe Photoshop
To begin, click Open on the home screen in Adobe Photoshop and select the image you want to posterize from the location where you’ve saved it on your computer.
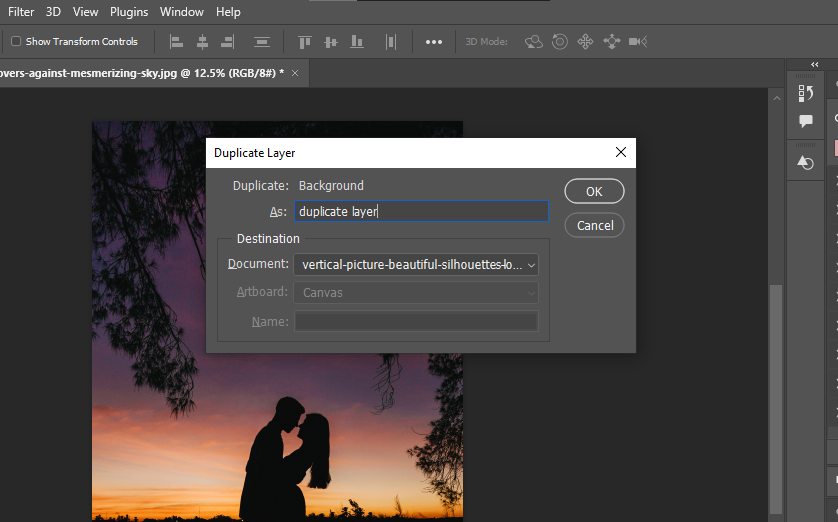
Step 2: Convert the Photo to a Smart Object
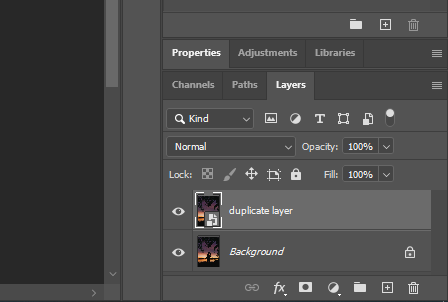
Now, right-click the image layer in the Layer panel on the right side of the screen and choose Duplicate Layer.
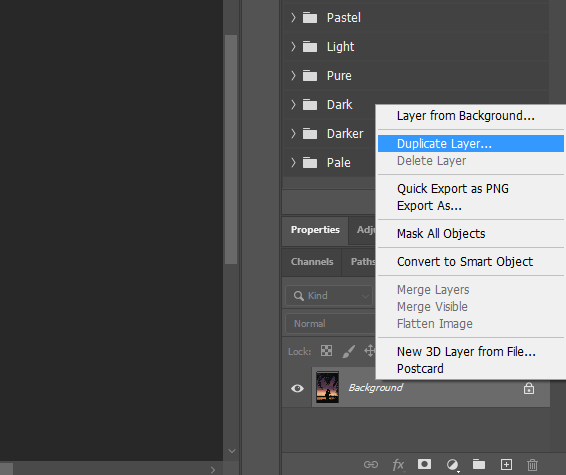
Rename the duplicate image in the pop-up menu and click OK.
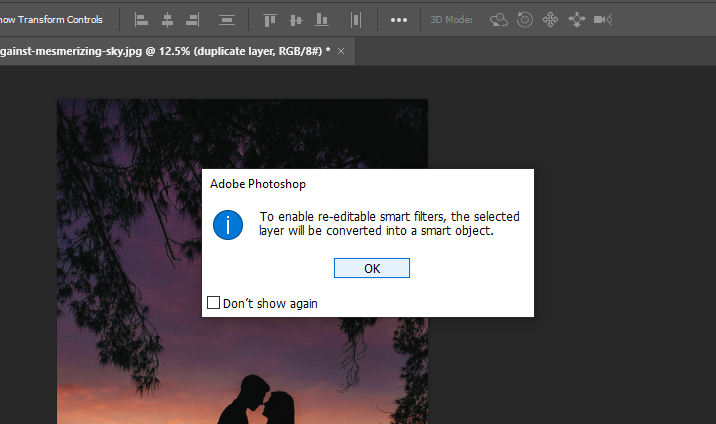
Next, click Filter in the upper menu panel and choose Convert For Smart Filters.
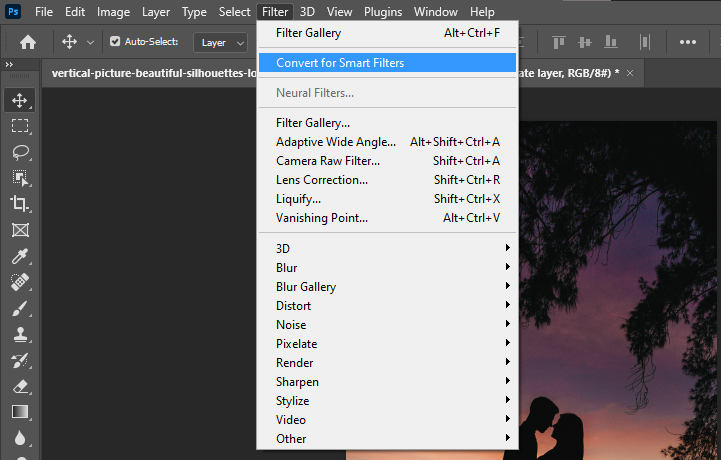
Click OK in the pop-up menu to convert the image into a smart object.
TIP: If you want to work with a black-and-white picture, click Image in the upper panel, hover over Adjustments, and choose Desaturate. Alternatively, press Shift+Ctrl+U on Windows and Shift+Command+U.
Step 3: Posterize the Image
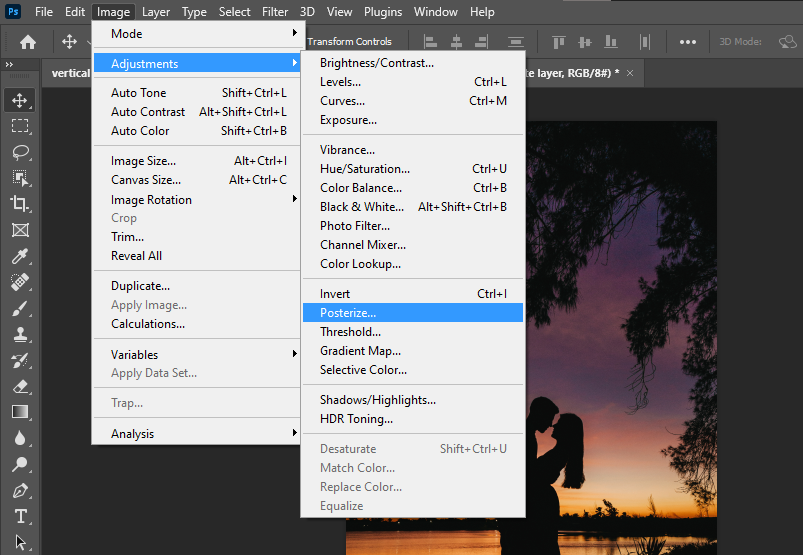
Select the duplicate photo layer in the Layer panel.
Click Image in the top menu, hover over Adjustments, and click Posterize.
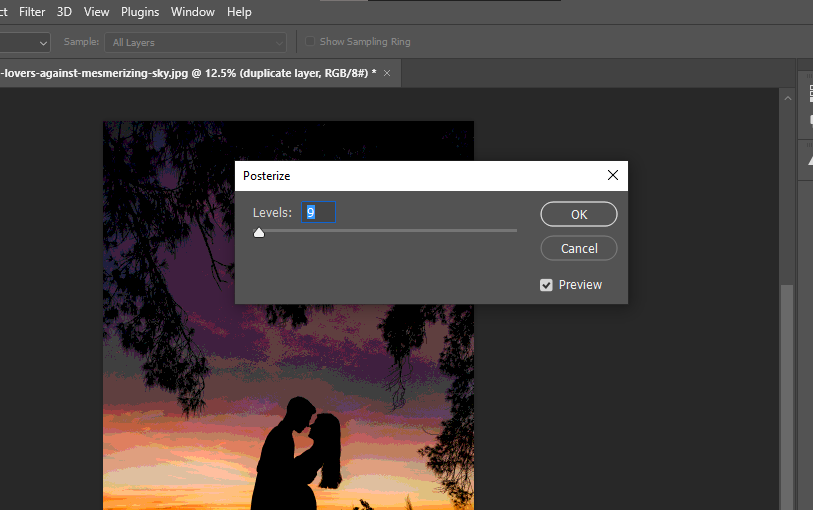
The Posterize dialog box will open on the screen. Drag the slider to the left or right to experiment with different levels, adjust the tone to achieve the desired posterization effect, and click OK to confirm the action.
Step 4: Save the Posterized Image
Finally, click File in the top left corner of the screen and click Save a Copy. Alternatively, click Alt+Ctrl+S on your Windows PC or Option+Cmd+S on your Mac.
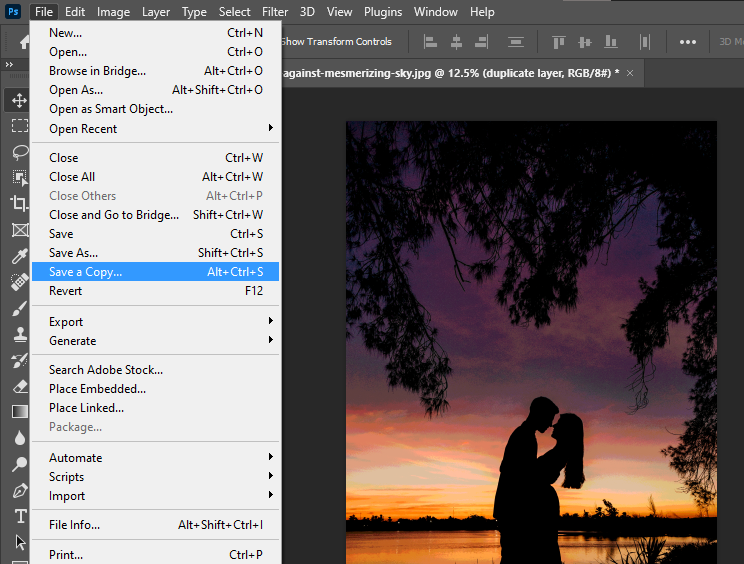
Rename your file, choose the file format for your picture from the drop-down menu next to Save as Type, and click Save.
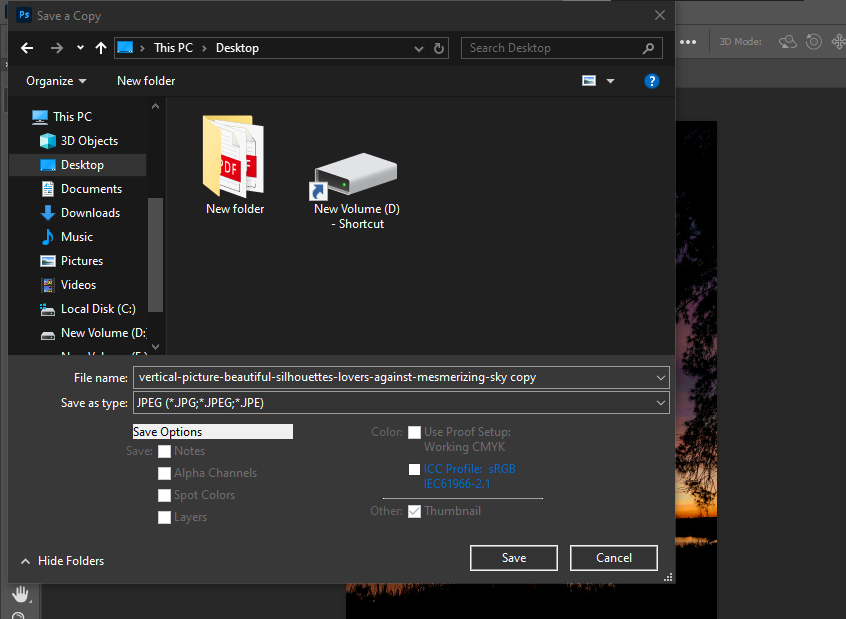
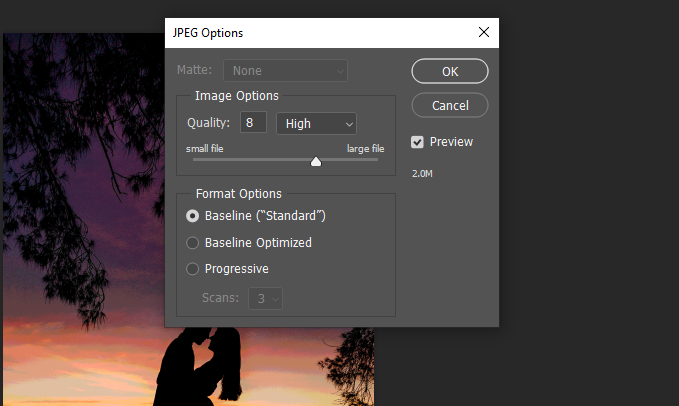
Select the image options in the pop-up menu on the screen for JPEG, click OK, and you’ve successfully applied the posterize photo effect to your image!
Tips and Tricks to Apply Posterize Effect
Adjust Levels Thoughtfully
Carefully control the intensity of the effect to find the sweet spot for the tonal level. For instance, if you select higher levels, it will retain more detail and colors, while the lower intensity creates a more abstract painting-like effect.
Duplicate The Original Photo
Always create a duplicate layer of the original photo in the Layer panel before applying the posterization filter. This will help you work on the copy of your image and revert to the start if needed without losing the original one.
Combine With Other Filters or Adjustments
Consider combining the effect with other filters like Stylize and Gaussian Blur or use adjustments, such as Brightness/Contrast, Exposure, and Vibrance, to fine-tune the color balance of the photo.
Common Mistakes to Avoid While Applying Posterize Effect
Don’t Overdo the Effect
Applying too few color levels of posterization can lead to a loss of details and flatten your image. So, always start with subtle adjustments between 4 and 10 and gradually reduce or increase the intensity to get the desired effect.
Apply Smart Filters
Ensure that you apply the Smart Filters to convert your photo into a Smart Object, so any edits you apply to it are non-destructive. This means you can make changes to the picture later without losing the image quality.
FAQs
What is the poster edge effect in Photoshop?
The poster edge effect in Photoshop reduces the number of colors in an image like the posterize tool, identifies its edges, and outlines them with black lines. It has three parameter sliders, i.e., edge thickness, edge intensity, and posterization.
Can I use free posterizing tools to apply the posterize effect on an image?
Yes, you can use posterization tools like PineTools, Cartoonize.net, PhotoKit, and MockoFUN to apply the posterize effect on your image without any subscription fee.
What Does It Mean To Posterize An Image?
To posterize an image means to reduce its tonal level or amount of detail, typically to a limited set, to increase the drama. This effect results in sudden shifts between the brightness level instead of a persistent color spectrum with a gradual transition.
Conclusion
That’s about it! You’ve now mastered how to posterize an image with Adobe Photoshop to infuse your compositions with a dynamic energy that instantly grabs the attention.
Keep in mind that as you continue to experiment and refine this effect, you’ll discover new ways to manipulate color and image composition to achieve unique and impactful results.
